Gaming Videos & Tutorials
Watch our latest gaming content, tutorials, and gameplay videos. Subscribe to stay updated with new releases.
Videos
Watch our latest gaming videos, guides, and walkthroughs.

Injustice 2
A white-suited Green Lantern battles a purple-suited counterpart near a rustic swamp cabin. Efficient combos and energy constructs quickly deplete the opponent's health bar, leading to a decisive clash. Following the victory, a transition screen featuring Batman precedes the next fight in an industrial laboratory setting. Batman utilizes swift martial arts strikes, batarangs, and environmental interactions to pressure Green Lantern. However, Green Lantern counters with shielding abilities and ring-powered constructs to turn the tide, eventually claiming another win. The final segment shifts to a majestic cathedral-like arena where Wonder Woman challenges Green Lantern. She executes acrobatic sword attacks and shield throws, but Green Lantern maintains control with zoning attacks, securing a third consecutive victory. 📖 Chapters: 0:00:00 - 0:00:43 - Green Lantern Swamp Cabin Mirror Match 0:00:43 - 0:01:10 - Batman Match Loading and Intro Screen 0:01:10 - 0:03:45 - Batman vs Green Lantern Laboratory Fight 0:03:45 - 0:04:13 - Wonder Woman Match Loading and Intro Screen 0:04:13 - 0:06:05 - Wonder Woman vs Green Lantern Cathedral Fight

Suicide Squad: Kill the Justice League
Gameplay begins with combat tutorials in a ruined landscape. Captain Boomerang demonstrates the Counter Shot technique, interrupting enemy attacks with timed boomerangs. The tutorial transitions to Shield Harvesting, where shooting enemies in the legs prepares them for melee strikes that replenish shields. The squad enters the Daily Planet building and coordinates to reach Metropolis. The sequence concludes with a high-action battle against alien forces using firearms and high-speed traversal on rooftops. 📖 Chapters: 0:00:00 - 0:00:44 - Opening Logos and Introduction 0:00:44 - 0:01:32 - Counter Shot Combat Tutorial 0:01:32 - 0:02:56 - Shield Harvesting Mechanics Demonstration 0:02:56 - 0:03:41 - Daily Planet Exploration and Cinematic Cutscene 0:03:41 - 0:04:37 - Rooftop Combat and Traversal in Metropolis

First playthrough: Call of Duty: Modern Warfare 4: Beta
The main menu of the Call of Duty: Modern Warfare III Beta loads after a brief connection sequence. Weapon customization begins in the Gunsmith menu, modifying the HAN 86 assault rifle with a holographic optic, tactical stock, and a 60-round drum magazine. The KG-7 Vulcan sniper rifle and Oris 8.6 marksman rifle are subsequently configured with various sights and attachments. The operator skin is changed to Coffey before entering the Quick Play menu to search for a multiplayer match. 📖 Chapters: 0:00:00 - 0:00:15 - Title Screen and Menu Connection 0:00:15 - 0:01:00 - Gunsmith Loadout and Weapon Customization 0:01:00 - 0:01:15 - Matchmaking Lobby Queue
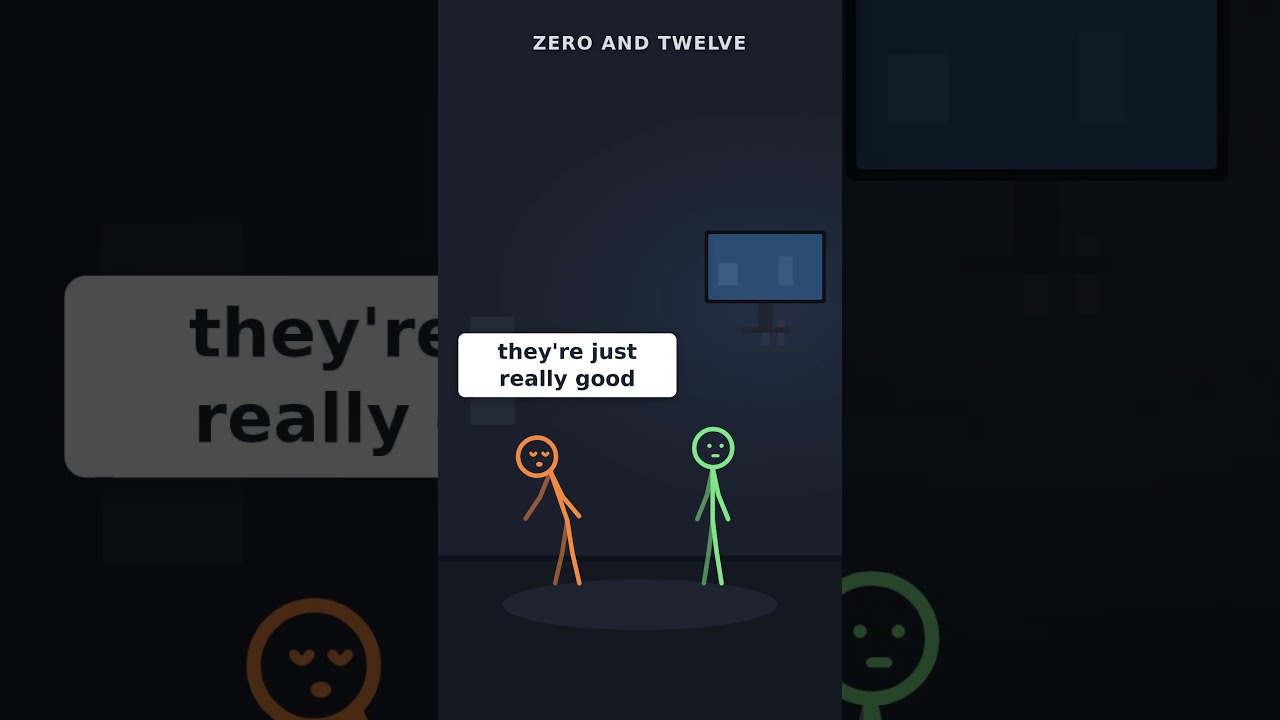
Zero and twelve!
An orange stick figure attempts to play a sniper role in a match, only to be repeatedly eliminated. A green stick figure spectates the continuous defeats, questioning the player's status. The match concludes with the green figure humorously celebrating the player's terrible final score of zero and twelve. 📖 Chapters: 0:00:00 - 0:00:06 - The sniper plan fails immediately 0:00:06 - 0:00:12 - Quick respawn and instant defeat 0:00:12 - 0:00:19 - Defending the opponent's high skill 0:00:19 - 0:00:26 - A legendary zero-and-twelve performance

Delta Force (I might be cheating)
The match begins with navigation through a narrow industrial hallway. Turning a corner leads to a quick combat engagement, resulting in a successful close-quarters elimination of an opponent. Moving out toward a courtyard, the sniper scope is used to check long sightlines around shipping containers. Transitioning back inside, a tactical grenade is prepped and thrown, followed by a sudden final firefight near the courtyard steps, ending in a defeat. 📖 Chapters: 0:00:00 - 0:00:08 - Hallway navigation and securing a close-quarters elimination 0:00:08 - 0:00:20 - Repositioning, scoping out the courtyard, and final engagement near the stairs

Delta Force crazy headshot snipe
The sequence features fast-paced first-person shooter gameplay on a hilly map. The character switches between a sniper rifle, a knife, and a pistol to engage enemy forces defending a sector. Action intensifies near a warehouse structure, culminating in a series of quick pistol shots and a final sniper headshot. 📖 Chapters: 0:00:00 - 0:00:13 - Approaching the objective zone with tactical gear 0:00:13 - 0:00:25 - Engaging defenders with pistol fire and a sniper headshot

Mafia: Definitive Edition for PS5
Chapters: 0:00:00 - 0:03:00 - Infiltrating Morello's Territory 0:03:00 - 0:06:00 - Car Sabotage and Firefight 0:06:00 - 0:09:00 - Welcomed into the Salieri Family 0:09:00 - 0:12:00 - Target Practice and Lockpicking Tutorial 0:12:00 - 0:15:00 - First Collection Stop at the Bakery 0:15:00 - 0:18:00 - Second Collection in Chinatown 0:18:00 - 0:21:00 - Ambush at the Roadside Motel 0:21:00 - 0:24:00 - Infiltrating the Motel and Rescuing Sam 0:24:00 - 0:27:00 - High-Speed Money Bag Pursuit 0:27:00 - 0:30:00 - Tensions Rise Between Salieri and Morello 0:30:00 - 0:33:00 - Intermezzo: Meeting with Detective Norman 0:33:00 - 0:36:00 - The Heist Plan for the Grand Prix Car 0:36:00 - 0:39:00 - Stealing the Race Car Under Cover of Night 0:39:00 - 0:42:00 - Tuning with Lucas Bertone and Returning the Car 0:42:00 - 0:45:00 - Race Day: Tommy Stepping Up to Drive 0:45:00 - 0:50:08 - Lost Heaven Autodrome Grand Prix Victory
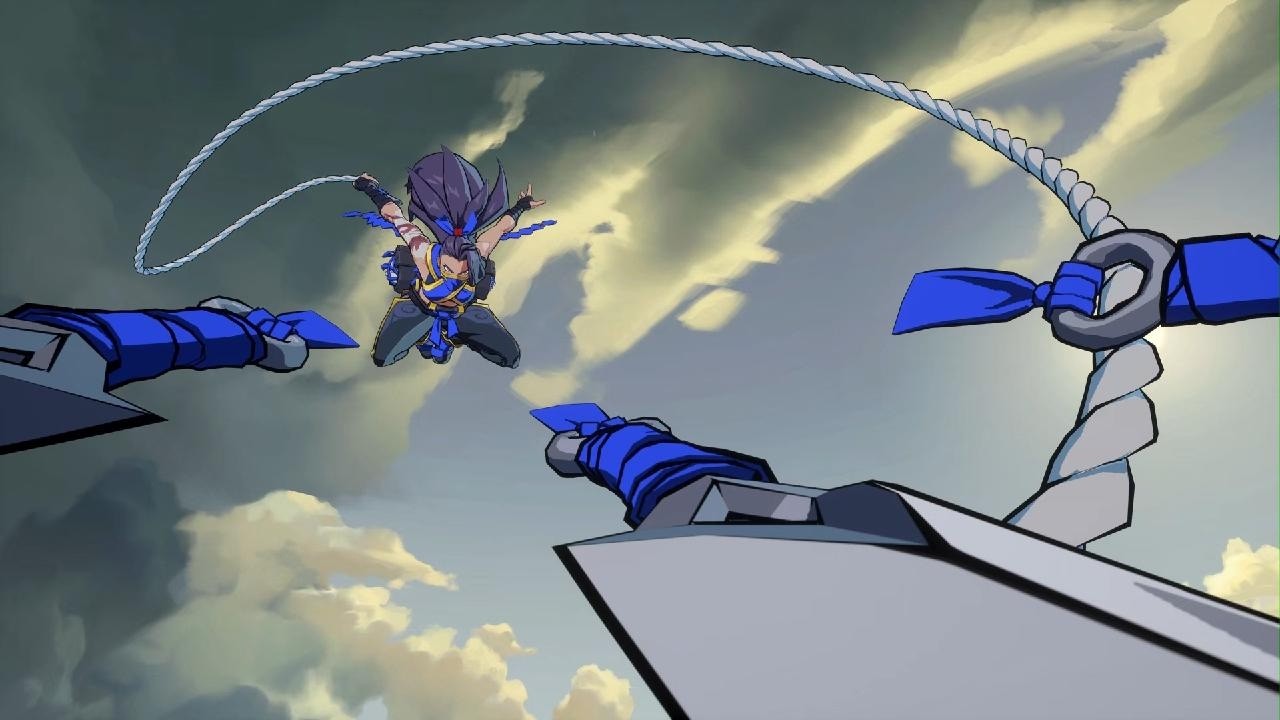
2XKO
Chapters: 0:00:00 - 0:02:15 - Lobby navigation, matchmaking queue, and character selection 0:02:15 - 0:04:30 - First match begins on Scuttler's Strand with Akali and Ekko 0:04:30 - 0:06:45 - Intense tag-team exchanges, assists, and combo setups 0:06:45 - 0:09:00 - Climax of the first match and victory celebration screen 0:09:00 - 0:11:15 - Match re-queue and champion draft showcasing Yasuo and Ahri 0:11:15 - 0:13:30 - Second match combat demonstrating high-level execution and parries 0:13:30 - 0:15:30 - Final rounds and transition back to the multiplayer lobby
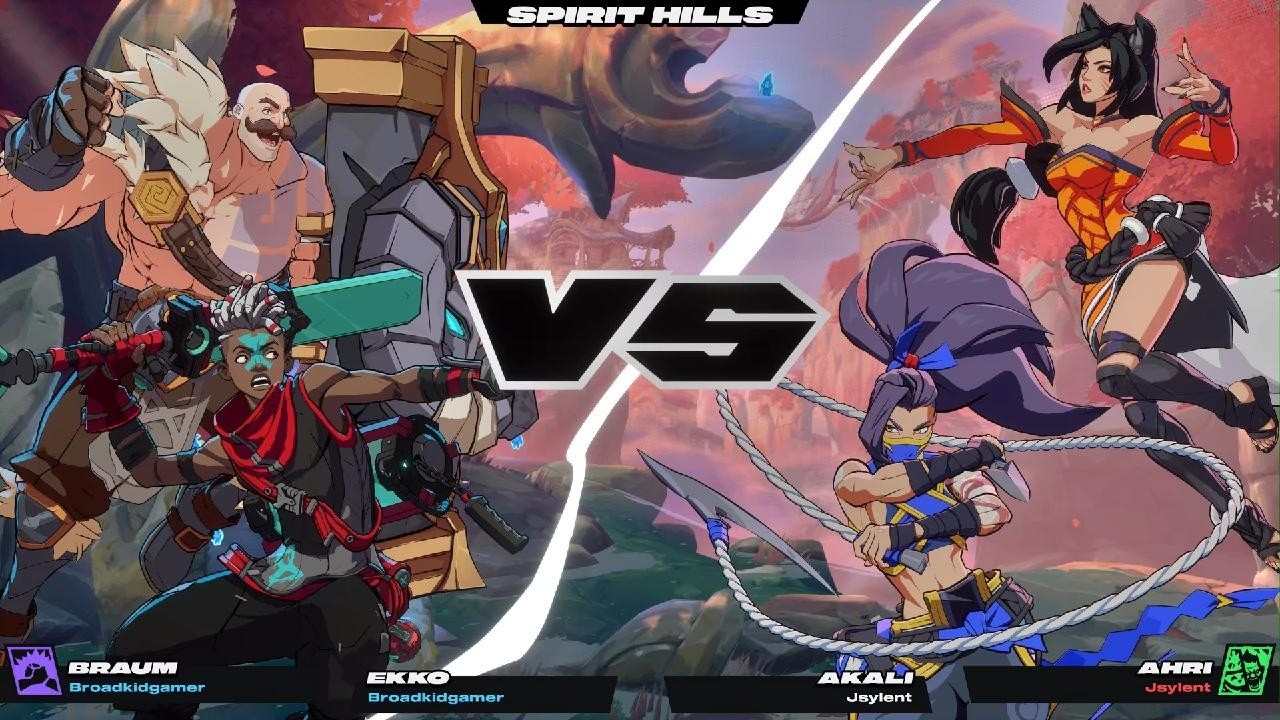
2XKO
Chapters: 0:00:00 - 0:00:45 - Lobby Exploration and Matchmaking Queue 0:00:45 - 0:01:10 - Character and Stage Selection Screen 0:01:10 - 0:03:34 - First Match: Round 1 (Ekko/Braum vs Akali/Ahri) 0:03:34 - 0:05:57 - First Match: Round 2 (Braum/Ekko vs Akali/Ahri) 0:05:57 - 0:07:34 - First Match: Round 3 (Braum/Ekko vs Akali/Ahri) 0:07:34 - 0:08:54 - Rematch Lobby and Next Character Selection 0:08:54 - 0:11:09 - Second Match: Rounds 1 & 2 (Ekko/Braum vs Akali/Ekko) 0:11:09 - 0:12:12 - Second Match: Round 3 (Ekko/Braum vs Akali/Ekko) 0:12:12 - 0:13:26 - Lobby Return and Battle Screen Viewing
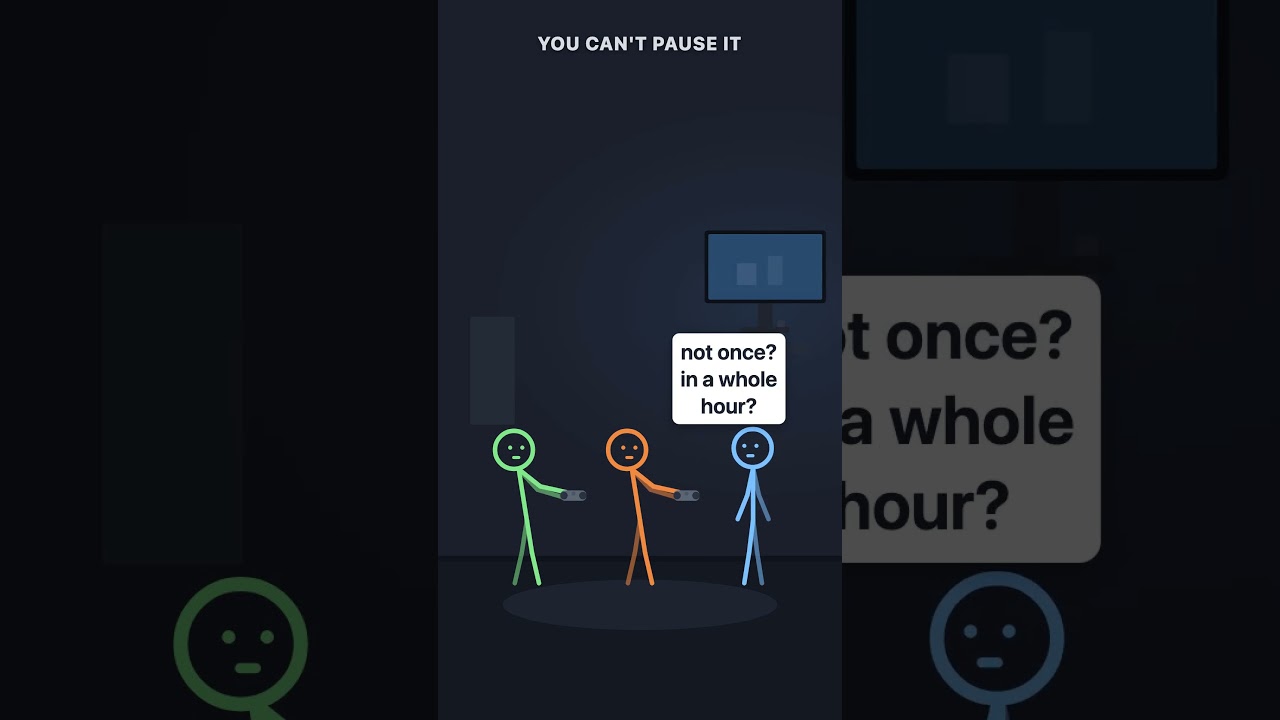
You can't pause it #gaming
Two stickmen, one green and one orange, play a game on a screen. A blue stickman approaches to announce dinner is ready. The orange stickman explains that online matches cannot be paused because others rely on them. The green stickman immediately leaves to get food, abandoning the game. The blue stickman asks the remaining orange stickman who is counting on him, causing the orange stickman to slump in silent defeat. 📖 Chapters: 0:00:00 - 0:00:15 - Dinner announcement and the pause dilemma 0:00:15 - 0:00:29 - Abandonment and the painful truth

Mad at me
An orange and a green stick figure play a video game. The orange figure tries to warn the green figure about an enemy, but the green figure gets defeated and complains about the silence. The orange figure then realizes their microphone was muted the entire time, resolving a humorous, awkward misunderstanding. 📖 Chapters: 0:00:00 - 0:00:10 - Gaming Session and Miscommunication 0:00:10 - 0:00:20 - The Muted Mic Realization 0:00:20 - 0:00:29 - Awkward Misunderstanding Resolved
Blindfire
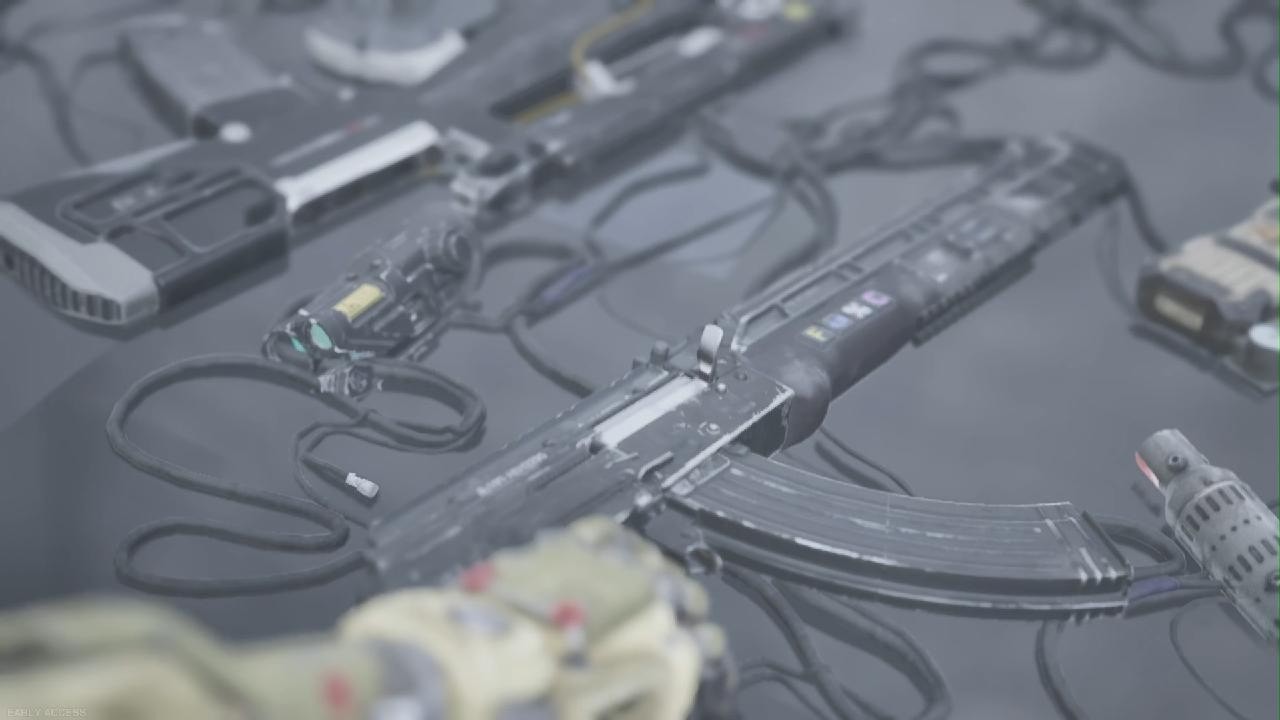
I dont know what this is Chapters: 0:00:00 - 0:03:25 - Menu navigation, settings calibration, and matchmaking lobby 0:03:25 - 0:06:10 - Wingman Round 1 on Darkthorne Hold with dark corridor combat 0:06:10 - 0:09:15 - Wingman Rounds 2 and 3 ending in a match victory 0:09:15 - 0:12:50 - Character level up and locker cosmetic customization 0:12:50 - 0:15:45 - Spotlight match on Umbral Rift with objective-based combat 0:15:45 - 0:19:10 - Spotlight round progression and leveling up to Initiate II 0:19:10 - 0:22:50 - Armory customization of weapon skins and emerald tracers 0:22:50 - 0:26:00 - Touchdown mode on Abyssal Ascent with bomb delivery attempts 0:26:00 - 0:29:30 - Touchdown gameplay with vertical platform engagements 0:29:30 - 0:33:37 - Final Touchdown rounds, match wrap-up, and lobby return
Off The Grid (early access)
Chapters: 0:00:00 - 0:04:30 - Character customization, menu navigation, and settings calibration 0:04:30 - 0:09:00 - Hex decoding, reward unlocking, and matchmaking queue 0:09:00 - 0:13:30 - Dropship deployment and initial landing in Stork City 0:13:30 - 0:18:00 - Urban looting and early-game combat encounters 0:18:00 - 0:22:30 - Mid-game engagements and rooftop tactical positioning 0:22:30 - 0:27:00 - Intense street-level squad gunfights 0:27:00 - 0:31:30 - Late-game survival, extraction point defense, and victory 0:31:30 - 0:36:00 - Match progression summary and level upgrades in lobby 0:36:00 - 0:41:00 - Snowy harbor matchmaking and warm-up phase 0:41:00 - 0:45:30 - Resort map deployment and initial resource gathering 0:45:30 - 0:50:00 - Aerial jetpack checkpoint trials and rooftop combat 0:50:00 - 0:52:27 - Final team battle, squad elimination, and match end screen
![Power Rangers - Battle for The Grid [Act 1]](https://i.ytimg.com/vi/fdvWjUbnT1U/maxresdefault.jpg)
Power Rangers - Battle for The Grid [Act 1]
Chapters: 0:00 - Introduction and Main Menu 0:24 - Story Selection: Prologue Act 1 0:30 - Cinematic: Lord Drakkon's Victory and Betrayal 2:14 - Command Center Dialogue: Jason and Kimberly 2:32 - Combat Training: Red Ranger vs. Pink Ranger 3:59 - Dialogue: Tommy Arrives for Training 4:26 - Tag-Team Battle: Red and Green Rangers vs. Pink Ranger 7:48 - Battle Continued: Red and Green Rangers Tag-Team Tactics 10:33 - Dimensional Energy Spike: Lord Drakkon Confronts the Rangers 11:06 - Story Selection: Dwindling Light Act 1 11:18 - Pink Ranger vs. Mastodon Sentries 13:31 - Cinematic: Lord Drakkon Attacks Tommy and Jenn Arrives 15:01 - Zordon's Warning Message 16:13 - Story Selection: Dwindling Light Continued 16:46 - Udonna vs. Mastodon Sentries 18:15 - Udonna's Ultimate Ability Showcase 19:23 - Battle Continuation: Udonna's Defeat and Retrying 21:05 - Dialogue: Goldar Confronts Udonna 23:01 - Story Selection: Remains of War Act 1 23:16 - Gia Moran (Yellow Ranger) vs. Mastodon Sentries 25:27 - Dialogue: Ranger Slayer Intervenes 27:13 - Gia Moran vs. Ranger Slayer Combat 29:20 - Dialogue: Kat Manx Joins the Fray 31:13 - Kat Manx (Red Ranger) and Gia Moran vs. Sentries 33:00 - Lord Drakkon Appears and Defeats Kat Manx 35:05 - Story Selection: Stones Turned Act 1 35:16 - Magna Defender vs. Lord Drakkon 37:05 - Magna Defender Combat Highlights 38:11 - Story Selection: Ancient Terror Act 1 38:16 - Cenozoic Blue Ranger vs. Mastodon Sentries 40:01 - Cenozoic Blue Ranger Combos and Ultimate 41:10 - Dialogue: Ranger Slayer and Kimberly Face-Off 42:44 - Battle Continued: Pink Ranger Team Conflicts 44:11 - Cinematic: Jenn Scott Explains the Multiverse Crisis Chapters: 0:00:00 - 0:02:15 - Prologue Cinematic and Lord Drakkon's Rise 0:02:15 - 0:04:15 - Red Ranger vs. Pink Ranger Training Match 0:04:15 - 0:07:15 - Green Ranger and Pink Ranger Team Up 0:07:15 - 0:10:30 - Green Ranger vs. Pink Ranger Showdown 0:10:30 - 0:13:30 - Lord Drakkon Invades the Command Center 0:13:30 - 0:16:13 - Chronological Crisis and Zordon's Warning 0:16:13 - 0:20:50 - Udonna Defends the Mystic Forest 0:20:50 - 0:22:55 - Udonna Confronts Goldar 0:22:55 - 0:27:05 - Gia Moran Faces the Mastodon Sentries 0:27:05 - 0:29:20 - Gia Moran Battles the Ranger Slayer 0:29:20 - 0:30:00 - Kat Manx Arrives for the Rescue 0:30:00 - 0:32:14 - Lord Drakkon's Rise and Prologue Cutscene 0:32:14 - 0:33:55 - Jason and Kimberly Sparring Session 0:33:55 - 0:37:40 - Tommy Joins Training Prior to Drakkon's Invasion 0:37:40 - 0:41:03 - Battle Against Drakkon and Tommy's Defeat 0:41:03 - 0:42:53 - Udonna Defends the Mystic Forest 0:42:53 - 0:44:11 - Udonna Faces Goldar in the Woods 0:44:11 - 0:46:32 - Gia Moran and Kat Manx Combat Sentries in Ruins 0:46:32 - 0:48:58 - Lord Drakkon Confronts Kat Manx as Rangers Regroup
Fighting Electro n & Vulture
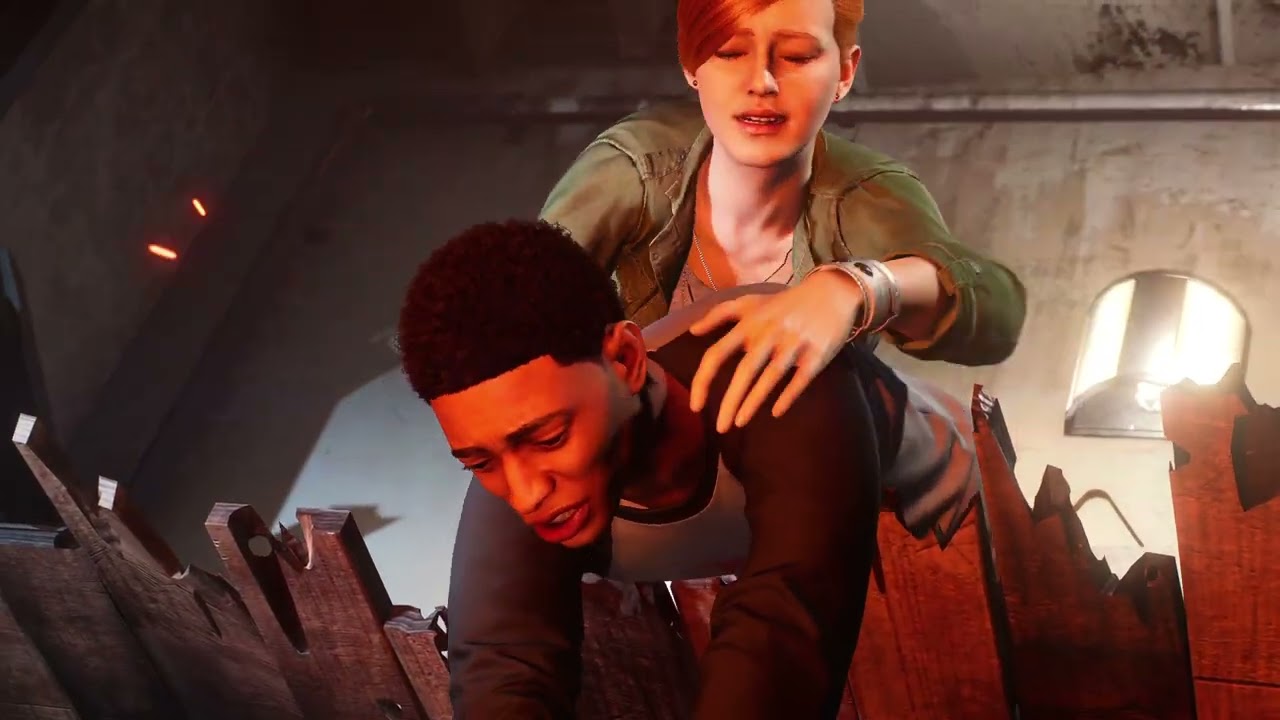
Chapters: 0:00 - Swinging through the city to reach the first police precinct 1:45 - Electro's attack on the police station and initial transformer disablement 3:00 - Engaging in rooftop combat with Demons near the police precinct 4:30 - Saving trapped officers and clearing the Upper East precinct 6:20 - Rhino's assault and combat against Ryker's breakout prisoners 8:40 - Rescuing Aunt May and Miles Morales from the burning Harlem building 9:15 - Facing off against Sable Agents and the Priority Target encounter 12:30 - Investigating Doctor Octavius's secret laboratory and hidden plans 14:40 - The trap is set: Meeting Octavius via log recording 16:15 - Vulture and Electro team-up boss fight at the industrial yard 18:40 - Defeating Electro and Vulture through coordinated aerial attacks 21:10 - Dealing with Scorpion's neurotoxin effect and hallucinations 23:00 - Navigating the surreal 'Sea of Poison' dreamscape 25:30 - Completing bomb defusal challenges within the nightmare 28:30 - Final confrontation with Scorpion hallucinations and collecting the antidote
Defeating Mister Negative Doc Oc - ending
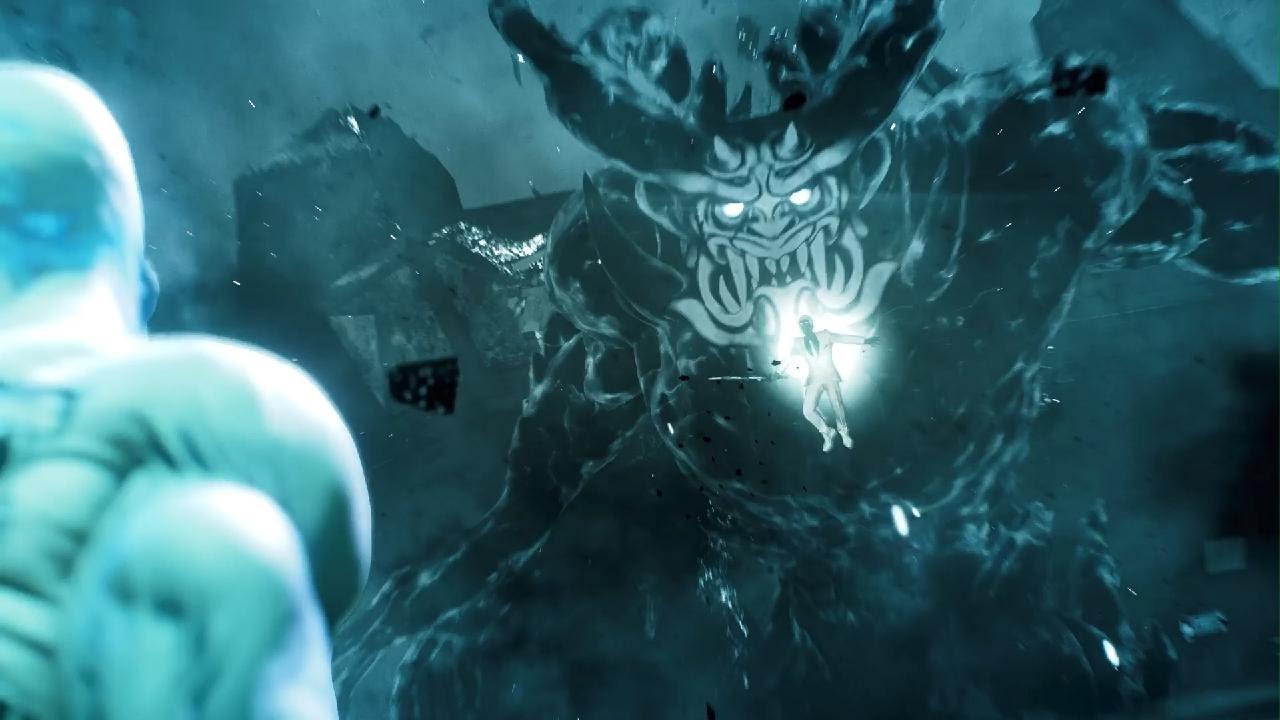
Chapters: 0:00 - Confrontation with Martin Li 0:15 - Demonic Transformation 0:30 - Inner Realm Battle 3:57 - Otto Octavius Intervention 4:50 - Osborn Captivity Disclosure 6:46 - Spider-Man Rescue Mission 7:12 - Medical Recovery Scene 10:23 - Citywide Defense Coordination 13:38 - Chelsea APC Interception 16:19 - Drone Challenge Initiation 17:57 - Taskmaster Duel Encounter 20:09 - Bomb Challenge Engagement 21:14 - Chinatown Combat Operations 23:00 - Anti-Ock Suit Development 24:26 - Oscorp Tower Siege Arrival 26:30 - Final Duel Against Dr. Octopus 28:50 - Suit Power Activation 31:11 - Tower Descent Destruction 33:00 - Mentorial Betrayal Revelation 35:xx - Final Compromise 38:12 - The Cure Choice 40:26 - Aunt May's Farewell 42:54 - Epilogue Credits Sequence Chapters: 0:00 - Mister Negative Boss Battle 4:25 - Doctor Octopus Interstices 7:12 - Regrouping at F.E.A.S.T. 9:40 - The Genetically Modified Spider Bite 10:22 - Traversing the City Skyline 11:04 - Dismantling a Sable Checkpoint 13:38 - Neutralizing a Sable APC Patrol 15:05 - Optimizing Gadgets and Map Navigation 15:36 - Executing the Drone Challenge 17:55 - Taskmaster Ambush and Duel 19:50 - Interrogating Taskmaster 20:10 - The Bomb Defusal Challenge 21:25 - Subduing Sable Forces During a Mass Arrest 24:46 - Upgrading the Suspension Matrix 25:31 - Forging the Iconic Anti-Ock Suit 28:00 - Osborn Held Hostage Atop Oscorp Tower 29:20 - Confronting Doctor Octopus 33:51 - Climactic Rooftop Showdown 34:10 - Defeating Otto and Securing the Antiserum 37:05 - Aunt May's Tragic Farewell 39:55 - Three Months Later: Rekindled Hopes Chapters: 0:00:00 - 0:04:50 - Mister Negative Boss Climax 0:04:50 - 0:07:10 - Otto Octavius Intervenes 0:07:10 - 0:10:30 - Recovery at FEAST 0:10:30 - 0:13:10 - City Traversal and Sable Fights 0:13:10 - 0:14:50 - Building the Anti-Ock Suit 0:14:50 - 0:16:50 - Norman Osborn's Capture 0:16:50 - 0:22:00 - Final Confrontation with Doc Ock 0:22:00 - 0:23:55 - Aunt May's Sacrifice 0:23:55 - 0:25:00 - Epilogue and Credits Chapters: 0:00:00 - Mister Negative transforms into a giant demon beast 0:00:00 - Spider-Man battles Mister Negative in the dark dimension 0:00:00 - Martin Li's defeat and the arrival of Doctor Octopus 0:00:00 - Spider-Man recovers at the F.E.A.S.T. shelter 0:00:00 - Spider-Man swings through Manhattan and battles Sable forces 0:00:00 - Miles Morales gets bitten by a genetically modified spider 0:10:00 - Mister Negative Boss Battle 0:10:00 - Doc Ock's Ambush and May's Diagnosis 0:10:00 - Building the Anti-Ock Suit and City Navigation 0:10:00 - Final Confrontation with Doc Ock and Tragic Aftermath 0:20:00 - Mister Negative Boss Fight - Phase 1 0:20:00 - Otto Octavius Intervenes and Captures Norman Osborn 0:20:00 - Rescue and Recovery at the F.E.A.S.T. Shelter 0:20:00 - Miles Morales is Bitten by the Spider 0:20:00 - Swinging Through the City as Spirit Spider 0:20:00 - Clearing Sable Checkpoints and Arrests 0:20:00 - Sable APC Chase and Chinatown Exploration 0:20:00 - Completing the Chinatown Drone Challenge 0:20:00 - Sudden Taskmaster Ambush and Boss Fight 0:20:00 - Bomb Challenge in Chinatown 0:20:00 - Fighting Sable Patrols in Lower Chinatown 0:20:00 - Crafting the Anti-Ock Suit at Octavius Industries 0:20:00 - Final Boss Fight Against Doctor Octopus - Rooftop Phase 0:20:00 - Side of the Building Wall-Crawling Battle 0:30:00 - Martin Li's defeat and Doc Ock's betrayal 0:30:00 - Injured Spider-Man arrives at F.E.A.S.T. 0:30:00 - Swinging through New York and fighting Sable agents 0:30:00 - Completing Chinatown drone challenge 0:30:00 - Taskmaster boss fight encounter 0:30:00 - Preparing for the final lab mission and gadget upgrades 0:40:00 - Mister Negative's dark transformation 0:40:00 - Surviving the shadow clone assault 0:40:00 - Evading the giant demon specter Chapters: 0:00:00 - Showdown with Mr. Negative 0:00:00 - Doctor Octopus Intervenes 0:00:00 - The Aftermath and Miles' Bite 0:00:00 - Clearing Sable Checkpoints 0:00:00 - Taskmaster Boss Battle 0:00:00 - Taskmaster Bomb Challenge 0:00:00 - Upgrading Gear and Anti-Ock Suit Creation 0:00:00 - Rooftop Climax Against Doc Ock 0:30:00 - Mister Negative Boss Fight 0:30:00 - Doctor Octopus Confrontation and Betrayal 0:30:00 - Healing at F.E.A.S.T. and Miles' Spider Bite 0:30:00 - Swinging Through Manhattan and Sable Agent Skirmish Chapters: 0:00:00 - 0:00:33 - Martin Li transforms into a giant shadow demon inside the mindscape 0:00:33 - 0:01:19 - Combat begins against inner demons and giant sweeps 0:01:19 - 0:02:14 - Boss fight intensifies with aerial maneuvers and web attacks 0:02:14 - 0:03:00 - Spider-Man subdues Martin Li and concludes the mindscape battle 0:30:00 - 0:33:57 - Defeating Mister Negative in the Spectral Arena 0:33:57 - 0:37:15 - Doctor Octopus Kidnaps Norman Osborn 0:37:15 - 0:40:22 - Peter Recovers at the F.E.A.S.T. Shelter 0:40:22 - 0:43:00 - Combating Sable Mercenaries in the Streets Chapters: 0:00:00 - 0:03:55 - Showdown with Mister Negative in the demon realm 0:03:55 - 0:07:12 - Doctor Octopus intervenes and defeats Spider-Man 0:07:12 - 0:10:21 - Regrouping and recovering at the FEAST shelter 0:10:21 - 0:13:38 - Combating Sable agents at city checkpoints 0:13:38 - 0:16:15 - Stopping the Sable APC patrol in Chelsea 0:16:15 - 0:17:55 - Completing the drone chase challenge 0:17:55 - 0:19:57 - Surprise encounter and boss fight with Taskmaster 0:19:57 - 0:21:13 - Completing the rooftop bomb challenge 0:21:13 - 0:24:43 - Neutralizing Sable forces in Lower Chinatown 0:24:43 - 0:26:29 - Upgrading gadgets and preparing the Anti-Ock suit 0:26:29 - 0:30:29 - Boss battle against Doctor Octopus atop Oscorp Tower 0:30:29 - 0:33:28 - Emotional climax and defeating Doc Ock on the skyscraper wall 0:33:28 - 0:39:54 - Tearful farewell to Aunt May and securing the antiserum 0:39:54 - 0:41:19 - Aunt May's funeral and Otto's imprisonment at the Raft 0:41:19 - 0:43:00 - Three months later: Peter and Mary Jane reunite at the diner
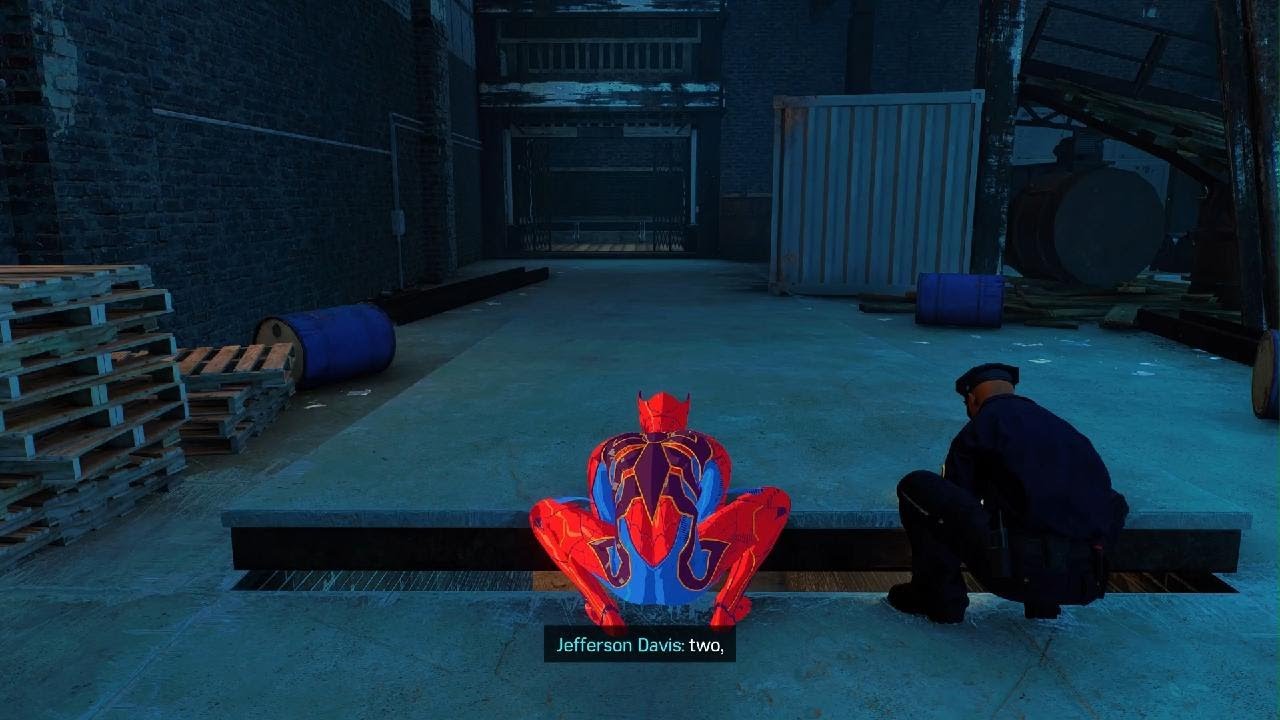
Doing side & main missions
Chapters: 0:00 - Spider-Man begins his investigation at the shipping docks 0:15 - Guards patrol the docks while Spider-Man watches from the crane 1:00 - Stealth operations begin as Spider-Man neutralizes rooftop snipers 1:45 - Strategic takedowns continue on the remaining dock guards 2:45 - A double stealth takedown finishes the exterior dock area 3:25 - Spider-Man continues searching for Fisk's men in the shipyard 4:00 - Spider-Man uses the environment to distract and trap the final thugs 5:12 - Officer Jefferson Davis arrives at the scene to assist 6:00 - Teamwork begins as they search for an entrance to the warehouse 6:58 - Spider-Man crafts and unlocks the new Electric Web gadget 7:30 - Spider-Man and Officer Davis enter the warehouse to investigate 8:25 - Electric Web used to activate junction boxes and open doors 9:00 - Searching for scrapes on the floor leads to hidden passages 10:00 - A collaborative effort discovers secret rooms within the containers 11:20 - Opening the second secret container in the warehouse 12:00 - The duo discovers a hidden bootlegger tunnel under the floor 13:00 - Moving through the tunnels toward the central vault 14:00 - The Demons gang is caught red-handed raiding the vault 15:00 - An intense firefight breaks out at the tunnel exit 16:00 - A high-speed truck chase begins through the city streets 17:00 - Spider-Man dodges rockets while chasing the armored transport 18:00 - Stopping the truck and neutralizing the Demon gunmen 19:00 - Peter Parker returns to find an eviction notice on his door 20:00 - Spider-Man searches for his lost items in city waste trucks 21:00 - A lead takes Spider-Man to a waste incinerator facility 22:00 - Combat sequence at the incinerator to rescue a sanitation worker 23:05 - Peter finally retrieves his personal drive from the trash 24:00 - Spider-Man intercepts a Demon attack on an armored car 25:15 - A mysterious message from Black Cat sets up a stakeout 26:00 - Spider-Man uses a camera to track Black Cat's movements 27:15 - A second stakeout reveals the Demons moving on Fisk construction 28:30 - Stealth takedowns on the construction site rooftop 29:30 - A large-scale brawl ensues on the partially built skyscraper 30:45 - Demons deployment via helicopter escalates the fight 31:45 - Spider-Man clings to a flying helicopter in a dramatic sequence 32:30 - Peter Parker and Mary Jane attend the award ceremony 33:40 - Officer Davis's ceremony is tragically interrupted by an explosion

Martin Li's attack
The video starts with a chaotic scene in a city setting, where an explosion occurs, sending people fleeing in fear. Amidst the destruction, Rio Morales frantically calls out for her son, Miles, who is seen lying on the ground, dazed. After a moment of panic, Rio finds Miles and they share a brief emotional reunion before she leaves to find Miles' father. Miles then navigates through the debris and chaos of the city, at one point rescuing another person trapped under a large metal structure. He then witnesses a confrontation between some armed men and a victim, leading to a stealthy traversal through the ruins. Miles and Rio are later seen at a funeral for Miles' father, Jefferson Davis, mourning with others. The scene then transitions to Spider-Man swinging through the city, eventually reaching a recycling center where he discovers the Inner Demons' criminal operations involving explosives and weapons. Following a series of combat encounters with the Inner Demons, Spider-Man is confronted by Silver Sable and her security force, who have been hired by Mayor Norman Osborn to restore order. After a brief tense encounter, Silver Sable and Spider-Man parts ways, with Spider-Man continuing his investigation into Martin Li's plans, fueled by information gathered with the help of MJ and Yuri Watanabe. 📖 Chapters: 0:00 - Chaos in the City 0:27 - Miles and Rio Reunite 1:08 - Miles Rescues a Victim 2:20 - Emotional Moment 3:10 - Stealth Navigation 4:05 - Mission Failed 5:50 - Spider-Man Investigates 7:44 - Funeral Scene 9:46 - Spider-Man Swinging 10:55 - Black Cat Stakeout 12:04 - Infiltration of the Recycling Center 14:38 - Confrontation with Silver Sable 15:45 - Spider-Man Continues Investigation

Marvel's Spider-Man Remastered - Tombstones reveal
Chapters: 0:00 - Investigating Martin Li's personal office 1:26 - Solving the yin-yang puzzle lock 2:04 - Entering the secret Inner Demon archives 3:38 - Escaping the electrified trap in the hidden room 4:32 - Awkward confrontation with Martin Li and Aunt May 5:40 - Li uses his corruption power on street thugs 6:15 - Spider-Man swings through NYC discussing evidence 8:53 - Peter Parker assists Doctor Octavius in the lab 10:00 - Testing the neural-controlled mechanical arm 12:31 - Completing circuit board diagnostic puzzles 15:21 - Mary Jane describes her infiltration mission 15:43 - Mary Jane stealthily navigates the biker warehouse 17:23 - Failure and being discovered by the gang 18:00 - Mary Jane witnesses Tombstone's interrogation 19:21 - Tombstone executes Rick and takes MJ nearby 20:30 - MJ finds the APC blueprints and escapes 21:30 - Peter and MJ discuss teaming up over dinner 22:31 - Infiltrating the high-rise office building as Spider-Man 23:44 - Spider-Man takes down Inner Demon guards in the penthouse 24:49 - Rescuing Standish from the elevator explosion
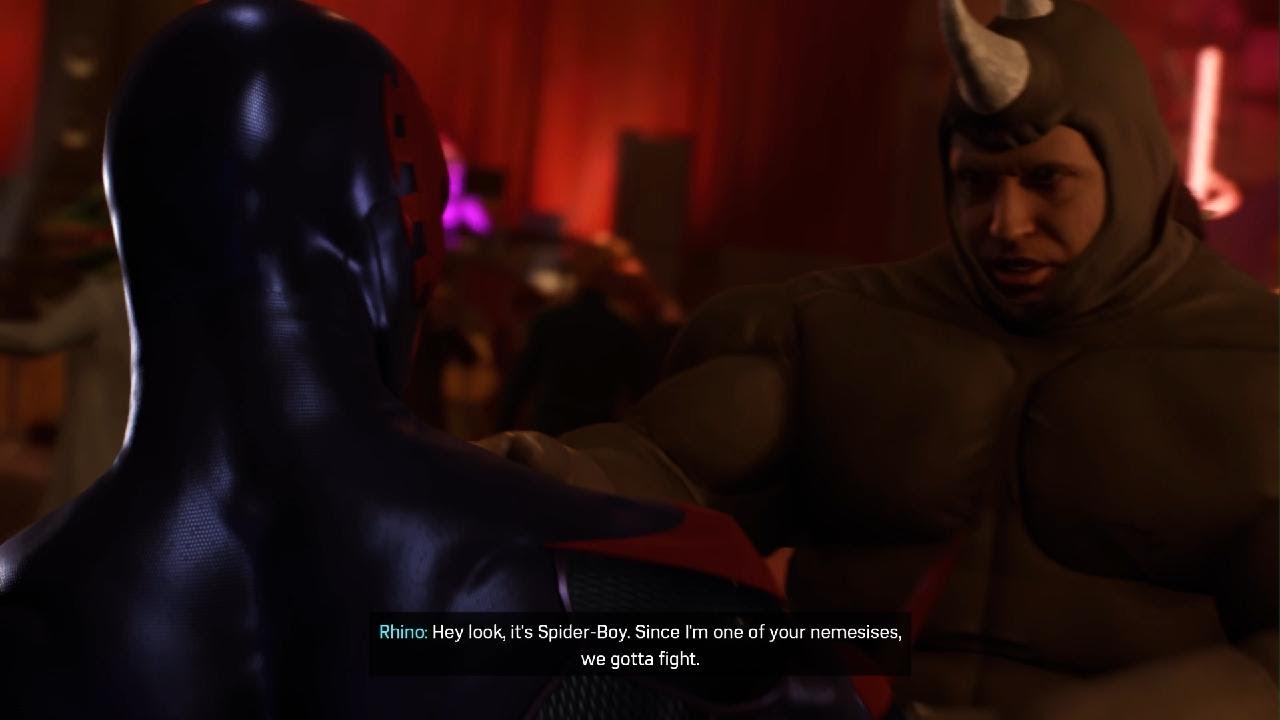
Marvel's Spider-Man Remastered - Issac Dalaney
Chapters: 0:00 - Mission Start: Tombstone - On the Move 0:25 - Reverse Engineering Shipment Tracker 2:25 - Following the Signal Through New York 3:40 - Chasing the Shipment Truck 3:55 - Combat Against Biker Gang and Convoy 5:10 - Mission Start: What's in the Box? 5:50 - Taskmaster Encounter and Challenge Briefing 6:15 - Bomb Disposal Time Challenge 7:35 - Dialogue with MJ regarding Isaac Delaney 9:10 - Mission Start: Back to School (Halloween Party) 10:10 - Navigating the Hall of Mirrors 11:00 - Locating Disguised Doctors at the Party 11:55 - Encounter with Party-goers and Rhino Disguise 12:45 - Pursuit Into University Science Center 13:30 - Stealth Infiltration and Neutralizing Demons 15:05 - Confrontation with Martin Li in the Lab 16:25 - Combat Arena Against Demon Forces 18:25 - Post-Mission Investigation with Yuri 20:05 - Planning Infiltration of Oscorp Tower 20:20 - Hacking Security Modules Externally 25:30 - Infiltrating Norman Osborn's Office 26:35 - Discovering Project GR-27 Details 28:15 - MJ Intercepts Standish at Sable Compound 28:35 - Tactical Stealth at the Sable Base 32:20 - Sable Base Reconnaissance and Photography 34:30 - Securingstandish and Evading Detection 36:00 - Peter and MJ Call Negotiation 37:55 - Aiding Philip Chang and College Buddies 38:45 - Locating Missing Students Photo Clue 42:00 - Subduing Corrupted Students Combat 44:00 - Mission Start: Strong Connections (Lab Work) 45:30 - Neural Interface Success and Otto Dialogue 47:35 - Investigating Lab Notes and Board 50:35 - Neural Circuit Calibration Diagnostic

Fighting Martin Li
Chapters: 0:00 - Spider-Man swings through the city toward the safehouse 0:23 - Silver Sable agents prepare Dr. Michaels for transport 0:58 - Inner Demons ambush the medical convoy 1:55 - Martin Li reveals himself and captures Dr. Michaels 2:28 - Spider-Man begins the truck pursuit through city streets 2:46 - Combat sequence on top of the moving Demon truck 3:40 - Inner Demon reinforcement vehicles join the chase 4:47 - Spider-Man confronts Martin Li inside the truck 5:34 - Martin Li pulls Spider-Man into a surreal negative dimension 6:58 - Battle against shadow remnants in the negative realm 8:27 - Giant demonic mask boss fight sequence 9:53 - Silver Sable confront Spider-Man at the crash site 10:44 - Spider-Man surveys the city from a rooftop 11:21 - Peter exchanges information with Yuri Watanabe 12:51 - Peter finds Dr. Michaels' empty transport car 13:09 - Mary Jane arrives at Grand Central Terminal 13:42 - MJ investigates Oscorp's technical exhibits 15:30 - Martin Li takes over the Grand Central Terminal 17:15 - MJ and Spider-Man coordinate a stealth plan 18:20 - Stealth sequence to secure the control tablet 19:44 - Coordinated takedowns of Inner Demon guards 21:10 - MJ moves through the terminal while Spider-Man provides cover 23:00 - Final stealth maneuver to reach the bomb 24:32 - Instructional sequence for defusing the Devil's Breath device 26:46 - Large-scale combat in the Grand Central lobby 28:15 - Clearing the path for hostages to escape 30:16 - Runaway subway train pursuit and boarding 31:46 - Final boss battle against Martin Li on the subway 34:12 - Subway derailment and stopping the train sequence 35:27 - Story conclusion and endgame mission completion

Prisonbreak fight
Chapters: 0:00 - Spider-Man encounters a police officer on a rooftop. 0:30 - Spider-Man begins searching for processed evidence. 1:15 - The first encounter with Fisk's thugs occurs. 2:30 - Spider-Man returns to the police precinct with the missing hard drives. 3:30 - A rocket attack strikes the rooftop during the conversation. 3:50 - Spider-Man engages in combat with numerous thugs on the ground. 5:00 - Fisk's men ambush a police officer on the rooftop. 5:50 - The police officer thanks Spider-Man for his assistance. 6:15 - Spider-Man navigates the city while swinging through buildings. 6:55 - Peter enters Otto's lab and meets him. 7:10 - Otto demonstrates the new mechanical arms to Peter. 7:55 - Peter checks the neural interface version. 8:05 - Peter initiates the diagnostic puzzle to fix the voltage spike. 9:05 - A critical failure occurs during the diagnostic process. 10:10 - Peter continues resolving the diagnostic errors. 11:20 - Peter resets the circuit to clear the errors. 12:05 - Peter stabilizes the system after troubleshooting components. 13:40 - Peter successfully fixes the cascading voltage spike errors. 14:15 - A warning about mental health side effects appears. 14:35 - Otto insists on moving forward despite Peter's concerns. 15:00 - Otto declares he no longer feels like a failure. 16:10 - Otto listens to Norman's live statement on television. 16:30 - Otto violently attacks the screen with a mechanical arm. 16:45 - Spider-Man swings through the city toward his next objective. 17:50 - Philip informs Spider-Man about a missing student. 18:45 - Spider-Man arrives at the Upper West Side park. 19:50 - Spider-Man investigates the park area. 20:45 - Spider-Man confronts several thugs in the park. 21:40 - Spider-Man takes down the corrupted individual. 22:00 - Spider-Man speaks with Steve after the rescue. 22:30 - The mission in the Upper West Side concludes. 23:35 - Spider-Man arrives at the F.E.A.S.T. center. 24:50 - Peter interacts with Aunt May in the kitchen. 25:50 - Aunt May discusses Martin Li with Peter. 26:45 - Peter swings back into action as Spider-Man. 27:45 - Spider-Man travels toward the Raft prison. 28:45 - Spider-Man observes the chaos at the Raft prison. 30:00 - Yuri Watanabe updates Spider-Man on the prison situation. 31:10 - Spider-Man battles a large group of prisoners. 32:20 - Spider-Man pursues suspects through the cell block. 33:55 - The encounter with Rhino occurs in the hallway. 35:10 - Rhino attacks Spider-Man with immense force. 36:30 - Spider-Man faces Electro in a fast-paced chase. 37:35 - The confrontation with Electro and Scorpion begins. 38:35 - Rhino and Vulture join the battle against Spider-Man. 39:30 - Mister Negative and Doc Ock reveal themselves. 40:15 - Spider-Man is severely injured and falls into the water.

Marvel's Spider-Man Remastered fighting Fisk
Chapters: 0:00 - Opening sequence featuring PlayStation Studios and Marvel logo animations 0:27 - Title Screen and initial game starting settings 0:47 - Introduction cinematic showcasing Peter Parker’s apartment and daily life 2:41 - Spider-Man beginning his traversal through the city toward Times Square 4:18 - Spider-Man joining the police at Fisk Tower for an intense shootout 5:12 - Combat sequence at Times Square against Fisk's men 6:19 - Spider-Man heading toward Fisk Tower as explosions rock the scene 7:12 - Infiltration of Fisk Tower and atrium combat 8:51 - Spider-Man clearing the balcony and moving further into the building 9:30 - Spider-Man using vents and elevators to reach upper floors 10:16 - Spider-Man receiving a phone call from Aunt May during a mission 12:03 - Spider-Man entering the server room to prevent data deletion 12:35 - Cinematic face-to-face with Wilson Fisk via monitor 13:41 - Spider-Man investigating an explosion and rescuing civilians 15:24 - Spider-Man teaming up with the bomb squad to clear the floor 16:21 - Combat against corrupt police and thugs in the executive offices 18:11 - Opening moments of the boss battle against Wilson Fisk 19:02 - Spider-Man dodging turret fire during the Fisk boss fight 21:18 - Final phase of the battle leading to Fisk’s take down 22:54 - Resolution of the boss fight and Fisk’s arrest 23:44 - Spider-Man completing 'The Main Event' mission and leveling up 24:19 - Traversal toward Dr. Octavius’s lab to check on work 25:29 - Introduction to Dr. Otto Octavius and his experimental lab 27:18 - Maintenance work on the prosthetic arm and circuit mini-games 28:40 - Successful component repair and spectrographic analysis setup 30:40 - Spider-Man heading back out to the city for patrol 31:43 - Meeting Captain Watanabe to discuss city tower maintenance 32:56 - Spider-Man collecting old backpacks and fixing surveillance towers 33:41 - Stopping a jewelry store robbery and engaging in combat 35:10 - Completing side activities and collecting more backpacks 36:50 - A cinematic sequence of rescuing a civilian from a vehicle crash 38:40 - Continuing traversal through the Financial District
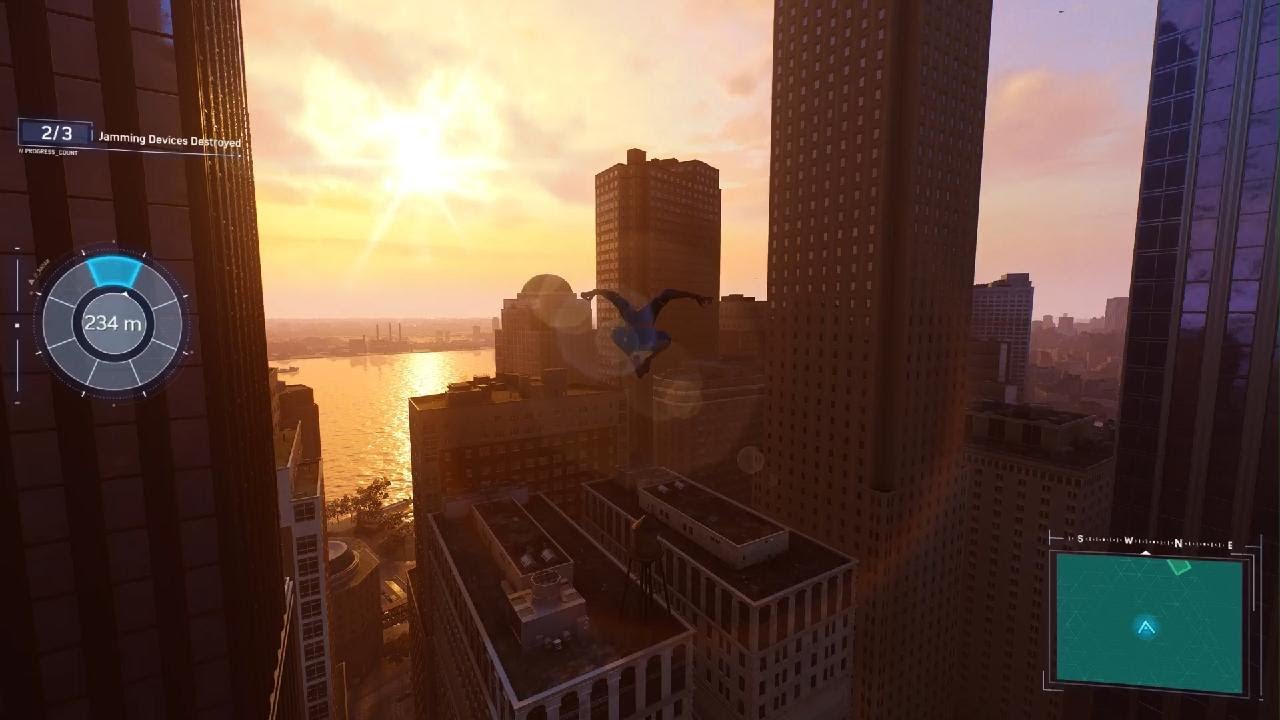
Marvel's Spider-Man Remastered side quests
Chapters: 0:00 - Collecting the Hygiene Kit backpack 0:15 - Swinging through high-rise buildings 0:38 - Finding the Graphing Calculator backpack 1:28 - Retrieving the Locket backpack 2:13 - Meeting the engineer regarding network failure 3:05 - Rooftop combat against jamming device guards 3:58 - Destroying the first signal jamming device 5:15 - Restoring more network towers 7:15 - Reporting unauthorized activity at the docks 8:15 - Neutralizing smugglers at the helipad 9:15 - Large group combat encounter with smugglers 10:15 - Docks cleared and mission completion 11:45 - Activating the Greenwich surveillance tower 12:15 - Finding the Oscorp Visitor Pass backpack 12:38 - Retrieving the Selfie backpack 12:57 - Stopping an armed robbery in progress 14:10 - Restoring another surveillance tower 14:48 - Spectrograph puzzle at the research station 15:10 - High-altitude traversal across city rooftops 16:25 - Configuring the local crime network 16:47 - Collecting the Prom Flower backpack 17:25 - Retrieving the Classic Web Shooter backpack 17:40 - Peter Parker enters the laboratory 18:10 - Completing laboratory spectrograph experiments 19:35 - Solving complex material candidate spectrographs 21:10 - Conducting biomedical research puzzles 22:30 - Repairing Spider-Man's damaged equipment at the workbench 23:45 - Cinematic encounter between Peter and Otto Octavius 25:35 - Crafting and equipping the Advanced Suit 26:30 - Solving spatial mapping and circuit layout puzzles 28:40 - Optimizing power efficiency circuits 29:30 - Upgrading skill tree abilities 30:05 - Testing the Advanced Suit traversal capabilities 31:10 - Investigating a hit and run in Hell's Kitchen 32:30 - Stopping a high-speed vehicle chase 33:38 - Retrieving the Vulture Jammer backpack 34:10 - Neutralizing thugs at a construction site 35:10 - Collecting the Lizard's Blood backpack 35:25 - Combat against masked criminals in the street 36:20 - Finding the Old Cellphone backpack 36:50 - Retrieving the Good Luck Card backpack 37:10 - Activating the Central Park surveillance tower 37:50 - Collecting the Wrestling Flyer backpack 38:00 - Engaging criminals in combat near park walkways 39:15 - Savng a civilian from a vehicle crash 40:15 - Retrieving the Physics Book backpack 41:15 - Neutralizing a drug deal in Central Park 42:15 - Recovering a stolen flash drive from a bird 43:10 - Combat encounter with mercenaries in the park 44:15 - Investigating Belvedere Castle at night

Marvel's Spider-Man Remastered more side quests
Chapters: 0:00 - Initial web-swinging through a park area at night 0:15 - Clearing out Fisk's men on a rooftop during 'Storming the Castle' 0:45 - Conversation with Stephanie regarding the crime boss arrest 1:15 - Reviewing skills and suits menu for progression 1:33 - Traversing the Upper East Side to find surveillance towers 2:10 - Matching signal wavelengths to activate the Oscorp tower 2:40 - Ascending a massive skyscraper with high-speed wall running 3:03 - Collecting a hidden backpack at the very peak of the tower 3:15 - Performing a long free fall descent before web-swinging 3:50 - Activating another surveillance tower in the Upper East Side 4:20 - Rescuing a kidnapped citizen from a car trunk 4:34 - Defeating a crowd of thugs in a street-level brawl 5:50 - Stopping a drug deal in progress near a brick building 6:40 - Searching for collectibles under a bridge structure 7:30 - Combat encounter involving citizen rescue after a hit and run 8:50 - Lifting a vehicle to save a trapped civilian 9:30 - Pairing with a surveillance tower near the waterfront 10:08 - Intervening in an assault on Museum Mile 11:35 - High-intensity fight against a large group on a rooftop in Harlem 12:15 - Activating the final district tower for Harlem coverage 13:03 - Navigating the suit selection menu and viewing upgrades 14:00 - Stopping a high-speed vehicle chase with cinematic takedowns 15:00 - Clearing an armed robbery in progress near Sugar Hill 16:20 - Rooftop combat against drug dealers involving web-hang takedowns 17:15 - Collecting multiple character-themed backpacks across Midtown 18:05 - Engaging in combat at the Grand Central Terminal area 18:50 - Taking landmark photos of the Empire State and United Nations buildings 19:35 - Crafting and testing the new Impact Web gadget 19:40 - Clearing out waves of enemies at a massive Fisk construction site

Marvel's Spider-Man Remastered fighting shocker
Chapters: 0:00 - Examining Laboratory Interior 0:25 - Substance Pattern Matching Session 5:45 - Identifying Diphenyltetrazolium Bromide 5:55 - Analyzing Graphene Structure 8:43 - Final Substance Identification and Lab Exploration 11:26 - Transition to Spider-Man Traversing the City 12:01 - Receiving Mission Video from Harry Osborn 13:05 - Checking Research Station Data 13:35 - Collecting Smog Samples Mid-Air 15:14 - Photographing Pollution Sources 16:01 - Encountering Shocker at the Bank 17:50 - Intense Boss Fight with Shocker 19:08 - Finishing Move and Capturing Shocker 20:00 - Post-Fight Discussion and Skills Upgrade 21:20 - Navigating City at Night Towards New Objectives 22:42 - Accessing Chemical Leak Research Station 23:29 - Tracing Chemical Trails and Analyzing Vents 25:35 - Dispersing Vaccine to Parks and Birds 27:38 - Investigating Demon Gang Activity Messages 28:15 - Engaging Demons in Rooftop Combat 30:00 - Customizing Suits and Skills in Menu 32:21 - Coordinating with Yuri Watanabe for Next Steps
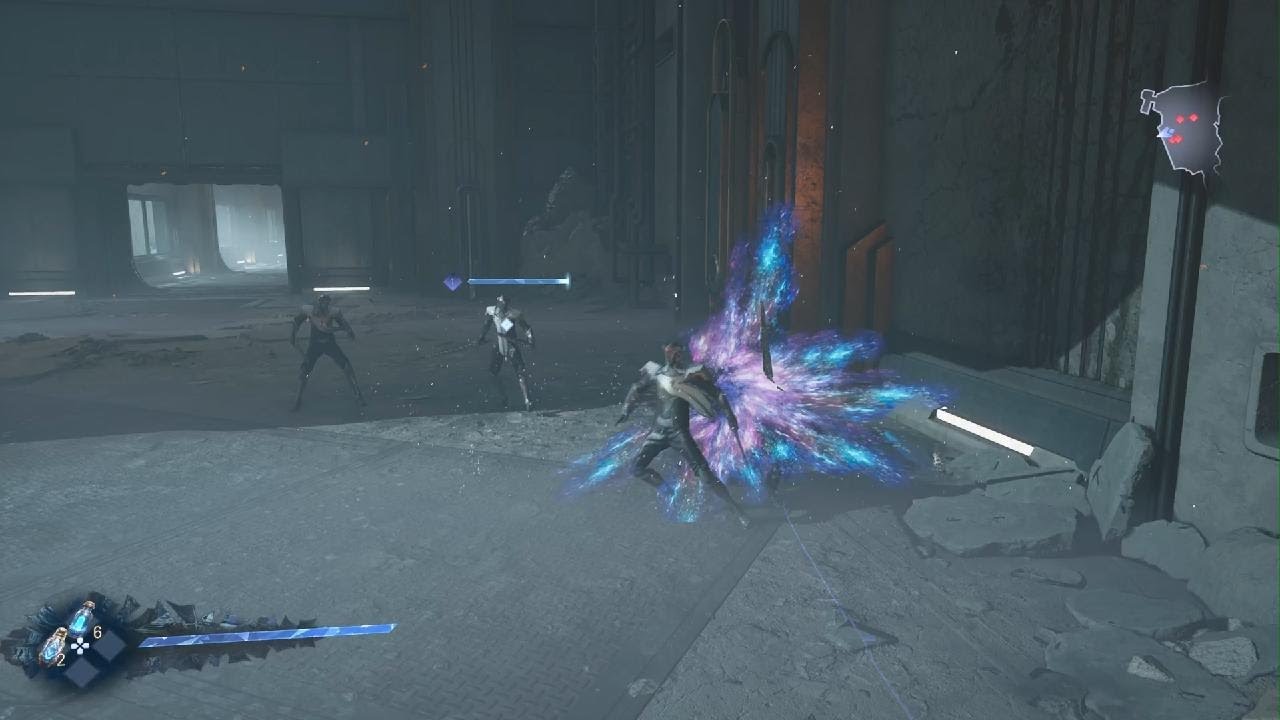
Lost Soul Aside
Chapters: 0:00 - Opening sequence and title reveals 0:25 - Recap and backstory featuring Louisa 0:45 - Cinematic depiction of the battle on Mount Salvation 1:36 - Early gameplay demonstration of combat abilities 2:08 - Introduction of powerful entities and the scourge on humanity 3:22 - Prologue: Recap and transitioning into Kaser's perspective 4:07 - Kaser awakens in the Unknown Depths 4:43 - Kaser begins his ascent and exploration of the underground area 5:27 - Combat Basics and Item Usage tutorial 5:38 - Kaser's encounter and combat against Imperial Guards 6:14 - Overview of the character's equipment, items, and settings 6:52 - Kaser navigates through obstacles and traps in the facility 7:59 - Kaser witnesses the effects of the meteors on the environment 9:30 - Encounter with the Mysterious Voice and a massive energy source 10:39 - Kaser navigates a collapsing section of the underground area 11:53 - Reaching the energy chamber and overloaded its core 14:26 - Cinematic interaction with the Massive Dragon 15:23 - Kaser gains and tests new powerful abilities 17:15 - Extensive combat tutorial sequences showcasing various skills 19:18 - Dialogue between Kaser and Lord Arena regarding their alliance 21:18 - Continuing the journey through the underground facility 23:44 - Final cinematic sequence ending in a confrontation at the Imperial Capital

ActionCam: Supernatural Case - second option
Chapters: 0:00:00 - 0:01:38 - Approaching the Abandoned School 0:01:38 - 0:03:30 - Infiltration and Hallway Exploration 0:03:30 - 0:03:42 - First Monster Encounter 0:03:42 - 0:05:00 - Navigating Ventilation Ducts 0:05:00 - 0:06:38 - Classroom Combat and Looting 0:06:38 - 0:07:32 - Searching for Library Clues 0:07:32 - 0:08:52 - Solving the Library Box Puzzle 0:08:52 - 0:10:48 - Basketball Court Ambush 0:10:48 - 0:12:44 - Ascending to the Upper Floors 0:12:44 - 0:13:34 - Unlocking the Basement Transition 0:13:34 - 0:15:24 - Final Confrontation and Decision
![Assassin's Creed Mirage [2]](https://i.ytimg.com/vi/yqgiIopxEVw/maxresdefault.jpg)
Assassin's Creed Mirage [2]
Chapters: 0:00:00 - 0:00:25 - Menu Navigation and Loading 0:00:25 - 0:01:10 - Initial Briefing with Roshan 0:01:10 - 0:01:54 - Rock Climbing and Leap of Faith Practice 0:01:54 - 0:03:24 - Discussing the Order of the Ancients 0:03:24 - 0:04:13 - Finding Fuladh in the Camp 0:04:13 - 0:05:25 - Meeting with Fuladh and Scholar Ahmad 0:05:25 - 0:07:02 - Eavesdropping on Rayhan's Diplomatic Warning 0:07:02 - 0:08:01 - Retrieving Leather Supplies 0:08:01 - 0:09:15 - Receiving New Sword and Dagger 0:09:15 - 0:10:11 - Throwing Knife Training 0:10:11 - 0:11:13 - Advanced Parkour Traversal 0:11:13 - 0:12:40 - Navigating the Upper Fortress 0:12:40 - 0:14:08 - Combat Sparring and Technique Masterclass 0:14:08 - 0:15:15 - Night Patrol and Stealth Takedowns

ActionCam: Supernatural Case - new game
The investigation begins at the iron gates of James Brownstone High School on a foggy, rainy night. After entering the school grounds, the mission focuses on exploring the dark, dilapidated corridors to find clues about a missing girl. Early exploration involves searching offices and classrooms for items such as batteries and evidence notes. A school blueprint found on a wall provides direction through the maze-like hallways. The tension escalates as the first supernatural entity appears, leading to a frantic combat encounter where a pistol is used for defense. Navigation continues through narrow ventilation shafts to bypass blocked paths. Further exploration leads to the school gymnasium, where another shadow creature is dispatched. The investigation then shifts to the library, where a locked wooden box contains a sliding tile puzzle. Successfully solving the puzzle reveals a photograph of a basement area, providing the next objective in the supernatural case. Chapters: 0:00:00 - 0:02:15 - Entering James Brownstone High School 0:02:15 - 0:04:30 - Initial Exploration and First Combat Encounter 0:04:30 - 0:06:45 - Gymnasium Skirmish and Searching the Library 0:06:45 - 0:08:31 - Solving the Library Puzzle and Basement Clue

Sleeping Dogs: Definitive Edition
The video provides a comprehensive look at several gameplay mechanics within Sleeping Dogs. It begins with exploration and demonstrates the camera hacking mini-game in a city park. Viewers will then see a complete street race titled 'Summit', highlighting high-speed driving and drifting through the neon-lit streets of Hong Kong. Following the race, the content covers lockbox discovery and hacking. The final portion of the video focuses on a mission involving a weaponized vehicle, demonstrating vehicular combat with turrets during a high-speed pursuit, including a mission failure and a successful restart from a checkpoint to showcase extended combat sequences. Chapters: 0:00:00 - 0:01:40 - Park exploration and security camera hacking 0:01:40 - 0:03:30 - The 'Summit' high-speed street race gameplay 0:03:30 - 0:06:25 - Free roaming, lockbox hacking, and mission initiation 0:06:25 - 0:08:50 - Vehicular combat chase and mission failure sequence 0:08:50 - 0:10:53 - Mission restart and extended weaponized car pursuit

Fortnite Easy Dubz
This video showcases a complete Fortnite match from initial looting to a final Victory Royale. The footage demonstrates strategic movement across the island, including traversals through Risky Reels, the Red Steel Bridge, and Holly Hedges. Viewers will see multiple squad engagements involving assault rifles, shotguns, and grenades, along with tactical team play such as reviving downed allies. The content also covers resource gathering and the use of environmental objects like Slurp trucks for shield maintenance. Chapters: 0:00:00 - 0:01:15 - Initial Looting and Early Combat at Risky Reels 0:01:15 - 0:03:25 - Map Navigation and Resource Gathering 0:03:25 - 0:05:15 - Bridge Exploration and Tactical Positioning 0:05:15 - 0:07:30 - High-Action Skirmish on the Red Steel Bridge 0:07:30 - 0:09:30 - Rotation Toward Salty Springs and Mid-Game Looting 0:09:30 - 0:11:15 - Intense Building and Combat Near Holly Hedges 0:11:15 - 0:13:01 - Final Circle Engagement and Victory Royale
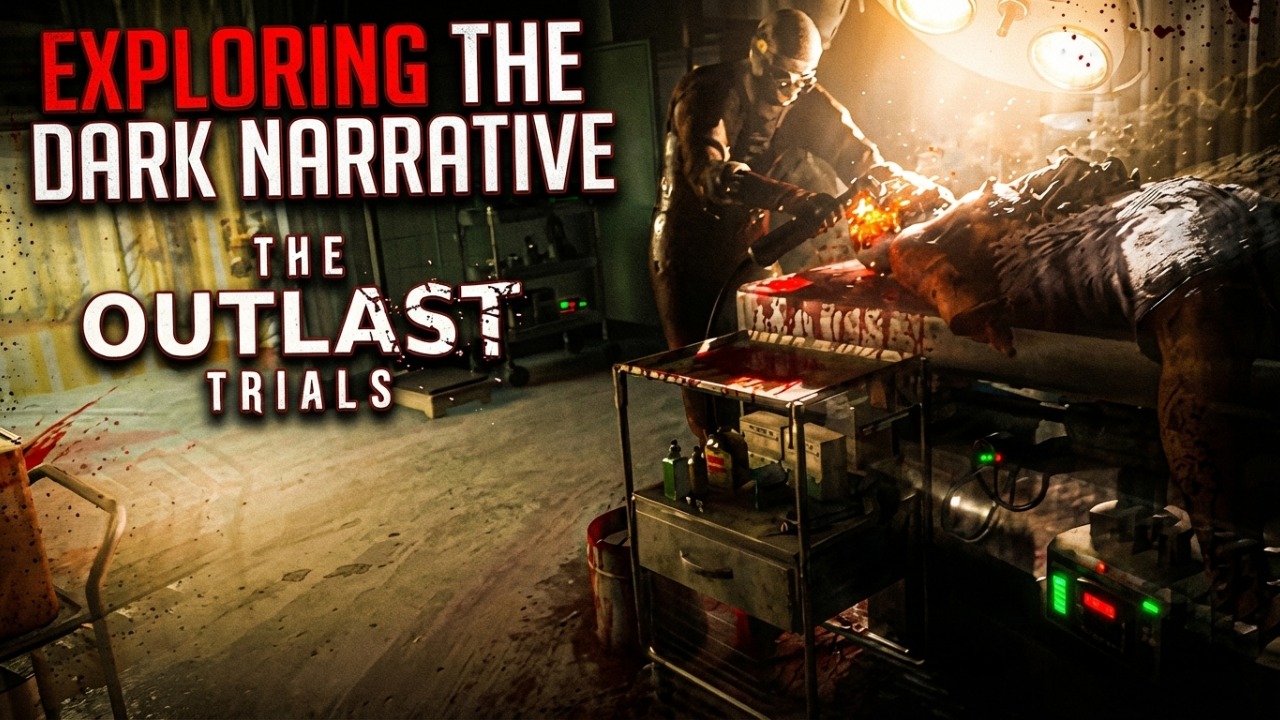
Exploring the Dark Narrative of The Outlast Trials
This video provides a comprehensive walkthrough and analysis of the opening sequence and initial trial of 'The Outlast Trials.' The content begins by showing the game's various settings, including interface options, audio levels, and brightness calibration. It then transitions into a psychological introduction featuring a Rorschach test, followed by a cinematic narrative that sets the dark tone of the game. Viewers will see the subject's initial capture and a disturbing surgery sequence led by Dr. Easterman. The video covers character customization before diving into the gameplay tutorial, which demonstrates movement, vaulting, and the use of night vision goggles. The core of the analysis focuses on a primary trial set within a mansion, showcasing stealth mechanics, item management, and encounters with major antagonists like Mother Gooseberry. The footage concludes with the subject's 'rebirth' procedure and final cinematic sequences that transition from the trial environment into the game's broader world. 📖 Chapters: 0:00:00 - 0:00:55 - Intro Logos and Loading Screens 0:00:55 - 0:02:01 - Game Settings and Calibration 0:02:01 - 0:03:09 - Psychological Rorschach Test Sequence 0:03:09 - 0:05:18 - Cinematic Intro and Subject Capture 0:05:18 - 0:06:45 - The Trial Induction Surgery 0:06:45 - 0:07:43 - Subject Character Customization 0:07:43 - 0:09:12 - Tutorial: Movement and Night Vision 0:09:12 - 0:12:31 - Entering the Mansion for the First Trial 0:12:31 - 0:14:43 - Stealth and Hiding Mechanics Demonstration 0:14:43 - 0:16:34 - Theatre Sequence and Mother Gooseberry Encounter 0:16:34 - 0:19:04 - Greenhouse Area and Trial Objective Introduction 0:19:04 - 0:21:49 - Destroying Trial Records and Evading Enemies 0:21:49 - 0:24:57 - Psychosis Encounter and Trial Completion 0:24:57 - 0:27:03 - The Subject's Rebirth Procedure 0:27:03 - 0:29:18 - Final Cinematic Sequences and World Transition

My first goal is to blow shi up⚜️
This video showcases a full match of Team Deathmatch in a modern military first-person shooter game. Viewers will see the matchmaking process, operator selection, and tactical deployment phase. The primary focus is on intense gunplay and strategic movement within a desert-themed urban map featuring intricate building interiors and open courtyards. The gameplay demonstrates various engagements, including long-range scoped shots, close-quarters combat, and the tactical use of gadgets like sonic traps. Throughout the match, the player maintains an aggressive playstyle, actively seeking out and eliminating opponents, contributing to their team's ultimate victory. 📖 Chapters: 0:00 - 0:05 - Matchmaking and Lobby Screen 0:05 - 0:27 - Operator Selection and Team Roster Display 0:27 - 0:50 - Loading Screen for Threshold Map 0:50 - 1:20 - Tactical Deployment Phase with Map Overview 1:20 - 1:55 - Initial Engagements and First Elimination 1:55 - 2:16 - Respawn and Strategic Flank 2:16 - 2:44 - Indoor Combat and Enemy Eliminations 2:44 - 3:13 - Second Respawn and Multiple Kills 3:13 - 3:42 - Outside Movement and Headshot Eliminations 3:42 - 4:17 - Gadget Use and Double Kill 4:17 - 4:51 - Third Respawn and Continued Push 4:51 - 5:19 - Final Engagements and Sonic Trap Deployment 5:19 - 5:37 - Match Concludes with Victory

Me n Opietes lwk moving in friendly 2s
📖 Chapters: 00:00:00 - 00:00:08 - Loading Screen: Setting the Stage for Demon Island Match 00:00:08 - 00:01:53 - Match 1: Demon Island - Blue Team (Jhala, Jiro) Dominates 00:01:53 - 00:02:25 - Post-Match & Character Selection Transition 00:02:25 - 00:05:15 - Match 2: Small World's End - Agile Tactics Lead to Blue Team Victory 00:05:15 - 00:05:45 - Results Review & Preparing for Next Battle 00:05:45 - 00:08:14 - Match 3: Shorwind Fishing Port - Strategic Engagements Secure Win for Blue Team 00:08:14 - 00:08:53 - Victory Screen & Character Selection Cycle 00:08:53 - 00:11:34 - Match 4: Suzaku Castle - Blue Team's Precision Overcomes Opponents 00:11:34 - 00:12:16 - Match Summary and Legend Selection 00:12:16 - 00:15:53 - Match 5: Mammoth Fortress - Powerful Offense from Jhala and Jiro 00:15:53 - 00:16:16 - Match Progression and Next Stage Loading 00:16:16 - 00:19:26 - Match 6: Temple Ruins - Red Team Secures a Challenging Victory 00:19:26 - 00:20:00 - Post-Loss Review and Character Reselection 00:20:00 - 00:22:29 - Match 7: Miami Dome - Aggressive Play Leads to Blue Team Win 00:22:29 - 00:23:45 - Match Results, Character Setup, and Map Load 00:23:45 - 00:26:51 - Match 8: Shipwreck Falls - Coordinated Attacks Seal Final Victory
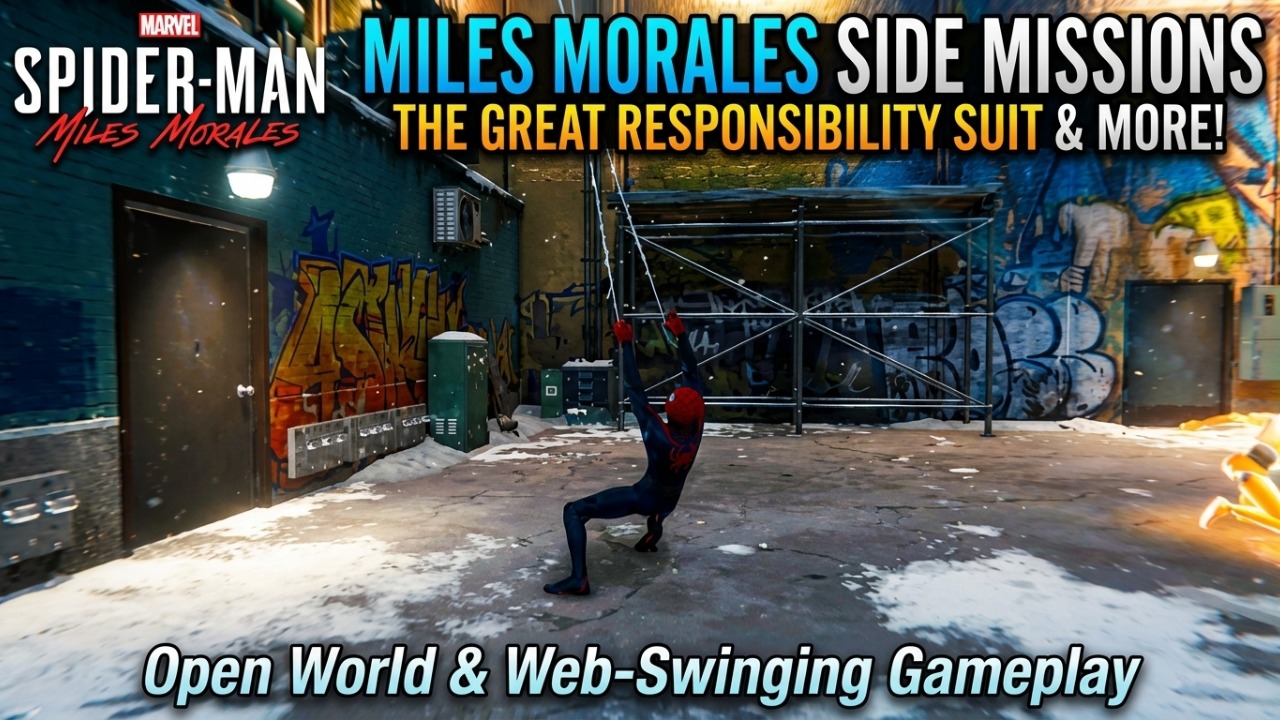
Marvel's Spider-Man: Miles Morales side missions
📖 Chapters: 0:00:00 - 0:21:00 - Menu Navigation & Skill Unlocking 0:21:00 - 1:15:00 - Open-World Exploration and Web-Swinging 1:15:00 - 2:20:00 - Peter Parker's Gift: The Great Responsibility Suit 2:20:00 - 3:25:00 - City Swinging in New Suit & Podcast Commentary 3:25:00 - 6:09:00 - Holographic Combat Training with Holo-Peter 6:09:00 - 7:48:00 - Roxxon Plaza Break-In & Combat with The Underground 7:48:00 - 8:15:00 - Post-Mission Menu Review & Skill Upgrades 8:15:00 - 9:20:00 - Heading to Roxxon Plaza & Dialogue on Venom Powers 9:20:00 - 10:29:00 - Roxxon's NuForm Reactor Presentation 10:29:00 - 11:15:00 - Roxxon Plaza Investigation & Encounter with The Prowler 11:15:00 - 15:05:00 - Combat Against The Underground in Roxxon Plaza 15:05:00 - 15:42:00 - NuForm Shipment Clues & Heading Home 15:42:00 - 16:36:00 - Menu Overview: Suits, Skills, Missions & Benchmarks 16:36:00 - 17:08:00 - Returning Home & Changing into Casual Clothes 17:08:00 - 18:40:00 - Christmas Eve Dinner with Family & Friends 18:40:00 - 20:55:00 - Exploring Miles' Room & Dad's Legacy 20:55:00 - 23:49:00 - Christmas Preparations & Phin's Arrival 23:49:00 - 25:57:00 - Power Outage & Fixing the Transformer 25:57:00 - 26:27:00 - Christmas Dinner Resumes & Family Moments This video provides a comprehensive look into the early gameplay and narrative elements of Marvel's Spider-Man: Miles Morales. Viewers will first see Miles navigating in-game menus, including skills and missions, where he unlocks the 'Venom Smash' ability. The video then transitions into an open-world segment, showcasing Miles swinging through a snowy New York City as Spider-Man, performing various acrobatic tricks while conversing with his friend Ganke. A significant portion covers a cutscene where Miles receives his first official Spider-Man suit from Peter Parker and proceeds to test it in a holographic training challenge, learning new combat mechanics like air launches, swing kicks, and disarming enemies. This training is interrupted by a real-world encounter with 'The Underground,' leading to dynamic combat sequences within Roxxon Plaza, where Miles utilizes his new 'Venom Power' abilities. The video highlights the mystery surrounding 'NuForm' shipments and introduces new characters, including Simon Krieger from Roxxon and the enigmatic 'Prowler'. The latter part of the video focuses on Miles returning to his apartment for a Christmas Eve dinner, interacting with Ganke, his mom Rio, and his childhood friend Phin, while simultaneously uncovering more clues about his dad's past and the growing threat to Harlem. The video concludes with Miles navigating power outages and fixing a transformer, blending gameplay with narrative progression.
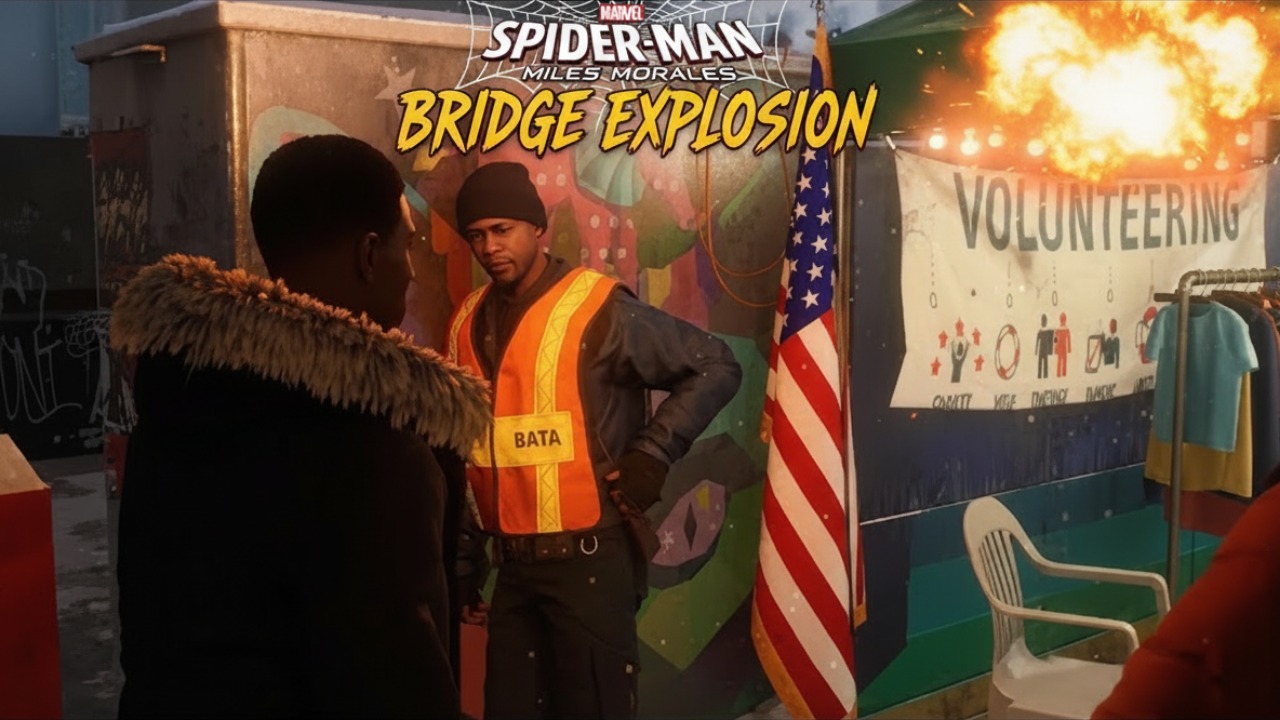
Marvel's Spider-Man: Miles Morales bridge explosion
This video showcases a significant narrative and gameplay segment from 'Marvel's Spider-Man: Miles Morales'. Viewers will initially see Miles Morales navigating a festive Harlem street fair, interacting with various community members and his friend Ganke. The narrative progresses to a political rally where Miles's mother, Rio Morales, is speaking, which is dramatically interrupted by an attack from the Underground faction and Roxxon security. The core gameplay shifts to intense combat sequences where Miles, as Spider-Man, battles multiple enemies across the snowy city streets and rooftops, utilizing his unique combat abilities and web-slinging mechanics. The video culminates in a high-stakes sequence on the Braithwaite Bridge, which is collapsing due to an explosion. Miles must engage in further combat while simultaneously performing heroic rescues, saving a bus full of civilians, and using his powers to create a makeshift path across the destroyed bridge for others. 📖 Chapters: 0:00:00 - 0:18:00 - Game Introduction and Menu Selection 0:18:00 - 0:56:00 - Harlem Street Fair Exploration and Community Interactions 0:56:00 - 1:29:00 - Food Truck Dialogue and Campaign Booth Conversations 1:29:00 - 2:25:00 - Encountering Hailey and Discussions about Rio Morales's Campaign 2:25:00 - 3:09:00 - Meeting Uncle Aaron and Approaching the Political Rally 3:09:00 - 4:00:00 - Rally Attack and Spider-Man's First Appearance 4:00:00 - 5:16:00 - Street Combat Against Underground Forces 5:16:00 - 6:30:00 - Rooftop Engagements and Pursuit of Enemies 6:30:00 - 7:50:00 - Web-Slinging Towards Braithwaite Bridge Amidst Crisis 7:50:00 - 8:20:00 - Confrontation with Tinkerer on the Collapsing Bridge 8:20:00 - 9:40:00 - Intense Combat on the Damaged Bridge 9:40:00 - 10:27:00 - Navigating Environmental Hazards and Continued Battle 10:27:00 - 11:19:00 - Bus Rescue and Civilian Evacuation from the Falling Bridge 11:19:00 - 12:48:00 - Creating a Web Path for Stranded Civilians 12:48:00 - 13:10:00 - Final Rescue and Aftermath of the Bridge's Destruction
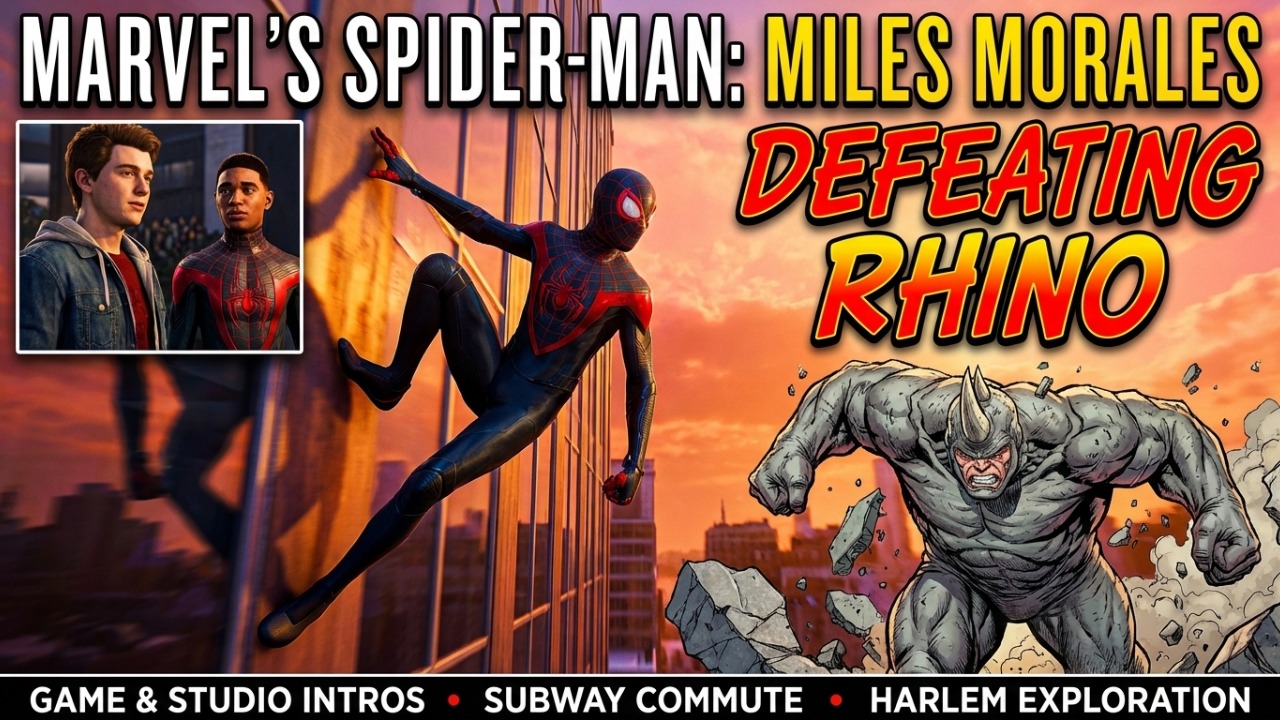
Marvel's Spider-Man: Miles Morales - defeating Rhino
📖 Chapters: 0:00:00 - 0:28:00 - Game and Studio Introductions 0:28:00 - 1:45:00 - Miles Morales's Subway Commute and Game Setup 1:45:00 - 3:05:00 - Exploring Harlem and Neighborhood Interactions 3:05:00 - 5:40:00 - Miles Transforms into Spider-Man and Begins Web-Slinging 5:40:00 - 7:40:00 - Prison Convoy Attack and Rhino's Escape 7:40:00 - 9:20:00 - Initial Combat with Escaped Prisoners 9:20:00 - 11:00:00 - Rhino's Rampage Through City Streets and Mall Chase 11:00:00 - 13:20:00 - Pursuit Through an Industrial Area and New Powers Demonstrated 13:20:00 - 16:00:00 - Utilizing Venom Punch Against Rhino 16:00:00 - 17:00:00 - Peter Parker Injured; Miles Confronts Rhino Alone 17:00:00 - 20:00:00 - Rhino's Defeat and Roxxon's Arrival 20:00:00 - 21:20:00 - Simon Krieger's Encounter with Spider-Men 21:20:00 - 23:25:00 - Peter Parker's Departure and Miles's New Role 23:25:00 - 23:45:00 - Miles Embraces His Destiny as New York's Only Spider-Man The video provides a comprehensive walkthrough of a significant portion of Marvel's Spider-Man: Miles Morales, focusing on the protagonist's initiation into his role as a solo superhero and his first major confrontation with the villain Rhino. You will initially see the game's introductory sequence, including Miles Morales commuting on a subway and navigating his neighborhood, showcasing the vibrant and snowy Harlem environment. The narrative quickly escalates as Miles is thrust into action, teaming up with the original Spider-Man (Peter Parker) to manage a prison convoy disaster. The core of the video centers around the dynamic boss battle against Rhino, demonstrating Miles's emerging bio-electric 'Venom' powers and web-slinging combat maneuvers through diverse environments like city streets, a bustling shopping mall, and an industrial complex. The content highlights both cinematic storytelling and interactive gameplay sequences. Following Rhino's defeat, the video transitions into crucial story beats: Peter Parker's departure, leaving Miles as the sole protector of New York, and the introduction of Simon Krieger from Roxxon Energy, setting up future conflicts. The video concludes with Miles embracing his new responsibilities and taking to the skies. Chapters: 0:00:00 - 0:01:10 - Opening Logos and Game Settings Configuration 0:01:10 - 0:02:25 - Subway Ride and Walking Through Harlem 0:02:25 - 0:03:45 - Convoy Crash, Rhino Boss Fight, and Venom Punch Tutorial
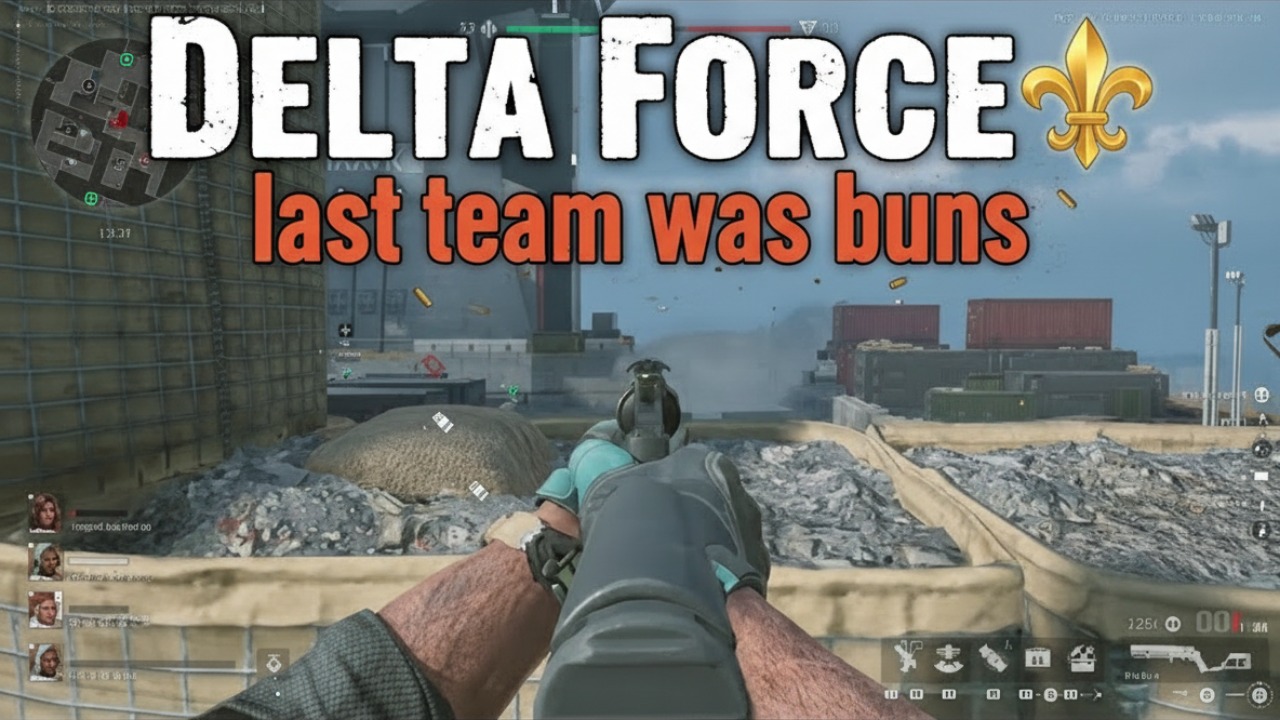
Delta Force - last team was buns ⚜️
📖 Chapters: 0:00 - 0:15 - Initial Deployment and Indoor Engagement on Hawk Map 0:15 - 0:40 - Sustained Rooftop Combat and Multiple Eliminations 0:40 - 1:12 - Internal Facility Engagements Leading to Elimination 1:12 - 1:52 - Continued Interior Battles and Subsequent Elimination 1:52 - 2:30 - Exterior and Interior Combat Featuring a Multi-Kill 2:30 - 2:42 - Final Internal Firefight and Player Elimination 2:42 - 3:00 - Rooftop Defense and Engagement with Enemy Gadgets 3:00 - 3:20 - Close-Quarters Engagements, Securing a Double Kill 3:20 - 3:55 - Intense Indoor Firefights, Net Trap Deployment, and Revives 3:55 - 4:18 - Rapid Engagements and Eliminations Using Pistol 4:18 - 4:55 - Multiple Eliminations on the Rooftop with Grenade Plays 4:55 - 5:30 - Decisive Engagements Leading to First Match Victory 5:30 - 6:53 - Post-Match Statistics, Battle Pass Progression, and Pre-Game Lobby 6:53 - 7:20 - Threshold Map Deployment, Urban Navigation, and Initial Kills 7:20 - 8:10 - Continuous Indoor and Outdoor Combat with Multiple Eliminations 8:10 - 9:00 - Engagements on Multiple Levels, Eliminations, and Tactical Movements 9:00 - 9:55 - Fast-Paced Combat and Eliminations Across Various Sections 9:55 - 10:30 - Strategic Pushes and Multiple Kills 10:30 - 11:25 - Recurring Eliminations and Tactical Redeployments 11:25 - 12:30 - Consistent Engagements, Including a Long-Range Shot 12:30 - 13:22 - Final Intense Skirmishes Leading to Second Match Victory 13:22 - 15:30 - Second Match Results, Battle Pass Progress, and Weapon Customization 15:30 - 16:05 - Cracked Map Deployment, Initial Skirmishes, and Eliminations 16:05 - 17:05 - Recurrent Combat in Alleyways and Close-Quarters 17:05 - 18:05 - Sustained Engagements, Utilizing Grenades and Gadgets 18:05 - 19:15 - Multiple Eliminations in the Desert Environment 19:15 - 20:23 - Final Push and Multiple Kills to Secure Third Match Victory 20:23 - 22:36 - Third Match Results and Best Squad Presentation 📖 Chapters: 0:00:00 - 0:02:29 - First Match - Initial Deployment and Outdoor Engagements 0:02:29 - 0:05:29 - First Match - Indoor Combat and Intense Close-Quarters Battles 0:05:29 - 0:06:52 - First Match Conclusion and Menu Navigation 0:06:52 - 0:08:46 - Second Match - Deployment on Urban Map and Early Engagements 0:08:46 - 0:10:29 - Second Match - Focused Indoor Combats and Strategic Positioning 0:10:29 - 0:13:25 - Second Match - Continued Urban Warfare and Player Elimination 0:13:25 - 0:15:29 - Second Match Conclusion and Weapon Customization 0:15:29 - 0:17:12 - Third Match - Desert Map Deployment and Initial Skirmishes 0:17:12 - 0:19:29 - Third Match - Navigating Alleyways and Multiple Enemy Encounters 0:19:29 - 0:22:36 - Third Match - Sustained Firefights and Final Victory
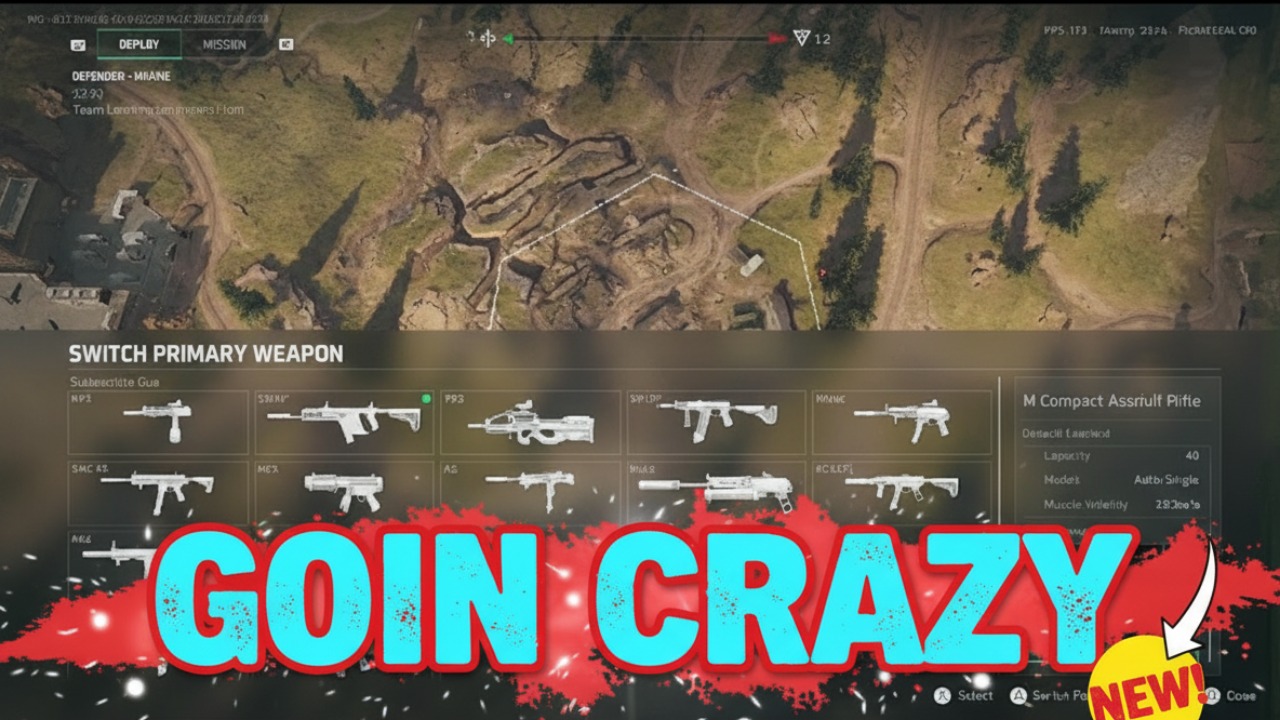
Goin crazy
📖 Chapters: 0:00:00 - 0:00:01 - Introduction to the Game Menu 0:00:01 - 0:16:00 - Operator Selection and Loadout Customization 0:16:00 - 0:29:00 - Match Start Countdown: Operator Selection Display 0:29:00 - 1:07:00 - Loading Screen for 'Trench Lines' Map 1:07:00 - 1:33:00 - Deployment Map and Weapon Selection 1:33:00 - 2:01:00 - First Engagement on 'Trench Lines' - Player Elimination 2:01:00 - 2:09:00 - Deployment After Elimination and Resupply 2:09:00 - 3:12:00 - Intense Combat in Trenches and Player Eliminations 3:12:00 - 3:40:00 - Respawn and Continued Trench Warfare 3:40:00 - 5:15:00 - Sustained Engagements and Strategic Pushes 5:15:00 - 8:25:00 - Aggressive Assault with Submachine Gun and Final Elimination 8:25:00 - 10:23:00 - Final Push on 'Trench Lines' Leading to Team Defeat 10:23:00 - 10:46:00 - End of Match Summary: Defeat and Best Squad Display 10:46:00 - 11:48:00 - Loading Screen for 'Knife Edge' Map 11:48:00 - 12:45:00 - First Engagements on 'Knife Edge' - Indoor Combat 12:45:00 - 15:15:00 - Continuous Indoor Engagements and Multi-Kills 15:15:00 - 17:17:00 - Dominant Gameplay and Team Victory on 'Knife Edge' 17:17:00 - 17:43:00 - End of Match Summary: Victory and Performance Statistics
![Where Winds Meet gameplay [part 1]](https://radyztpmyncvapevoczl.supabase.co/storage/v1/object/public/thumbnails/thumbnails/episode-431-thumbnail-1765960181406.png)
Where Winds Meet gameplay [part 1]
📖 Chapters: 0:00:00 - Video Start: Game Boot-up and Title Screen 0:12:00 - Main Menu and Login Sequence 0:34:00 - Junhu Wakes Up to Ruby's Scolding 1:53:00 - Gameplay Begins: Searching for Clues Outside 2:27:00 - Discovering a Spear and Ruby's Enthusiasm 3:13:00 - Finding a Hidden Letter Inside the Abode 3:36:00 - Revealing the Letter's Content and Narrative Clues 3:44:00 - Junhu Reflects on the Letter and Spirit Tablet 4:21:00 - Ruby's Frustration and Junhu's Distraction 5:34:00 - Gameplay: Departing with Ruby and Item Collection 6:21:00 - Broken Bridge and Junhu's Agility 6:55:00 - Navigating Miasma and Continued Journey 7:25:00 - Scenic Overlook and Encountering a Mysterious Archer 8:58:00 - Introduction of Feng Jisheng and Ruby's Excitement 00:00:00 - Initial Dialogue: Feng Jisheng's Humility 00:00:30 - Ruby's Disappointment and Archery Manuscript Offer 00:00:48 - Introduction of 'Still Waters' Technique 00:01:10 - Ruby's Excitement for the Secret Book 00:01:25 - Junhu Accepts the 'Still Waters' Technique 00:01:44 - Archery Practice Begins: Still Waters Trial 00:03:07 - Archery Competition Result: A Tie 00:03:22 - Warning about 'Killerblade' and Unsavory Characters 00:04:00 - Ruby's Hero Fantasies and Departure 00:04:47 - Quest Update and Character Level Up 00:05:07 - Combat Encounter: Greenwood Marauders 00:05:40 - Discovering a Chest and Community Signpost 00:06:12 - Encountering a Wayfarer and Unique Item Exchange 00:07:01 - Wayfarer's Favor and Map Revelation 00:08:08 - Seeking the Black Bear for Skill Acquisition 00:08:32 - Skill Theft Mini-Game: Tai Chi 00:08:58 - Combat with the Black Bear using Tai Chi 00:09:44 - Bear Defeated and Quest Progression 0:00:00 - Resource gathering and mounting horse 0:00:05 - Horseback riding through scenic fields 0:00:15 - Approaching and ascending to the main complex 0:00:29 - Entering the gate and NPC interactions 0:00:37 - Accessing the game's main menu 0:00:39 - Navigating and adjusting controller settings 0:00:51 - Reviewing and modifying basic game settings 0:01:00 - Adjusting camera sensitivities and options 0:01:13 - Briefly browsing display and audio settings 0:01:17 - Exploring language and 'Other' game settings 0:01:29 - Final review of controller settings menu Chapters: 0:00:00 - 0:01:55 - Waking up and talking to Ruby 0:01:55 - 0:04:22 - Searching the Bamboo Abode for clues 0:04:22 - 0:06:21 - Broken bridge and forest exploration 0:06:21 - 0:08:45 - Archery challenge and Still Waters technique 0:08:45 - 0:11:00 - Fighting bandits on the mountain road 0:11:00 - 0:12:23 - Meeting the Wayfarer and map acquisition 0:12:23 - 0:14:48 - Learning Tai Chi from the wild bear 0:14:48 - 0:15:52 - Qi Sheng and unlocking the Panacea Fan 0:15:52 - 0:17:32 - Horseback travel and river battle
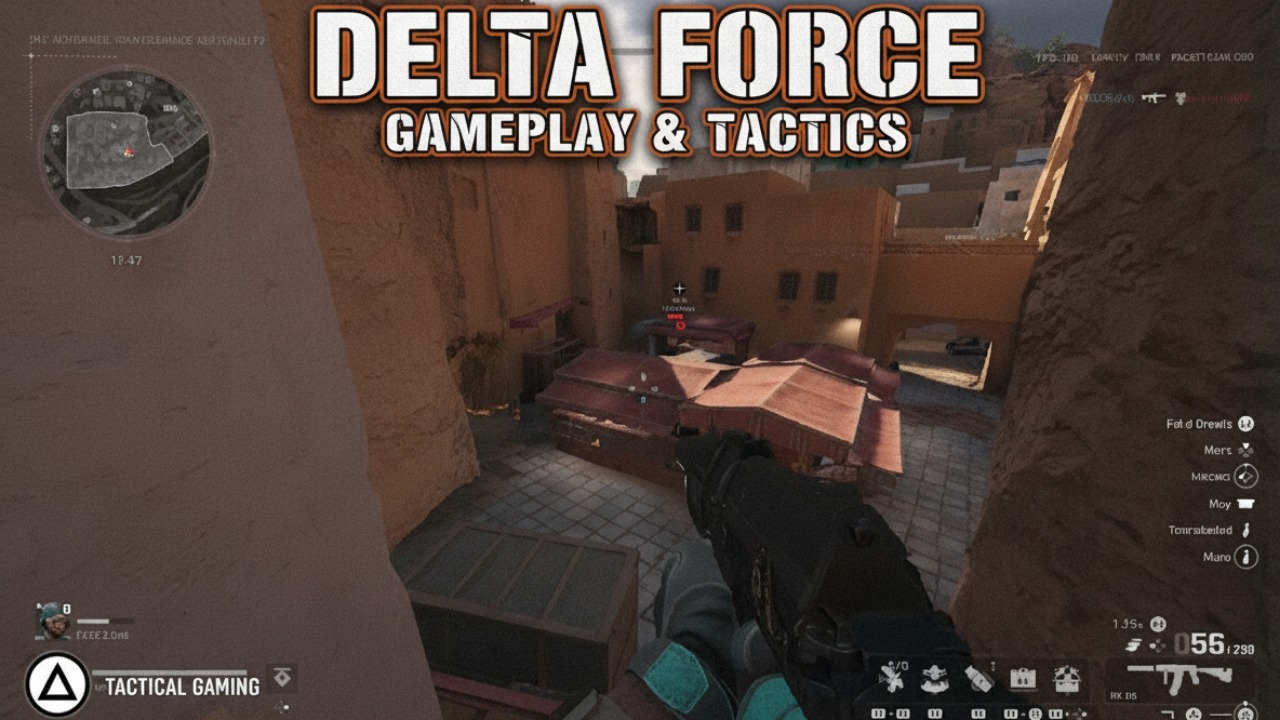
Delta Force
Last part then I'll post other stuff 📖 Chapters: 0:00 - 0:13 - Game Start-up and Main Menu Navigation 0:13 - 1:25 - Detailed Weapon Customization in Gunsmith 1:25 - 2:30 - Firing Range Practice and Match Setup 2:30 - 3:15 - First Combat Engagement in Desert Town 3:15 - 4:30 - Sustained Engagements and Tactical Movement 4:30 - 5:15 - Multiple Takedowns and Strategic Positioning 5:15 - 6:00 - Aggressive Pushes and Continuous Firefights 6:00 - 6:55 - Securing Kills with Gadget Usage 6:55 - 7:35 - Dynamic Combat Across Varied Terrain 7:35 - 8:15 - Engaging Enemies from Multiple Angles 8:15 - 9:00 - Direct Confrontations and Effective Weapon Control 9:00 - 9:45 - Adapting to Enemy Positions and Securing Eliminations 9:45 - 10:20 - Strategic Movement and Multi-Kill Sequences 10:20 - 11:00 - Maintaining Offensive Pressure and Consistent Eliminations 11:00 - 11:45 - High-Intensity Engagements and Quick Reactions 11:45 - 12:30 - Navigating for Tactical Advantage and Securing Kills 12:30 - 13:10 - Resupply and Aggressive Close-Quarters Play 13:10 - 13:55 - Engaging Multiple Targets with Precision 13:55 - 14:43 - Final Push and Victory Earned 14:43 - 15:00 - Post-Match Results and Best Squad
Delta Force - I'm moving once again ⚜️
📖 Chapters: 0:00:00 - 0:02:45 - Intense Urban Combat and Multi-Kills on 'Shady' Map 0:02:45 - 0:04:10 - Match End and Post-Game Stats Review: 'Shady' Map 0:04:10 - 0:06:55 - Lobby Navigation, Weapon Customization, and New Match Preparation 0:06:55 - 0:08:40 - Early Engagements in 'Monument' Desert Map 0:08:40 - 0:11:00 - Aggressive Pushing and Sustained Combat on 'Monument' 0:11:00 - 0:14:20 - Clutch Plays and Victory on 'Monument' Map 0:14:20 - 0:15:50 - Post-Match Performance and Season Pass Progression 0:15:50 - 0:23:05 - Deep Dive into Weapon Attachments, Cosmetics, and Matchmaking 0:23:05 - 0:25:30 - First Contact and Strategic Maneuvers in 'Trench Lines' Map 0:25:30 - 0:29:55 - Continuous Engagements and Final Push on 'Trench Lines'

Delta Force: Weapon Customization & Intense Multiplayer Gameplay
This comprehensive video provides an in-depth look at the menu navigation, customization options, and intense gameplay sequences within a modern military-themed first-person shooter. Viewers will see detailed interactions with the game's lobby, Glacier Store for weapon skins, and the 2025 Delta Force Invitational prediction system. The core of the video features two full Team Deathmatch gameplay sessions on the 'Knife Edge' and 'Trainwreck' maps, showcasing fast-paced combat, strategic use of cover, weapon handling, and objective play, along with post-match statistics and progression rewards.
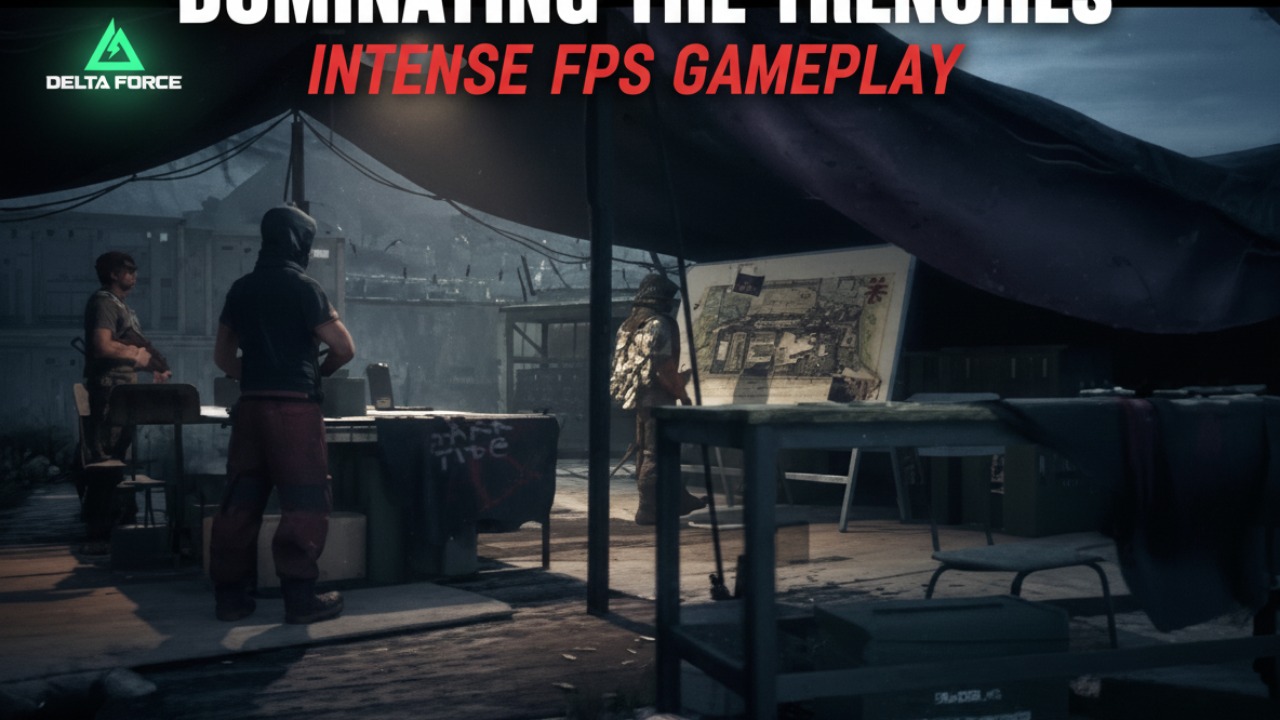
Dominating the Trenches: Intense FPS Gameplay
This video showcases intense first-person shooter gameplay within the 'Trench Lines' map in a Team Deathmatch mode. Viewers will observe the player's strategic movement through a war-torn environment featuring trenches, fortified positions, and open fields with wind turbines and artillery. The gameplay demonstrates rapid engagements, precise aiming, and effective use of cover to secure multiple kills against enemy combatants. The player actively participates in firefights, often taking elevated positions for tactical advantage and contributing significantly to their team's ultimate victory. The video highlights continuous combat, showcasing various weapon engagements and the dynamic nature of multiplayer battles. 📖 Chapters: 0:00 - 0:27 - Game Loading and Deployment Selection 0:27 - 1:04 - Initial Engagements and First Elimination 1:04 - 1:45 - Respawn and Aggressive Pushes 1:45 - 2:33 - Elevated Positions and Multiple Kills 2:33 - 3:18 - Scoreboard Check and Tactical Movement to High Ground 3:18 - 4:15 - Sustained Engagements and Flanking Maneuvers 4:15 - 5:29 - Advanced Positioning and Close-Quarters Combat 5:29 - 6:29 - Second Elimination and Continued Map Control 6:29 - 7:36 - Final Push, Multi-Kills, and Victory
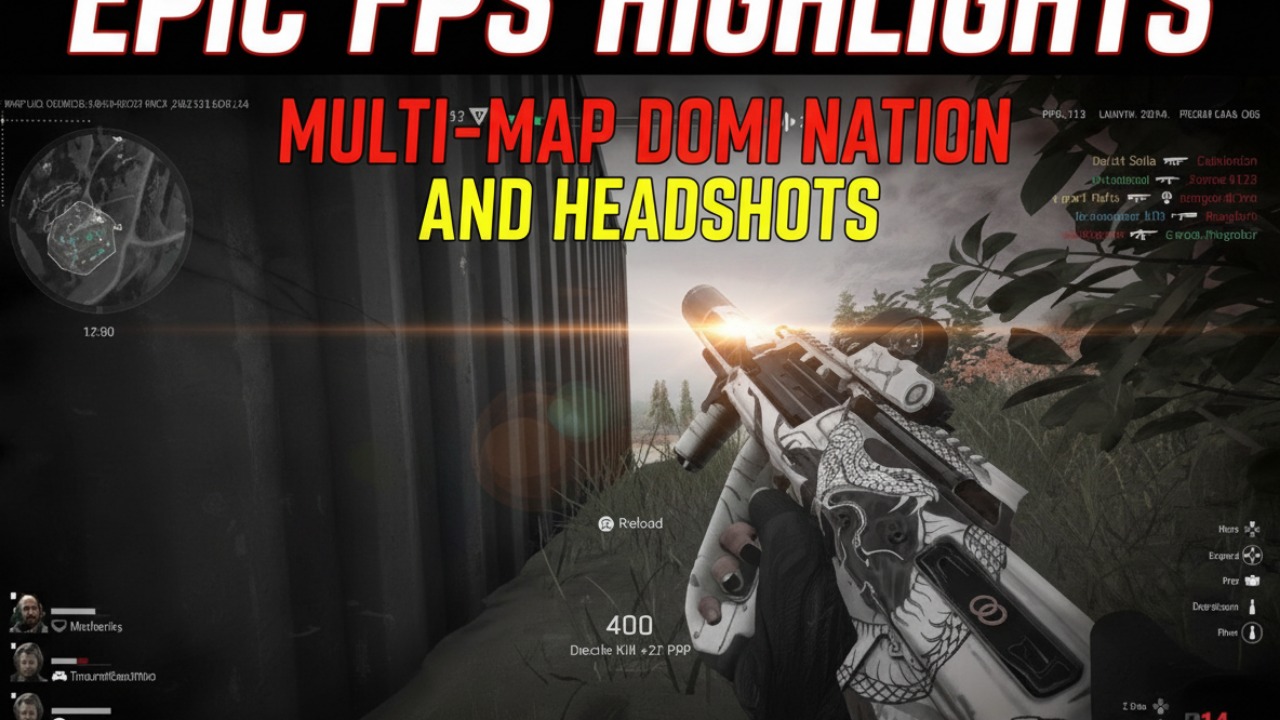
Epic FPS Highlights: Multi-Map Domination and Headshots
This video features extensive first-person shooter gameplay across three distinct maps: Trench Lines, Trainwreck, and Threshold. Viewers will see detailed combat encounters, tactical movement, and various weapon engagements, including assault rifles, pistols, and sniper rifles. The content showcases objective-based gameplay, multiple kills, killstreaks like 'Double Kill' and 'Quadra Kill', and highlights player performance through in-game notifications and end-of-match summaries. The video also includes character and weapon customization menus, offering a glimpse into the game's progression system and operator selection. 📖 Chapters: 0:00:00 - 0:24:28 - Game Loading and Map Overview (Trench Lines) 0:24:28 - 0:50:00 - Character Selection and Match Preparation 0:50:00 - 2:05:40 - Trench Lines Gameplay: Initial Engagements and Eliminations 2:05:40 - 3:24:50 - Trench Lines Gameplay: Sustained Combat and Multiple Kills 3:24:50 - 4:50:00 - Trench Lines Gameplay: Artillery Barrage and Aggressive Push 4:50:00 - 5:18:00 - Trench Lines Gameplay: Final Push and Victory 5:18:00 - 5:41:40 - Trench Lines Match Results and Best Squad Display 5:41:40 - 5:56:50 - Season Pass Progression Display 5:56:50 - 6:28:00 - Main Menu and Operator Selection (First Set) 6:28:00 - 7:00:00 - Game Loading and Map Overview (Trainwreck) 7:00:00 - 7:36:00 - Trainwreck Gameplay: Early Combat and Elimination 7:36:00 - 9:02:00 - Trainwreck Gameplay: Respawns, Multiple Kills, and Quadra Kill 9:02:00 - 10:20:00 - Trainwreck Gameplay: Objective Push and Intense Engagements 10:20:00 - 10:40:00 - Trainwreck Loadout Adjustments and Operator Selection 10:40:00 - 11:12:00 - Trainwreck Gameplay: Rapid Engagements and Eliminations 11:12:00 - 12:26:00 - Trainwreck Gameplay: Continuous Action and Victory 12:26:00 - 12:41:00 - Trainwreck Match Results and Best Squad Display 12:41:00 - 13:02:00 - Season Pass Progress and Rewards 13:02:00 - 13:30:00 - Main Menu and Operator Selection (Second Set) 13:30:00 - 14:02:00 - Team Display and Game Loading (Threshold) 14:02:00 - 14:21:00 - Threshold Gameplay: First Engagements 14:21:00 - 15:00:00 - Threshold Gameplay: Strategic Positioning and Multiple Kills 15:00:00 - 15:40:00 - Threshold Gameplay: Close Quarters Combat and Explosions 15:40:00 - 16:19:00 - Threshold Gameplay: Sniper Engagements and Headshots 16:19:00 - 17:35:00 - Threshold Gameplay: Continued Sniper Play and Tactical Moves 17:35:00 - 18:24:00 - Threshold Gameplay: Assault Rifle Combat in Buildings 18:24:00 - 19:43:00 - Threshold Gameplay: Final Pushes and Ongoing Combat
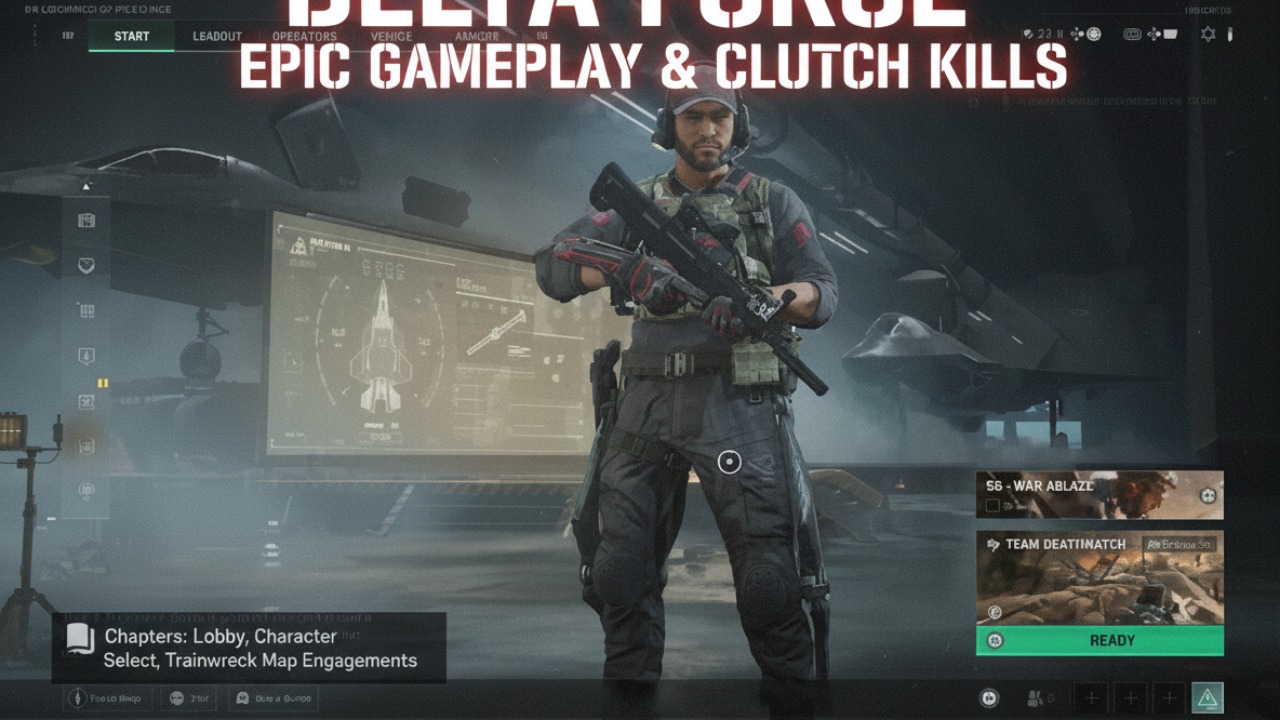
Delta Force
This video provides a comprehensive first-person gameplay experience of a tactical shooter, showcasing two complete Team Deathmatch rounds across different maps. Viewers will observe the player's strategic navigation, aggressive engagements, and effective use of various firearms and gadgets. The content covers the full match flow, from lobby and character selection, through deployment and intense combat scenarios, to post-match performance summaries. Key moments include multi-kills, precision aiming, tactical movement, and the utilization of map features to gain advantages, offering insights into gameplay mechanics and player skill in a fast-paced environment. 📖 Chapters: 0:00 - 0:26 - Lobby and Character Selection 0:26 - 0:58 - First Match Loading: Trainwreck Map Deployment 0:58 - 1:55 - Trainwreck Match 1: Initial Engagements and Multiple Kills 1:55 - 2:35 - Trainwreck Match 1: Overload Mode and Triple Kill Streak 2:35 - 3:20 - Trainwreck Match 1: Mid-Match Map Navigation and Combat 3:20 - 4:10 - Trainwreck Match 1: Aggressive Pushes and Close-Quarters Battles 4:10 - 5:21 - Trainwreck Match 1: Final Engagements and Victory 5:21 - 5:55 - Match 1 Results and Performance Overview 5:55 - 6:23 - Lobby and Character Selection for Second Match 6:23 - 7:05 - Second Match Loading: Knife Edge Map Deployment 7:05 - 8:15 - Knife Edge Match 2: Indoor Combat and Strategic Engagements 8:15 - 9:15 - Knife Edge Match 2: Continuous Hostile Encounters and Overload Activation 9:15 - 10:30 - Knife Edge Match 2: Intense Corridor Fights and Multi-Kills 10:30 - 11:30 - Knife Edge Match 2: Sustained Pressure and Weapon Effectiveness 11:30 - 12:47 - Knife Edge Match 2: Final Push and Victory
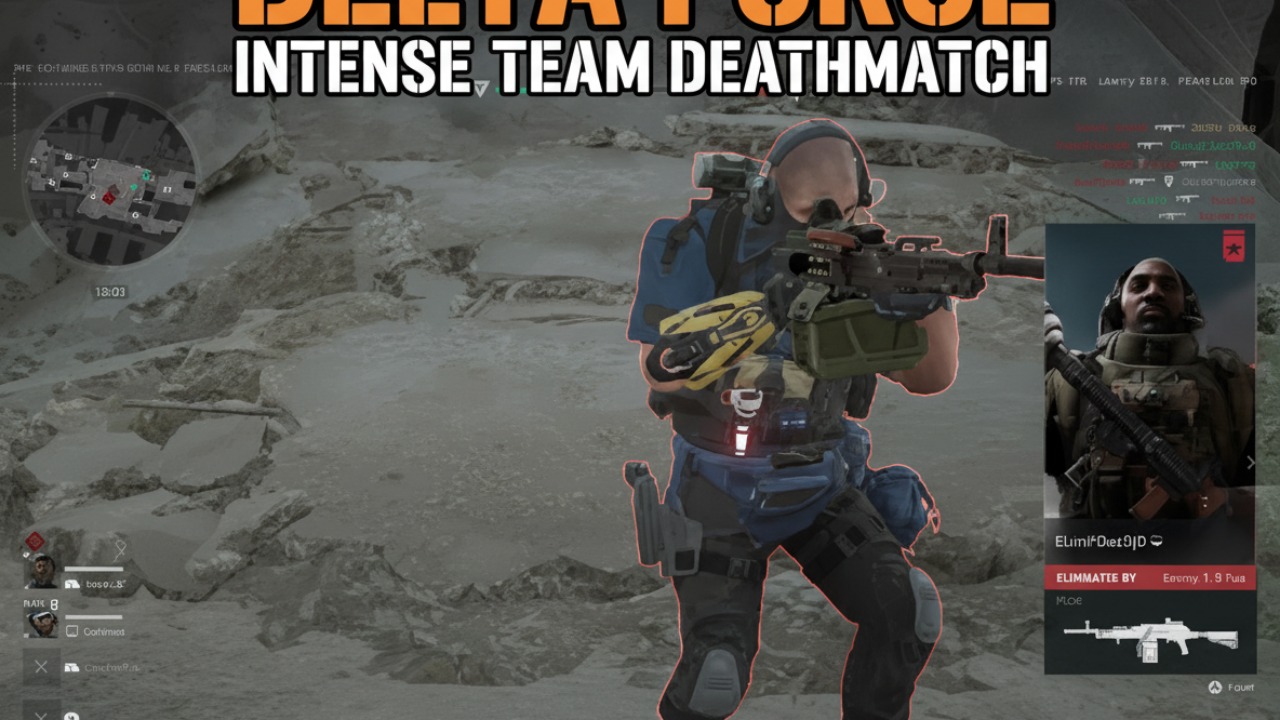
Delta Force: Intense Team Deathmatch Gameplay Highlights
This video provides a comprehensive overview of the gameplay experience in Delta Force, a first-person shooter. Viewers will initially see the game's introductory logos and cinematic sequences, which set the tone for the tactical combat. Following a loading screen, the video transitions to the main menu, showcasing various game modes like Warfare, Operations, Black Hawk Down, Team Deathmatch, and Manhunt, along with a 'Tactical Armament Giveaway' event. The process of character selection is demonstrated, featuring different operator classes such as Assault, Support, Engineer, and Recon. The core of the video consists of two extensive Team Deathmatch gameplay segments on different maps: 'Knife Edge' and 'Trench Lines'. During these segments, viewers will observe fast-paced, objective-based combat, showcasing a variety of weapons, operator abilities (like 'Anti-Peek activated'), and tactical movements across detailed urban and trench warfare environments. The gameplay features numerous kills, assists, revives, and tactical plays, highlighting intense gunfights and strategic positioning. The video also includes intermittent loading screens with game tips, and concludes with post-match performance summaries, including battle experience, defeat/victory screens, and season pass progression.
![Gohan Unleashed: Intense Combat and Strategic Tips in [Game Title]](https://i.ytimg.com/vi/I4f5lEUT_L0/hqdefault.jpg)
Gohan Unleashed: Intense Combat and Strategic Tips in [Game Title]
The video provides a comprehensive overview of combat mechanics and brief open-world traversal in a fighting game, featuring the character Gohan. It showcases multiple fast-paced combat encounters against the opponent Prometheus within a futuristic, grid-like arena. Viewers will see various offensive maneuvers, including basic attacks, elaborate combos, special abilities like energy blasts, and character-specific moves leading to decisive finishes. Each successful combat round is followed by a results screen displaying earned experience, gold, and character level-ups. Throughout the video, interceding loading screens present helpful gameplay tips, explaining mechanics such as 'Rush Pursuit', 'Throw Evasions', 'Missions', 'Abilities', 'Attack Types', 'Perfect Smashes', 'Chasing', and 'Armor'. The video concludes with an exploration of an urban-themed hub world, highlighting the player character's movement and environmental interaction. 📖 Chapters: 0:00:00 - Initial Game Loading and Tips 0:00:11 - Black Screen Loading with Tips: Rush Pursuit & Throw Evasions 0:00:49 - First Combat Encounter: Gohan vs Prometheus 0:01:17 - Combat Results and Character Level Up 0:01:24 - Loading Screen with Tips: Missions 0:01:32 - Second Combat Encounter: Gohan's Offensive Flurry 0:02:17 - Second Combat Results and Experience Earned 0:02:27 - Loading Screen with Tips: Abilities 0:02:36 - Third Combat Encounter: Relentless Attacks 0:03:15 - Third Combat Results Display 0:03:25 - Loading Screen with Tips: Attack Types 0:03:34 - Black Screen Loading 0:03:55 - Fourth Combat Encounter: Explosive Combos 0:04:32 - Fourth Combat Results and Gold Earned 0:04:42 - Loading Screen with Tips: Perfect Smashes 0:04:51 - Black Screen Loading 0:05:07 - Fifth Combat Encounter: Breaking Defenses 0:05:55 - Fifth Combat Results and Level Up 0:06:05 - Loading Screen with Tips: Chasing 0:06:14 - Black Screen Loading 0:06:30 - Sixth Combat Encounter: Devastating Special Moves 0:07:20 - Sixth Combat Results and Further Level Up 0:07:30 - Loading Screen with Tips: Attack Types 0:07:39 - Loading Screen with Tips: Armor 0:07:48 - Black Screen Loading 0:08:05 - Seventh Combat Encounter: Ultimate Ability Finish 0:08:30 - Seventh Combat Results and Final Level Up 0:08:40 - Loading Screen with Tips: Armor 0:08:49 - Black Screen Loading to Hub World 0:09:12 - Hub World Traversal and Exploration

Unleashing Ultimates: Epic JUMP FORCE Battles & Character Showcases
This video features multiple intense gameplay segments from a 3D arena fighting game, showcasing various character abilities and combat mechanics. Viewers will see different matchups, including Boa Hancock versus Aizen, Hancock versus Blackbeard, and Hancock versus Asta, highlighting special attacks and ultimate moves. The video then transitions into a menu navigation, demonstrating mission selection and character customization options, including team setup. The latter half of the video focuses on Roronoa Zoro's gameplay, first in a match against Luffy and then in a rematch against Blackbeard and later against Luffy again, featuring Zoro's distinct sword styles and powerful ultimate attacks. The video concludes with final match results and character stat displays. 📖 Chapters: 0:00:00 - Boa Hancock vs. Aizen (Round 1) 0:00:45 - Boa Hancock vs. Blackbeard 0:01:11 - Final Round: Boa Hancock vs. Asta 0:01:23 - Asta's Transformation and Attack 0:02:39 - Trunks' Ultimate Attack and Victory 0:02:44 - Match Results - Trunks' Team Wins 0:03:08 - Navigating Game Menus and Mission Selection 0:03:28 - Character Selection for Next Match 0:03:55 - Loading Screen - Hong Kong Arena 0:04:07 - Blackbeard vs. Luffy (Initial Encounter) 0:04:19 - Round 1: Roronoa Zoro vs. Luffy 0:04:59 - Zoro's Three-Sword Style Ultimate Attack 0:05:18 - Round 2: Roronoa Zoro vs. Blackbeard 0:06:04 - Zoro Defeats Blackbeard (K.O.) 0:06:08 - Blackbeard's Team Wins - Match Results 0:06:20 - Selecting Rematch Option 0:06:31 - Loading Screen with Gameplay Tips 0:06:36 - Rematch Round 1: Roronoa Zoro vs. Blackbeard 0:07:22 - Zoro's Ultimate Attack Secures Round 1 0:08:15 - Rematch Round 2: Roronoa Zoro vs. Luffy 0:09:01 - Luffy's Gear Fourth: Bounce Man Transformation 0:09:43 - Zoro's Final Ultimate Attack and Victory 0:09:50 - Match Results - Zoro's Team Wins
Eivor's Origin Story & First Gameplay - Assassin's Creed Valhalla
The video provides a comprehensive narrative and gameplay introduction to a video game, focusing on a character's origin story and early experiences. It begins with a brief display of in-game settings, then transitions into a cinematic flashback depicting a violent assault on a Viking village. Viewers will witness intense combat and the sacrificial efforts of Rosta to protect young Eivor during the attack. The escape attempt culminates in Eivor falling through ice and encountering a wolf, marking a traumatic event. The narrative then shifts to the Animus, where the game introduces a unique choice regarding Eivor's gender identity. Subsequently, the video showcases adult Eivor's capture and humiliation by the antagonist, Kjotve the Cruel. This leads into an action sequence where Eivor breaks free from captivity on a ship, engaging in combat with captors. The final segment initiates actual gameplay, demonstrating Eivor's journey through a snowy, mountainous landscape as they embark on a quest to locate and rescue their crew, discovering the territory of Rygrja Fylke. This video provides a comprehensive guide through the initial stages of a video game, focusing on exploration, navigation, combat, and mission progression. Viewers will learn how to climb towering mountains to synchronize points for map reveal, utilize a raven to scout distant areas and locate objectives, engage in stealth combat, and gather resources. The content also features a brief cutscene revealing a character encounter that progresses the narrative, followed by a 'Battle for the Northern Way' quest initiation. The video ends with the character approaching a restricted area, indicating the next phase of the mission. This video features gameplay from Assassin's Creed Valhalla, starting with the character Eivor navigating a snowy, mountainous settlement and engaging in combat against multiple enemies. The gameplay transitions to Eivor boarding a longship, initiating a sailing sequence across a vast, icy body of water, offering scenic views of the snowy landscape. After sailing, Eivor disembarks and continues on foot through a snow-covered forest, eventually encountering a distressed villager who seeks assistance regarding bandits. The video concludes with Eivor engaging these bandits in combat and then having a dialogue with the villager, revealing a betrayal and setting up a new objective. 📖 Chapters: 0:00:00 - Initial Gameplay View and Pause Screen 0:00:05 - Settings Adjustments (Screen, Controls, Gameplay, Interface) 0:00:51 - Village Attack and Rosta's Heroic Protection 0:01:20 - Young Eivor's Desperate Escape Attempt 0:01:38 - Eivor Attempts to Fight with a Sword 0:01:50 - Varin and Sigurd Join the Defense 0:02:07 - Varin Offers Himself to Kjotve 0:02:46 - Rosta's Final Stand and Death 0:03:12 - Sigurd Helps Eivor Escape on Horseback 0:03:27 - Ambush and Eivor Falls Through Ice 0:03:53 - Wolf Attack and Traumatic Memory 0:04:23 - Animus Glitch and Memory Stream Overlap 0:05:18 - Animus Choice: Selecting Eivor's Gender 0:05:48 - Adult Eivor's Capture and Kjotve's Taunts 0:06:29 - Kjotve's Humiliation and Threat to Eivor 0:07:06 - Eivor Confined on Ship, Planning Escape 0:07:42 - Eivor Breaks Free and Fights Captors on Boat 0:08:24 - Beginning of Gameplay: Honor Bound Quest 0:09:00 - Exploring Snowy Mountains and Discovering Rygrja Fylke 00:00:00 - Mountain Climbing and Synchronization 00:00:30 - Eagle Vision and Scout Objectives 00:01:00 - Raven Scouting and Objective Marking 00:01:30 - Entering Restricted Area and Initial Stealth Combat 00:02:00 - Resource Gathering and Tent Exploration 00:02:30 - Looting Chest and Discovering a Note 00:03:00 - Continuing Exploration and Enemy Encounters 00:03:30 - Stealth Combat and Eliminating Opponents 00:04:00 - Character Interaction and Narrative Progression 00:04:30 - Quest Initiation: Battle for the Northern Way 00:05:00 - Approaching Restricted Area and Final Scouting 0:00:00 - Eivor Navigating Snowy Settlement and Initial Combat 0:00:20 - Path Through Snowy Village and First Enemy Encounters 0:00:45 - Intense Combat Sequence Against Multiple Foes 0:01:10 - Further Combat Engagements on a Snow-Covered Path 0:01:30 - Final Enemies in Settlement and Clearing the Path 0:01:58 - Raven Flight for Area Overview and Map Interaction 0:02:14 - Boarding the Longship and Dialogue with Dag and Bragi 0:02:45 - Longship Sailing Sequence Through Icy Waters 0:03:03 - Scenic View of Snowy Landscape and Map Interaction 0:03:40 - Eivor Traversing a Snow-Covered Forest on Foot 0:04:19 - Detailed Map View and Online Service Error Message 0:04:45 - Continued Trek Through the Forest and Approaching a Glow 0:05:19 - Encountering Hrorek and His Plea for Help Against Bandits 0:05:45 - Following Hrorek Through Snowy Terrain to Bandit Location 0:06:28 - Combat with Bandits and Subsequent Dialogue with Hrorek 0:08:00 - Hrorek's Confession and Eivor's Retribution 0:08:48 - World Event Completed and Final Map View
Delta Force is lwk fun
The mission starts with atmospheric cinematics depicting elite operatives in diverse combat scenarios. Following initial account registration, focus shifts to extensive loadout customization within the Gunsmith menu. A CAR-15 assault rifle receives meticulous adjustments, with different optics, stocks, and barrels tested to optimize tactical performance. Technical control settings are fine-tuned before entering matchmaking. Once an operator is chosen, deployment begins on the 'Cracked' map for an 'Attack and Defend' operation. Intense urban skirmishes unfold as the attacking force pushes toward Objective B1, utilizing rooftops and alleyways for cover. Upon securing the first sector, the assault advances into a heavily fortified industrial zone. Operatives employ smoke gadgets and coordinated suppressive fire to breach a large warehouse facility. The engagement culminates in a chaotic close-quarters battle for objectives C1 and C2, ending in a decisive victory as the final sector is captured. Chapters: 0:00:00 - 0:03:00 - Cinematic introduction and initial account registration 0:03:00 - 0:06:00 - Main menu navigation and the beginning of weapon modification 0:06:00 - 0:09:00 - Extensive testing and selection of various rifle attachments in the Gunsmith 0:09:00 - 0:12:00 - Finalizing settings, selecting an operator, and deploying to the mission 0:12:00 - 0:15:00 - First contact and tactical urban combat while pushing Objective B1 0:15:00 - 0:18:00 - Securing the first sector and advancing through the city streets 0:18:00 - 0:21:00 - Intense firefights and breaching maneuvers inside the objective warehouse 0:21:00 - 0:22:45 - Final objective capture and team victory confirmation Chapters: 0:00:00 - 0:01:17 - Game Loading and Account Sign-in 0:01:17 - 0:03:07 - Initial Setup and Player Registration 0:03:07 - 0:03:47 - Warfare Mode Selection and Matchmaking Intro 0:03:47 - 0:05:30 - Gunsmith Calibration and CAR-15 Customization 0:05:30 - 0:07:07 - Control Sensitivity Adjustments and Loading Screen 0:07:07 - 0:08:33 - Initial Sector Attack and B1 Combat Engagement 0:08:33 - 0:10:09 - Rooftop Engagements and B Sector Captures 0:10:09 - 0:11:43 - Final Warehouse Siege and Team Victory
Jump Force: Hancock, Trunks, Zoro & Luffy Dominate!
This video provides an in-depth look at various combat encounters within a popular anime fighting game, featuring a diverse roster of characters. Viewers will observe intense 3v3 tag-team battles set against dynamic, destructible environments. The content demonstrates intricate combo sequences, character-specific special abilities, and powerful ultimate attacks (Awakenings). The video includes several matches, highlighting characters like Boa Hancock, Aizen, Trunks, Asta, Blackbeard, Roronoa Zoro, and Monkey D. Luffy. The analysis covers character selection, strategic gameplay, and the devastating impact of each character's unique movesets, offering insights into effective combat strategies and character synergy. This video provides a comprehensive overview of gameplay in a fighting game featuring various anime characters. Viewers will see detailed combat sequences, including character special abilities and ultimate attacks, across multiple matches. The content begins with a battle between Kurapika and Makoto Shishio, showcasing Kurapika's unique chain and fiery sword techniques. This is followed by navigation through in-game menus, demonstrating mission selection, difficulty settings, and character roster browsing. The core of the video consists of several multi-round matches, primarily featuring Roronoa Zoro against opponents like Frieza, Dio, and Kakashi Hatake, as well as a series of repeated missions where Luffy faces Frieza. Each match highlights distinct combat styles, character interactions, and ultimate moves, culminating in victory screens displaying earned rewards. The video also includes loading screens with gameplay tips, offering insights into game mechanics such as J-Skills, Escapes, Cooldowns, Sidestepping, and Gauge Carryover. 📖 Chapters: 0:00:00 - Boa Hancock vs. Aizen: First Encounter 0:00:45 - Boa Hancock vs. Blackbeard: Power Exchange 0:01:00 - Boa Hancock's Ultimate Attack: Perfume Femur 0:01:11 - Round 2: Boa Hancock vs. Trunks 0:01:38 - Trunks Unleashes Sword Combos 0:02:15 - Trunks' Powerful Guard Break and Combo 0:02:30 - Trunks Finishes with Heat Dome Attack 0:02:43 - Match 1 Results and Experience Earned 0:02:56 - Loading Screen: Tips - Chasing 0:03:08 - Menu Navigation: Selecting Missions 0:03:28 - Character Selection for Next Battle 0:03:55 - Loading Screen: Tips - Throws 0:04:06 - Round 1: Blackbeard vs. Roronoa Zoro Begins 0:04:10 - Blackbeard Activates Awakening: 'My Time is Now!' 0:04:50 - Blackbeard's Black Hole Liberation 0:04:59 - Zoro's Awakening: The Billion-Fold World Trichiliocosm! 0:05:03 - Zoro's Ultimate Attack: Great Dragon Shock 0:05:19 - Round 2: Blackbeard vs. Monkey D. Luffy 0:05:25 - Zoro's One-Sword Style Iai Death Lion Song 0:06:00 - Zoro's Three Thousand Worlds Finisher 0:06:08 - Match 2 Results and Experience Earned 0:06:21 - Loading Screen: Tips - Full Power Smashes 0:06:31 - Round 1: Blackbeard vs. Monkey D. Luffy Begins 0:06:35 - Blackbeard's Awakening Re-engagement 0:07:00 - Luffy's Gum-Gum Red Hawk 0:07:20 - Zoro's Ultimate Attack: The Billion-Fold World Trichiliocosm! 0:07:42 - Blackbeard's Dark-Dark Fruit Power Activation 0:08:08 - Zoro's One-Sword Style Iai Death Lion Song K.O. 0:08:16 - Round 2: Blackbeard vs. Monkey D. Luffy Redux 0:09:00 - Luffy Activates Gear Fourth! Bounce Man! 0:09:25 - Luffy's Gum-Gum Grizzly Magnum 0:09:44 - Zoro's Final Blow: Three Thousand Worlds 0:09:50 - Match 3 Results and Conclusion 00:00:00 - Kurapika vs. Makoto Shishio - Intense Battle 00:00:27 - Post-Match Dialogue & Results 00:00:45 - Loading Screen: J-Skills Tips 00:00:58 - Mission Results: Costume Hunting 3 (Rank A) 00:01:41 - Mission Selection & Difficulty Setup 00:02:00 - Character Selection: Player Team Formation 00:02:40 - Loading Screen: Cooldowns Tips 00:02:46 - Character Introductions & Pre-Match Dialogue 00:03:52 - Gameplay Round 1: Zoro vs. Frieza 00:04:49 - Gameplay Round 2: Zoro vs. Dio (Dio Wins with Ultimate) 00:05:50 - Post-Match Dialogue & Results 00:06:29 - Loading Screen: Sidestepping & Gauge Carryover Tips 00:06:46 - Restarted Match: Zoro vs. Frieza (Round 1) 00:07:37 - Restarted Match: Zoro vs. Dio (Round 2) 00:08:52 - Restarted Match: Zoro vs. Kakashi (Final Round) 00:09:56 - Final Match Results & Ending Dialogue
Delta Force: Intense First-Person Shooter Gameplay Showcase
This video delivers an extensive look into the world of **Delta Force**, a modern military first-person shooter. It kicks off with captivating cinematic cutscenes that introduce characters and diverse settings, including mountainous regions, desert towns, and even a train traversing a bridge. Following the intro, viewers get a glimpse of the main menu, showcasing various game modes like Warfare and Operations, alongside options for weapon skin customization. The heart of the video is intense, objective-based FPS gameplay set within a dynamic desert-themed urban environment, featuring sandy hills, rocky outcrops, and intricate urban structures. Players are thrust into fast-paced combat scenarios, engaging enemies with a robust arsenal including assault rifles, sniper rifles, pistols, and grenade launchers. The gameplay emphasizes tactical movement and strategic engagements; you'll observe precise aiming down sights (ADS), quick reloads, effective use of cover behind environmental objects, and advanced tactical elements such as calling in artillery barrages, deploying smoke screens, and utilizing gadgets like sonic traps and recon. Teamwork plays a vital role, as demonstrated through moments where players are knocked down and require timely rescues or self-revives, highlighting the persistent and collaborative nature of combat. The action escalates with the appearance of armored vehicles, adding a layer of strategic challenge and vehicle-based combat. A dynamic objective system guides the player's movement across the map, focusing on capturing sectors and pushing towards final objectives. Beyond the battlefield, the video also briefly navigates through the game's settings menu, specifically showcasing controller sensitivity and control mapping options. The entire session captures the ebb and flow of a team-based match, featuring multiple eliminations and respawns, ultimately concluding with a 'DEFEAT' screen after a duration of 22 minutes and 44 seconds, signifying an unsuccessful attempt to capture the enemy HQ.
Delta Force: Hawk Ops - Intense Team Deathmatch Gameplay on Knife Edge & Trainwreck!
This video provides an in-depth look at the Delta Force: Hawk Ops game, showcasing its gameplay mechanics, game modes, and in-game progression. Viewers will learn about the game's various modes like Warfare and Operations, character customization options, and experience a full Team Deathmatch gameplay session on the Knife Edge map. The analysis covers the strategic combat, operator abilities, and the fast-paced action of the game, highlighting multiple engagements and a full match from start to finish. The video also shows the end-of-match performance statistics and season pass progression. 📖 Chapters: 0:00:00 - 0:00:05 - Opening Logos and Game Introduction 0:00:05 - 0:00:37 - Cinematic Gameplay Trailer and Loading Screens 0:00:37 - 0:00:50 - Main Menu Navigation and Mode Selection 0:00:50 - 0:01:06 - Exploring Game Modes: Attack and Defend, Team Deathmatch, King of the Hill, Fault, Air Superiority, Battle Practice 0:01:06 - 0:01:21 - Operator Selection and Customization Overview 0:01:21 - 0:01:57 - Match Loading Screen: Knife Edge Map (Team Deathmatch) 0:01:57 - 0:02:17 - First Engagements and Player Eliminations 0:02:17 - 0:02:24 - Player Elimination and Spectator View 0:02:24 - 0:03:00 - Intense Combat and Multiple Kills 0:03:00 - 0:03:30 - Strategic Positioning and Enemy Eliminations 0:03:30 - 0:04:00 - Close-quarters Battle and Grenade Throws 0:04:00 - 0:04:30 - Flanking Maneuvers and Sniper Kills 0:04:30 - 0:05:00 - Sustained Firefights and Objective Play 0:05:00 - 0:05:25 - Final Kills Leading to Match Victory 0:05:25 - 0:07:05 - Match End Screen: Victory and Best Squad Display 0:07:05 - 0:07:23 - Battlefield Performance and Season Pass Progress 0:07:23 - 0:08:11 - Lobby and Second Match Loading Screen: Trainwreck Map 0:08:11 - 0:08:58 - Second Match Gameplay: Initial Deploy and Engagements 0:08:58 - 0:09:55 - Open Area Combat and Multiple Opponent Eliminations 0:09:55 - 0:10:29 - Intense Firefight with Explosions and Enemy Encounters 0:10:29 - 0:11:00 - Strategic Movement and Securing Kills 0:11:00 - 0:11:34 - Continued Combat and Match Defeat 0:11:34 - 0:12:00 - Post-Match Results: Defeat and Progression 0:12:00 - 0:13:00 - Lobby and Third Match Loading Screen: Knife Edge Map 0:13:00 - 0:13:45 - Third Match Gameplay: Entry and First Eliminations 0:13:45 - 0:14:30 - Aggressive Pushing and Close-Range Combat 0:14:30 - 0:15:00 - Flanking Routes and Enemy Encounters 0:15:00 - 0:15:30 - Sustained Assault and Tactical Gameplay 0:15:30 - 0:16:00 - Explosive Kills and Area Denial 0:16:00 - 0:16:30 - Final Push and Match Defeat 0:16:30 - 0:18:28 - Post-Match Results: Defeat and Final Progression

Mortal Kombat 1: The Multiverse War Begins
Combat begins with Mileena engaging Raiden in a fierce duel within a green-lit, cavernous environment. Mileena utilizes her agility and sais to deliver rapid-fire combos, quickly securing a round victory. The match continues with Raiden attempting to counter with lightning strikes, but Mileena maintains her aggressive pressure and wins the fight. A cinematic transition follows, introducing Dark Sindel, who single-handedly battles several Earthrealm defenders, including Liu Kang, Scorpion, and Kitana, in a high-octane action sequence. Following the cinematic, Mileena faces off against Dark Sindel in a two-round gameplay session. Mileena emerges victorious, leading to a poignant scene where her mother, Sindel, succumbs to her wounds after passing the title of Empress to Mileena. Geras then reveals to Liu Kang that he has preserved the soul of Sindel and, more importantly, the powers of the Keeper of Time. The final cinematic segment follows Titan Shang Tsung and Dark Geras plotting in the mountains before shifting back to Liu Kang and Geras as they walk toward the Fire Temple to reclaim the stored temporal power. The video concludes on a static pause menu for the remaining duration. The mission begins with an alliance of warriors observing the enemy's encampment in a snowy mountain range. Johnny Cage demonstrates high-tech surveillance equipment to the group, including Mileena, Raiden, and Scorpion. They devise a strategy to divide their forces to attack portals and the Dragon Army simultaneously. As the plan unfolds, a massive portal opens, and the forces of darkness, led by a horned variant of General Shao, prepare for Armageddon. Combat starts with intense rock-throwing sequences before transitioning into a one-on-one duel where Shang Tsung faces Kenshi. The battle utilizes various special moves and Kameo assistance from Quan Chi. After successfully thwarting the initial wave, the sorcerers Shang Tsung and Quan Chi find themselves double-crossed and must fight their way through alternate versions of Rain and Smoke. The narrative shifts to Liu Kang, who explains the fracturing of time after the battle for Kronika's Hourglass, revealing that every outcome created a new timeline governed by a different Keeper of Time. The peaceful moment is short-lived as Titan Shang Tsung arrives with his own multiversal army. Liu Kang leads a desperate defense at the Hourglass, engaging in fierce combat against corrupt variants of Baraka, Li Mei, and Kung Lao. The struggle concludes with the destruction of the enemy's influence over the current timeline, as Liu Kang and his allies prepare to gather a grand army from across all realities. Chapters: 00:00:00 - Mileena vs Raiden gameplay begins 00:00:18 - Second round of Mileena vs Raiden 00:00:55 - Cinematic battle featuring Dark Sindel 00:01:36 - Duel between the two versions of Sindel 00:02:44 - Mileena vs Sindel gameplay starts 00:03:14 - Final gameplay round between Mileena and Sindel 00:03:45 - Mileena becomes Empress cinematic 00:04:14 - Geras reveals the truth about the Keeper of Time 00:04:26 - Video enters a static pause menu for the remainder 0:00:00 - Tactical planning and surveillance of the Dragon Army 0:03:45 - The dark portal opens and Armageddon begins 0:05:53 - Shang Tsung and Quan Chi vs Kenshi and Ermac combat 0:10:30 - The sorcerers are double-crossed in the frozen ruins 0:13:00 - Shang Tsung vs Rain and Smoke gameplay 0:16:30 - Shang Tsung vs Scorpion and Sub-Zero battle 0:19:40 - Liu Kang explains the multiverse and Keepers of Time 0:23:10 - Titan Shang Tsung launches an attack on the Hourglass 0:25:30 - Liu Kang and Kitana vs Baraka and Reptile fight 0:28:45 - Final resolution and the multiversal call to arms Chapters: 0:00:00 - 0:00:55 - Mileena battles Raiden in an intense match 0:00:55 - 0:02:44 - Cinematic sequence showing Dark Sindel's confrontation and Sindel's defeat 0:02:44 - 0:03:45 - Mileena faces off against Sindel in a fast-paced duel 0:03:45 - 0:04:26 - Emotional cutscene detailing Sindel's final words and passing 0:04:26 - 0:15:00 - The gameplay pauses, displaying the main menu screen 0:15:00 - 0:30:00 - The paused menu screen remains idle until the end 0:30:00 - 0:32:00 - Mileena defeats Raiden and faces Dark Sindel's invasion 0:32:00 - 0:34:25 - Mileena defeats Dark Sindel followed by Sindel's tragic final moments 0:34:25 - 0:38:00 - Game pause screen displaying the main menu options 0:38:00 - 0:42:00 - Continued inactivity on the paused menu screen 0:42:00 - 0:46:00 - Extended pause menu display with no gameplay activity 0:46:00 - 0:50:00 - Main menu screen remains active in paused state 0:50:00 - 0:54:00 - Persistent pause screen with no changes 0:54:00 - 0:59:57 - Final stretch of the paused menu screen until the end of the video
Fortnite Creative: 1v1 Arena & Desert Zone Wars Action
This Fortnite gameplay video provides an extensive look at various creative game modes. It begins with the player navigating the hub to join a 1v1 arena battle. Viewers will see detailed weapon selection, fast-paced building techniques, and close-quarters shotgun combat. The footage transitions into a Desert Zone Wars map, showcasing different tactical approaches in a more open, desert-themed environment. The video includes full rounds of gameplay, demonstrating both offensive strategies and defensive building under pressure, as well as moments of spectating other players and adjusting in-game settings for optimal performance. 📖 Chapters: 0:00:00 - 0:00:28 - Hub Navigation and Map Selection 0:00:28 - 0:02:00 - 1v1 Arena: Weapon Selection and Build Practice 0:02:00 - 0:03:02 - 1v1 Arena: Intense Close-Quarters Combat 0:03:02 - 0:03:15 - Settings Menu: Adjusting Controller Sensitivity 0:03:15 - 0:04:18 - 1v1 Arena: Final Building Battle and Round Completion 0:04:18 - 0:04:46 - Creative Hub: Transitioning to Desert Zone Wars 0:04:46 - 0:06:19 - Desert Zone Wars: Round 6 Combat and Defeat 0:06:19 - 0:08:36 - Desert Zone Wars: Round 7 Tactical Play and Victory 0:08:36 - 0:11:39 - Desert Zone Wars: Spectating Remaining Players 0:11:39 - 0:12:32 - Final Hub Navigation and Loading Screen

Grand Theft Auto V online races
The gameplay session features two high-octane stunt races in Grand Theft Auto Online. The first race, 'Stunt - Big Drop', begins with a teal and yellow Grotti Itali RSX positioned on a high-altitude starting line. The vehicle speeds down long straightaways and maneuvers through massive drops and sharp turns situated high above the Los Santos skyline. A significant portion of the track involves leaping across gaps between skyscrapers and navigating through narrow sections built atop buildings. The race culminates in a final precision jump onto a massive target platform. Following a brief spectating period and a transition through the job lobby, the second race, 'Stunt - Wall Climb', commences. The chosen vehicle is a vibrant purple Principe Deveste Eight. This race takes place on a complex track characterized by its purple and white color scheme and numerous vertical sections. The Deveste Eight navigates through several intense loops, corkscrews, and long, cylindrical tube segments at high speeds. The race demands careful throttle control to maintain momentum through the vertical climbs and tight turns on elevated platforms, leading eventually to the final dash across the finish line. Chapters: 0:00:00 - 0:01:45 - Starting the 'Big Drop' stunt race in the Grotti Itali RSX 0:01:45 - 0:03:30 - Navigating high-altitude jumps and skyscraper-top stunts 0:03:30 - 0:04:35 - Final jumps and completing the 'Big Drop' race 0:04:35 - 0:07:00 - Spectating other finishers and transitioning between jobs 0:07:00 - 0:08:45 - Job selection and vehicle customization for 'Wall Climb' 0:08:45 - 0:11:30 - Beginning 'Wall Climb' and hitting high-speed loops in the Deveste Eight 0:11:30 - 0:13:45 - Racing through complex corkscrews and cylindrical tube sections 0:13:45 - 0:15:30 - Final laps and finishing the 'Wall Climb' stunt race Chapters: 0:00:00 - 0:02:45 - Stunt - Big Drop Race Start and First Lap Loops 0:02:45 - 0:04:35 - Skyscraper Jumps and Target Landing Finish 0:04:35 - 0:06:30 - Spectating Opponents and Race Results 0:06:30 - 0:08:36 - Voting Screen and Deveste Eight Selection 0:08:36 - 11:22 - Stunt - Wall Climb Race Start and Initial Laps 11:22 - 15:15 - First-Person Driving and Final Lap Battle

Splitgate 2
This video features gameplay from 'Splitgate 2', a first-person shooter. The player engages in multiple rounds of the 'Battle Royale' mode, showcasing character selection, map drops, looting, combat, and team dynamics. Viewers will see the game's interface, different map environments (desert, volcanic, snowy, floating islands), and various weapons and abilities in action. The video highlights specific in-game events like 'Fire Sale' and 'Biome Changes', as well as the progression and elimination mechanics of Battle Royale. The player demonstrates tactical movement, portal usage for flanking, and securing kills, though ultimately not achieving a win in the showcased rounds, placing 8th, 9th, and 8th respectively. The overall experience provides a comprehensive look at the Splitgate 2 Battle Royale gameplay. 📖 Chapters: 0:00:00 - Warning screen and 1047 Games logo 0:00:11 - Splitgate 2 title screen and connecting to servers 0:00:21 - Main Menu and Battle Royale matchmaking 0:00:46 - SSL logo animation 0:01:32 - Battle Royale 'Split Worlds' lobby screen 0:01:40 - Character selection for the first match 0:03:09 - Match loading screen with SSL logo 0:03:22 - Dropping into the 'Drought' map 0:03:45 - Looting weapons and armor 0:04:10 - First enemy engagement and kill 0:04:31 - Another kill and weapon swap to Jackhammer 0:04:52 - 'Zone Open' notification 0:05:01 - 'Fire Sale' event begins, indicating cheaper items 0:05:15 - Acquiring a Blink ability 0:05:40 - Navigating a waterfall area and picking up a Cadence weapon 0:06:18 - Picking up Regen Cloud and Time Dome perks 0:06:49 - Engaging enemies near a portal 0:07:44 - Player eliminated, spectating teammate 0:08:02 - Match end screen: Placed 8th, XP and challenges 0:08:54 - Transition screen and character selection for the second match 0:10:04 - Player selects Aeros and then Sabrask 0:11:32 - Match loading screen with SSL logo 0:11:42 - Dropping into the 'Inferno' map 0:12:04 - Goes out of bounds briefly, lands, and loots a Phasma weapon 0:12:30 - Picks up a Better Smart Wall perk 0:12:50 - Combat ensues, teammate gets a kill 0:13:14 - 'Zone Open' notification 0:13:28 - Looting and acquiring 'Rapid Deployment' perk 0:13:54 - Combat, 'Enemy Team Wiped' notification 0:14:02 - Player gets downed, teammate revives 0:14:14 - More combat and eliminations 0:14:50 - Player eliminated, spectating teammate 0:15:04 - Match end screen: Placed 9th, XP and challenges 0:16:01 - Match loading screen and character selection for the third match 0:17:23 - Player selects Aeros and customizes loadout 0:18:36 - Dropping into the 'Glacier' map 0:19:22 - Looting and picking up Sprinter perk 0:19:40 - Moving through buildings and finding a Goliath 0:20:07 - 'Zone Open' notification 0:20:30 - Acquiring a Synapse weapon and completing challenges 0:20:42 - Engaging enemies, teammate gets a kill 0:21:05 - More combat and teammate eliminations 0:21:38 - Picking up Cadence weapon and Killer Equipment perk 0:22:08 - Multiple enemies killed, 'Team Wiped' 0:22:31 - Player is eliminated 0:22:58 - Match end screen: Placed 7th, XP and challenges 0:23:08 - End screen and outro Chapters: 0:00:00 - 0:01:30 - Game Startup, Lobby Navigation, and Matchmaking 0:01:30 - 0:03:21 - Class Selection and Loadout Customization 0:03:21 - 0:04:20 - Dropship Deployment and Early Looting 0:04:20 - 0:05:05 - La Mesa Skirmish and Team Elimination 0:05:05 - 0:06:08 - Post-Match Stats, Re-Queueing, and Second Drop

Brawlhalla
This video provides a complete overview of casual 2v2 matches in Brawlhalla, featuring a player who consistently selects random characters, leading to a diverse showcase of legends and their abilities. Viewers will see eight full matches, each on a different map, demonstrating various combat scenarios, weapon pickups, special moves, and team dynamics. The gameplay is fast-paced and highlights aggressive strategies, combos, and competitive interactions. The video also includes the character selection, loading screens, and post-match scoreboards with statistics like KOs, falls, damage dealt, and damage taken. Additionally, the progression through the Battle Pass and earned rewards are shown after each match, providing insight into the game's reward system. Overall, it's a comprehensive look at casual Brawlhalla gameplay from start to finish, ideal for those interested in seeing different legends in action or understanding the flow of a casual match. 📖 Chapters: 0:00:00 - Brawlhalla Game Launch and Main Menu 0:00:12 - Selecting Friendly 2v2 Match 0:00:16 - Character Selection and Warm-up (Random Pick) 0:00:49 - Loading Screen - Match 1 Characters 0:00:59 - Match 1 Begins: Kaya and Azoth vs. Master Chief and Vector 0:02:27 - Match 1 Continues: Double KO and Gameplay Exchanges 0:03:32 - Match 1 End: Blue Team (Azoth and Kaya) Wins 0:03:41 - Character Selection and Warm-up for Match 2 0:03:59 - Loading Screen - Match 2 Characters 0:04:07 - Match 2 Begins: Xull and Thor vs. Master Chief and Orion 0:05:15 - Match 2 Continues: Orion KO'd 0:06:12 - Match 2 Continues: Master Chief KO'd, Teammate Disconnects 0:07:23 - Match 2 Continues: Xull Fights Alone 0:08:01 - Match 2 End: Red Team (Orion and Master Chief) Wins 0:08:12 - Character Selection and Warm-up for Match 3 0:08:31 - Loading Screen - Match 3 Characters 0:08:41 - Match 3 Begins: Ragnir and Lin Fei vs. Ulgrim and Tezca 0:09:51 - Match 3 Continues: Lin Fei KOs Tezca 0:10:39 - Match 3 End: Blue Team (Ragnir and Lin Fei) Wins 0:11:10 - Character Selection and Warm-up for Match 4 0:11:21 - Loading Screen - Match 4 Characters 0:11:29 - Match 4 Begins: Sentinel and Loki vs. Scarlet and Nix 0:12:30 - Match 4 Continues: Scarlet and Nix Get KOs 0:13:00 - Match 4 End: Blue Team (Sentinel and Loki) Wins 0:13:10 - Character Selection and Warm-up for Match 5 0:13:28 - Loading Screen - Match 5 Characters 0:13:34 - Match 5 Begins: Dusk and Wu Shang vs. Jake and Mega Man 0:14:40 - Match 5 Continues: Mega Man Double KO 0:15:20 - Match 5 End: Blue Team (Petra and Wu Shang) Wins 0:16:08 - Character Selection and Warm-up for Match 6 0:16:33 - Loading Screen - Match 6 Characters 0:16:42 - Match 6 Begins: Dusk and Wu Shang vs. Mega Man and Jake 0:17:17 - Match 6 Continues: Mega Man Double KO 0:18:22 - Match 6 Continues: Mega Man Gets Another KO 0:19:25 - Match 6 End: Red Team (Mega Man and Jake) Wins 0:19:31 - Character Selection and Warm-up for Match 7 0:20:11 - Match 7 Begins: Nix and Brynn vs. Red Raptor and Cross 0:21:26 - Match 7 Continues: Red Raptor KO'd 0:22:31 - Match 7 End: Blue Team (Brynn and Nix) Wins 0:23:00 - Character Selection and Warm-up for Match 8 0:23:15 - Loading Screen - Match 8 Characters 0:23:25 - Match 8 Begins: Loki and Brynn vs. Xull and Teros 0:24:25 - Match 8 Continues: Xull KOs Loki 0:25:00 - Match 8 Continues: Brynn KOs Teros 0:25:40 - Match 8 End: Red Team (Xull and Teros) Wins
Splitgate 2: Epic Battle Royale Victory - Full Gameplay
This video features a complete Battle Royale gameplay session in Splitgate 2, showcasing the game's mechanics, dynamic map changes, and intense combat encounters from start to finish. Viewers will experience the full cycle of a match, beginning with the game's vibrant intro and menu navigation, including character and loadout customization across different factions like Sabrask, Meridian, and Aeros. The gameplay initiates with a dropship sequence, allowing players to select their drop zones across various biomes (Glacier, Fracture, Inferno, Drought). The core of the video focuses on a full Battle Royale match, highlighting strategic looting, aggressive engagements, portal usage for tactical movement, and the continuous struggle to outlast opponents as the map shrinks and biomes change. The player demonstrates proficiency with various weapons, scoring multiple eliminations, and coordinating with teammates for revives and team wipes. The video captures the thrilling moments leading up to the final showdown, culminating in the player's team securing a victory through skilled gameplay and strategic positioning. After the triumphant win, the video briefly shows the progression screen and the main menu before transitioning to another match, starting the cycle anew. 📖 Chapters: 0:00:00 - Video Introduction & Game Studio Logos 0:00:13 - Game Loading & Main Menu Navigation 0:00:24 - Selecting Battle Royale Mode & Matchmaking 0:00:58 - Pre-Match Lobby & Character Selection 0:01:52 - Dropship Flight & Drop Zone Selection 0:02:42 - Landing in Drought Biome & Initial Looting 0:03:08 - First Combat Engagement & Player Elimination/Revive 0:03:22 - Multiple Kills & Level Up in Combat 0:03:52 - Biomes Changing & Movement to New Zones 0:04:10 - Player Eliminated & Spectating Teammate 0:04:22 - Teammate Revives Player & Continued Combat 0:04:54 - Team Wipe & Round 1 Progress 0:05:15 - Close Call & Strategic Positioning 0:05:43 - Movement Towards Glacier Biome 0:06:17 - Engaging Enemies in Glacier & Multiple Kills 0:06:50 - Round 2 Begins in Glacier Biome 0:07:07 - Airdrop Incoming & Looting New Weapons 0:07:39 - Eliminating Opposing Team & 5 Teams Remaining 0:08:00 - Utilizing Portals & Navigating Terrain 0:08:29 - Engaging Enemies at SubZro Station 0:08:50 - Acquiring New Weapons from Airdrop 0:09:20 - New Perk Acquisition & Continued Movement 0:09:50 - Further Looting & Preparing for Combat 0:10:19 - Portal Usage & Transition to Fracture Biome 0:10:48 - Final Round Commences & Heating Up Event 0:11:00 - Player Eliminated, Revived & Intense Combat 0:11:15 - Aggressive Pushing & Team Wipe 0:11:29 - Victory Achieved & Post-Match Screen 0:11:40 - Player Returns to Main Menu & Queues for Next Match 0:12:00 - Next Match Lobby, Character Selection & Loadout 0:13:00 - Dropship Flight & Hot Drop to Proelium Refinery 0:13:57 - Initial Combat & Multiple Kills 0:14:14 - Fire Sale Event & Zone Open 0:14:48 - More Eliminations & Navigation in Inferno 0:15:37 - Combat at Proelium Refinery & Tactical Movement 0:16:04 - Player Revived & Weapon Upgrades 0:16:47 - Navigating Towards SanctuM & Engaging Enemies 0:17:16 - Team Wipe & Round Progress 0:17:53 - Player Revived & Further Engagements 0:18:24 - Strategic Portal Use & Movement 0:19:04 - Team Wipe & Transition to Next Round 0:19:35 - Round 2 Begins in Inferno Portal 0:20:00 - Fire Sale Active & Looting 0:20:25 - Multiple Kills & New Perk (Tracker) 0:21:09 - Buy Station Purchase & Movement Through Cave 0:21:40 - Player Engages Enemies in Glacier Portal 0:22:20 - Detection & Intense Combat 0:23:00 - Close Encounters & Multiple Eliminations 0:23:41 - Another New Perk & Continued Combat 0:24:00 - Final Round Begins & Heating Up 0:24:43 - Player Eliminated, Revived & Return to Battle 0:25:27 - Final Showdown & Victory Chapters: 0:00:00 - 0:00:23 - Game launch and introductory splash screens 0:00:23 - 0:00:56 - Menu navigation, loadout inspection, and store showcase 0:00:56 - 0:01:51 - Matchmaking lobby and team character select screen 0:01:51 - 0:02:42 - Match drop phase over the futuristic canyon map 0:02:42 - 0:03:30 - Intense combat encounters ending in a first-place victory 0:03:30 - 0:04:05 - Post-match statistics and team victory dance animation 0:04:05 - 0:04:57 - Loadout modifications and queue for the second match 0:04:57 - 0:05:30 - Second match drop ship sequence over the arena 0:05:30 - 0:06:49 - Fast-paced arena gunfights culminating in a close defeat Chapters: 0:00:00 - 0:00:23 - Game Startup & Main Menu Loading 0:00:23 - 0:00:56 - Menu Navigation & Loadout Customization 0:00:56 - 0:01:51 - Matchmaking & Game Loading Screen 0:01:51 - 0:02:42 - Dropship Flight & Biome Preview 0:02:42 - 0:03:39 - First Drop, Looting & Initial Combat 0:03:39 - 0:04:05 - Elimination & Spectating Teammates 0:04:05 - 0:04:24 - First Respawn & Quick Firefights 0:04:24 - 0:04:45 - Second Elimination & Spectator Mode 0:04:45 - 0:05:13 - Second Respawn, Squad Wipe & Third Elimination 0:05:13 - 0:06:44 - Final Spectating Phase & Game Over 0:06:44 - 0:06:49 - Post-Match Progression & Outro Chapters: 0:00:00 - 0:00:23 - Menu navigation and loadout customization 0:00:23 - 0:01:51 - Matchmaking lobby and team preparation 0:01:51 - 0:02:42 - First drop over the snowy landscape 0:02:42 - 0:03:29 - First match landing and combat at Dry Junction 0:03:29 - 0:04:05 - Match victory and menu return 0:04:05 - 0:04:58 - Second match queuing and weapon attachment adjustments 0:04:58 - 0:05:29 - Second drop over the volcanic refinery map 0:05:29 - 0:06:49 - Refinery combat and final defeat

Splitgate 2
This video features extensive gameplay from the first-person shooter Splitgate 2, showcasing two different game modes: Battle Royale and Hotzone. Viewers will first see the player navigating the main menu, queueing for a Battle Royale match, and then participating in a full Battle Royale round on the 'Fracture' map. The Battle Royale segment highlights looting, combat, team play, and ultimately, the player's team being eliminated in 12th place. After this, the video transitions back to the main menu and then into a 'Hotzone' match on the 'Ozone' map. This segment focuses on objective-based gameplay where teams must capture and defend zones, featuring intense firefights, strategic use of abilities like smart walls and portals, and multiple kills, including double and triple kills. The player demonstrates proficiency with various weapons such as the Warden, Slinger, Trailblazer, Synapse, and Helios. The video concludes with the player's team securing a victory in the Hotzone match and displaying the post-game statistics and progression screens. 📖 Chapters: 0:00:00 - Video Start & Epilepsy Warning 0:00:03 - 1047 Games Logo Introduction 0:00:13 - Splitgate 2 Title Screen & Connecting to Servers 0:00:23 - Main Menu Navigation & Battle Royale Queue 0:01:11 - Splitgate Sports League (SSL) Logo Animation 0:01:58 - Battle Royale Map Selection and Character Pick (Sabrask) 0:03:13 - Battle Royale Match Begins: Dropping into Fracture Map 0:03:48 - Initial Looting and First Combat Engagement in Battle Royale 0:04:18 - Player Secures First Kill and Continues Engagements 0:04:30 - Player Downed & Spectating Teammates During Respawn Countdown 0:05:07 - Battle Royale Elimination Screen (12th Place) 0:05:57 - Splitgate Sports League (SSL) Logo Animation 0:06:00 - Back to Main Menu & Switching to Arena Quick Play (Hotzone) 0:06:32 - Splitgate Sports League (SSL) Logo Animation 0:06:38 - Hotzone Match: Character Selection (Sabrask) on Ozone Map 0:07:11 - Hotzone Round 1 Begins - Zone Incoming 0:07:30 - Zone Active & First Engagements in Hotzone 0:08:08 - Player Changes Loadout Mid-Match 0:08:19 - Zone Captured by Player's Team 0:08:44 - Player Selects New Loadout for the Next Engagement 0:09:09 - Player Achieves a Double Kill 0:09:12 - Player Swaps to a Different Loadout for Strategic Advantage 0:10:01 - Player Equips a New Weapon, Continuing to Fight 0:10:25 - Player Achieves Another Double Kill 0:10:30 - Hotzone Round 1 Won by Alpha Team 0:10:37 - Splitgate Sports League (SSL) Logo Animation 0:10:48 - Hotzone Match: Character Selection (Meridian) for Round 2 0:11:08 - Hotzone Round 2: Zone Active & Multiple Kills, including Triple Kill 0:11:36 - Zone Captured by Alpha Team, Player Gets More Kills 0:11:57 - Player is Killed in Hotzone Round 2 0:12:03 - Player Respawn and Continues Combat, Securing More Kills 0:12:56 - Player Lands a Triple Kill 0:13:00 - Player is Detected and Scores a Double Kill 0:13:13 - Hotzone Round 2 Won by Alpha Team 0:13:20 - Splitgate Sports League (SSL) Logo Animation 0:13:27 - Hotzone Match: Character Selection (Sabrask) for Match Point 0:13:46 - Hotzone Round 3: Zone Active & Intense Engagements, Payback Kill 0:14:10 - Player Secures Triple Kill and 'Four-Gone' Medal 0:14:31 - Zone Captured by Alpha Team 0:14:49 - Player is Killed in Hotzone Round 3 0:14:52 - Player Respawn and Continues to Fight, Getting Kills, 'On Fire' Streak 0:15:15 - Player Changes Loadout During Active Gameplay 0:15:48 - Zone Active & Player Secures Multiple Kills, 'Showstopper' Medal 0:16:34 - Alpha Team Wins Hotzone Match 0:16:42 - Post-Match Victory Screen, Progression & Challenges 0:16:59 - Splitgate Sports League (SSL) Logo Animation 0:17:01 - Video End: Return to Main Menu
Spider-Man Remastered: FULL FIRST MISSION Gameplay (Times Square & Fisk Boss Fight)
This video showcases the exciting opening sequence of Marvel's Spider-Man Remastered, beginning with the vibrant PlayStation Studios and Marvel intros. Viewers are then guided through the initial game setup, including selecting a save slot, difficulty, and customizing various game settings such as audio, graphics, subtitles, and accessibility options. A cinematic sequence follows, offering a glimpse into Peter Parker's civilian life and his dual identity as Spider-Man, highlighting his home, family photos, and notes on his inventions and daily struggles. An urgent alert on his phone signals the start of the first major mission, prompting Peter to quickly don his Spider-Man suit. The gameplay then transitions to exhilarating web-slinging across New York City, demonstrating traversal mechanics and introducing Captain Yuri Watanabe, who guides Spider-Man to Times Square where Fisk's men are attacking police. The video features the first combat encounter, showcasing Spider-Man's combat abilities, including web-strikes, dodging, and environmental interactions, as he clears Times Square of threats. Following this, Spider-Man infiltrates Fisk Tower, navigating air vents and engaging in further combat sequences against Fisk's forces, including a frantic race to stop data deletion in the server room. The narrative culminates in a dramatic confrontation with Wilson Fisk himself, leading to an intense boss battle that spans multiple levels of the building, highlighting Spider-Man's resilience and combat prowess. The video concludes with Fisk's capture and subsequent arrest, as he is escorted away in a police transport, vowing revenge against Spider-Man. 📖 Chapters: 0:00:00 - 0:00:03 - Sony Interactive Entertainment Presents 0:00:03 - 0:00:12 - PlayStation Studios Intro 0:00:12 - 0:00:17 - Insomniac Games Logo 0:00:17 - 0:00:25 - Marvel Logo 0:00:25 - 0:00:29 - Marvel Spider-Man Remastered Title Screen 0:00:29 - 0:01:42 - Game Settings Configuration 0:01:42 - 0:03:10 - Peter Parker's Apartment & Daily Life 0:03:10 - 0:03:50 - Spider-Man Suits Up for Action 0:03:50 - 0:05:54 - Web-Slinging Through New York City to Times Square 0:05:54 - 0:06:45 - Fisk's Men Attack Police at Times Square 0:06:45 - 0:08:00 - First Combat: Clearing Times Square 0:08:00 - 0:08:34 - Heading to Fisk Tower 0:08:34 - 0:09:21 - Fisk Tower Infiltration and Atrium Combat 0:09:21 - 0:11:14 - Atrium Combat and Focus Bar Tutorial 0:11:14 - 0:11:25 - SWAT Team Arrives 0:11:25 - 0:12:02 - Sneaking Through Air Vents to Server Room 0:12:02 - 0:14:00 - Server Room Combat & Data Deletion Countdown 0:14:00 - 0:14:45 - Fisk Confronts Spider-Man 0:14:45 - 0:15:23 - Fisk Activates Turrets and Office Combat 0:15:23 - 0:16:11 - Rescuing Civilians from Debris 0:16:11 - 0:17:08 - Entering Fisk's Office for Final Confrontation 0:17:08 - 0:18:16 - Boss Fight: Spider-Man vs. Kingpin 0:18:16 - 0:19:00 - Kingpin is Defeated and Arrested 0:19:00 - 0:20:06 - Spider-Man Surveys the City 0:20:06 - 0:20:29 - Game Credits

Splitgate 2
This video provides a comprehensive look at 'Splitgate 2' gameplay, focusing on the fast-paced 'Domination' game mode on the 'Eden' map. Viewers will first see the game's introductory screens, including the studio logo and loading sequence, followed by an in-depth tour of the main menu. This includes navigating character customization options, reviewing daily and weekly challenges, and exploring various loadouts for different factions (Aeros, Meridian, Sabrask) and their unique abilities. The core of the video showcases five full rounds of intense Domination matches. The player demonstrates strategic use of portals, engaging in numerous firefights, capturing and defending objectives, and achieving multi-kills like double and triple kills. The gameplay highlights the dynamic and competitive nature of Splitgate 2, with rounds ending in both victories and defeats. The video concludes with the post-match summary screen, detailing the player's progression, accumulated XP, kills, objectives completed, and various challenges successfully met, offering a complete overview of a player's experience in Splitgate 2. 📖 Chapters: 0:00:00 - Game Intro & Main Menu Overview 0:00:22 - Navigating Challenges and Loadouts 0:01:25 - Faction & Loadout Selection for Round 1 0:02:16 - Round 1 Begins: Initial Engagements & Kills 0:03:05 - Round 1 Combat: Multiple Kills & Zone Captures 0:03:55 - Round 1 Intensity: Double Kill & Death 0:04:35 - Round 1 Climax: Triple Kill & Team Loss 0:05:43 - Round 1 Results & Setup for Round 2 0:06:12 - Round 2 Begins: Aggressive Pushes & Zone Captures 0:07:03 - Round 2 Combat: Heating Up Medals & Continued Fighting 0:08:08 - Round 2 Dominance: Multi-Kills & Round Win 0:09:24 - Round 2 Results & Setup for Round 3 0:09:55 - Round 3 Begins: Focused Objective Play 0:10:51 - Round 3 Turnaround: Clutch Kill & Denials 0:12:06 - Round 3 Results & Setup for Round 4 0:12:37 - Round 4 Begins: Aggressive Flanks & Multi-Kills 0:13:38 - Round 4 Defense: Power Weapon & Payback 0:14:48 - Round 4 Results & Setup for Round 5 0:15:19 - Round 5 Begins: Intense Zone Contests 0:16:12 - Round 5 Combat: Strategic Captures & Counter-Plays 0:17:15 - Round 5 Climax: Guardian Angel & Final Push 0:17:49 - Match Victory & Progression Summary 0:18:18 - Post-Game Challenges & Final Lobby Screen

Cyberpunk 2077
Dive into Cyberpunk 2077's pivotal 'The Heist' mission! This video chronicles V and Jackie Welles' daring infiltration of Konpeki Plaza to steal 'The Relic' biochip. The mission begins with V and Jackie arriving at Konpeki Plaza, navigating security, and checking into their suite. They deploy Flathead, a spider bot, to expertly hack the hotel's systems, bypassing security and neutralizing a netrunner to clear their path. A time-skip takes them to Yorinobu Arasaka's penthouse, where V and Jackie secure The Relic. However, their escape is jeopardized by the unexpected arrival of Yorinobu's father, Saburo Arasaka. V and Jackie witness a shocking confrontation where Yorinobu murders Saburo, triggering a high-stakes 'Code Red' lockdown and compromising their netrunner, T-Bug. Forced to improvise, V and Jackie attempt a perilous escape through the building's exterior amidst heavy rain and Arasaka drones. Jackie sustains a severe injury, necessitating the urgent insertion of The Relic into V's neural port. A desperate struggle ensues as they fight their way through hordes of Arasaka security, including a heavy mech, making their way to the garage. The escape continues in Delamain's self-driving car, facing a relentless car chase and aerial drone pursuit. Jackie, critically wounded, makes a poignant sacrifice, entrusting V with The Relic before succumbing to his injuries. The journey takes a dark turn as V arrives at the No-Tell Motel to meet Dexter DeShawn. In a shocking betrayal, Dex shoots V in the head, leaving them for dead in a trash pile. This video captures the intense combat, stealth, hacking, tragic loss, and shocking betrayal that define this iconic mission. 📖 Chapters: 0:00:00 - Arrival at Konpeki Plaza & Mission Start 0:02:30 - Hotel Check-in as 'Victorino' 0:05:20 - Reaching Lapis Lazuli Suite 0:07:20 - Flathead Deployment & Initial Hacking 0:09:00 - Hacking to Distract Housekeeping Bot 0:11:30 - Flathead Neutralizes Netrunner 0:18:00 - Infiltrating Yorinobu's Penthouse & Acquiring The Relic 0:24:00 - Saburo Arasaka's Unexpected Arrival 0:26:00 - Yorinobu Murders Saburo Arasaka 0:27:30 - Code Red, T-Bug Compromised & Escape Attempt Begins 0:31:00 - Jackie Injured & Relic Transfer to V 0:36:00 - Stealth & Combat Through Konpeki Plaza 0:50:00 - Intense Penthouse Firefight Begins 0:51:00 - Engaging Heavy Mech Unit 0:52:15 - Entering Delamain Car & Escape Begins 0:53:00 - Car Chase & Drone Combat 0:54:15 - Jackie's Final Moments & Relic Transfer 0:56:00 - Arrival at No-Tell Motel 0:57:15 - Confrontation with Dexter DeShawn 0:59:15 - Dexter's Betrayal & V Shot 0:59:30 - V Wakes Up in a Trash Pile 📖 Chapters: 0:00:00 - Arrival at Konpeki Plaza & Mission Start 0:02:30 - Hotel Check-in as 'Victorino' 0:05:20 - Reaching Lapis Lazuli Suite 0:07:20 - Flathead Deployment & Initial Hacking 0:09:00 - Hacking to Distract Housekeeping Bot 0:11:30 - Flathead Neutralizes Netrunner 0:18:00 - Infiltrating Yorinobu's Penthouse & Acquiring The Relic 0:24:00 - Saburo Arasaka's Unexpected Arrival 0:26:00 - Yorinobu Murders Saburo Arasaka 0:27:30 - Code Red, T-Bug Compromised & Escape Attempt Begins 0:31:00 - Jackie Injured & Relic Transfer to V 0:36:00 - Stealth & Combat Through Konpeki Plaza 0:50:00 - Intense Penthouse Firefight Begins 0:51:00 - Engaging Heavy Mech Unit 0:52:15 - Entering Delamain Car & Escape Begins 0:53:00 - Car Chase & Drone Combat 0:54:15 - Jackie's Final Moments & Relic Transfer 0:56:00 - Arrival at No-Tell Motel 0:57:15 - Confrontation with Dexter DeShawn 0:59:15 - Dexter's Betrayal & V Shot 0:59:30 - V Wakes Up in a Trash Pile Chapters: 0:00:00 - Inbound to Konpeki Plaza 0:01:13 - Arrival and Entrance to Konpeki Plaza Lobby 0:02:40 - Check-in at Reception 0:04:43 - Exploring the 42nd Floor Lobby 0:06:06 - Entering the Lapis Lazuli Suite 0:07:34 - T-Bug Links into CCTV and System Breach begins 0:07:55 - Guiding the Flathead through Vents 0:08:44 - Neutralizing the Netrunner Dweller 0:08:50 - Bypassing Penthouse Security 0:12:44 - Waiting for the System Breach to Complete 0:13:46 - Yorinobu Arasaka Returns Early 0:14:04 - Opening the Hidden Safe 0:14:43 - Hiding in the Maintenance Shaft 0:15:23 - Saburo Arasaka Confronts Yorinobu 0:17:13 - The Death of Saburo Arasaka 0:17:55 - Penthouse Goes on Lockdown 0:18:24 - Escaping via the Balcony 0:18:41 - Jackie is Injured during the Escape 0:19:11 - Connecting the Relic to the Biochip 0:21:50 - Fighting through Konpeki Plaza Security 0:24:40 - Reaching the Garage and Delamain Cab 0:25:50 - Chase through Night City Streets 0:27:00 - Jackie's Final Moments 0:28:43 - Meeting Dexter Deshawn at the No-Tell Motel 0:29:45 - Shocking Betrayal and End of the Heist 0:30:00 - Arriving at Konpeki Plaza in the Delamain vehicle 0:32:40 - Checking in at the front desk 0:35:25 - Taking the elevator to the suite on floor 42 0:36:55 - Deploying the Flathead bot in the vent 0:37:44 - Controlling the Flathead through cameras 0:38:50 - Distracting the housekeeper and bypassing security 0:42:45 - Awaiting Yorinobu's departure in the suite 0:43:35 - Heading up to the Arasaka penthouse 0:44:50 - Hacking the safe and securing the Relic 0:46:00 - Hiding in the maintenance shaft as Arasaka family arrives 0:48:15 - Witnessing the family betrayal and Code Red 0:51:05 - Escaping through the penthouse window in the storm 0:52:20 - Fleeing the Arasaka guards in the hallway 0:54:40 - Reaching and boarding the Delamain escape vehicle 0:55:15 - Fighting off drones during the high-speed chase 0:58:40 - Arriving at the No-Tell Motel and Jackie's final moments 0:59:45 - Meeting with Dexter DeShawn and the ending betrayal
Cyberpunk 2077 Final mission
Dive into the epic conclusion of Cyberpunk 2077 with this full walkthrough of the 'Nocturne Op55N1' final mission, leading to the legendary 'Don't Fear The Reaper' ending. Follow V and Johnny Silverhand as they navigate critical decisions, confront Arasaka Tower, battle Adam Smasher, and make the ultimate choice for their future in Night City. 📖 Chapters: 0:00 - V's Predicament & Initial Choices 0:47 - Discussing the Final Choice 0:56 - V Gives Control to Johnny 1:01 - Johnny at Afterlife 1:25 - Johnny & Rogue: V's Condition & Help 1:39 - Mission Planning & Discussion 2:33 - V Wakes & Preps for Mission 2:54 - Rogue Explains Coropo Plaza Mission 2:57 - Gear Up & Loadout Customization 3:53 - Detailed Arasaka Infiltration Plan 4:10 - Finalizing Plan & Contacting Alt 4:29 - V Enters Netrunner Suit 4:35 - V Confronts Alt in Cyberspace 4:52 - Alt Explains Mikoshi 5:07 - Alt Offers V's Ultimate Choice 5:24 - V Returns to Reality, Talks to Rogue 5:35 - Departing Afterlife for Mission 5:36 - Rogue Discussion & Elevator 5:56 - Boarding AV & Flying to Target 8:25 - AV Shot Down & Crash Landing 9:00 - Regrouping After Crash 9:50 - Crash Site Combat & Infiltration 12:38 - Knockin' on Heaven's Door Start 12:39 - First Combat & Target ID 13:22 - Player Defeat & Reload 13:30 - Loading & Environment View 13:42 - Inventory Check 14:30 - Restarting Segment with Rogue & Weyland 14:47 - Stealth Takedowns & Infiltration 15:58 - Looting & Advancing with Rogue 16:18 - Rogue Identifies High-Ranker 16:53 - Firefight with High-Ranker 17:21 - Obtaining Access Token 17:24 - Finding Smart Pistol & Moving to Elevator 18:14 - Calling Elevator to Atrium 18:54 - Arasaka Atrium Entry 19:04 - Exploring Atrium 19:19 - Rogue Guides to Security Level 19:24 - Looting & Entering Office 19:32 - Reading Laptop Messages 19:39 - Moving Through Doorway 19:54 - Rogue Advises Jump to Lower Level 20:04 - Preparing for Jump with Anti-Gravs 20:24 - Reaching Security Level 20:34 - Security Level Engagements 23:05 - Arasaka Tower Infiltration & Combat 25:05 - Accessing Mikoshi Network 25:54 - Alt Bypasses Security to Mikoshi 26:14 - Elevator to Netrun Operations Control 26:29 - Combat in Elevator Area 27:24 - Elevator Dialogue (V, Johnny, Rogue) 27:54 - Reaching Netrunner Operations 28:24 - Rogue Clears Path, Warns of Elites 28:44 - More Arasaka Guards 29:24 - Clearing Path to Mikoshi 29:44 - Adam Smasher Boss Fight 33:55 - Adam Smasher Defeated! 34:08 - Path to Mikoshi Core Open 34:15 - Looting Smasher & Mikoshi Objective 34:25 - Johnny & Smasher Post-Fight Words 34:26 - Johnny's Farewell to Rogue 34:41 - Approaching Mikoshi 34:55 - Optional Adam Smasher Confrontation 35:12 - Relic Malfunction & Final Access Point 35:32 - Entering Mikoshi 35:43 - Connecting to Mikoshi 36:20 - V Navigates Digital Stream 36:47 - Transition to Cyberspace 36:53 - V on Rooftop (Symbolic Moment) 37:38 - Entering Alt's Cyberspace Domain 37:58 - Alt's Monologue 39:10 - Johnny Appears in Cyberspace 39:26 - Johnny Talks Rogue & Smasher 39:41 - Alt Explains V's Condition 40:04 - Johnny's Plea & Alt's Statement 40:16 - V's Ultimate Choice: Body or Cyberspace 40:27 - Johnny's Emotional Appeal 40:43 - V's Final Decision 41:30 - Johnny's Final Words 42:56 - Final Dialogue (Game Paused) 43:24 - V Crosses Bridge with Alt (Credits) Chapters: 0:00:00 - Making the final choice with Johnny at Viktor's Clinic 0:02:45 - Talking to Misty and following her to the roof 0:10:00 - Reflecting on the past with Johnny on the roof 0:14:30 - Johnny takes over V's body and visits Rogue at Afterlife 0:18:00 - Meeting Weyland and gathering gear for the heist 0:21:40 - Briefing from Rogue and entering Cyberspace to meet Alt 0:24:10 - The daring AV flight over Night City begins 0:26:30 - Assault on Arasaka Tower and breaching the defenses 0:28:15 - Breaching the jungle floor within Arasaka Tower 0:30:00 - Showdown at the heart of Arasaka Tower 0:30:00 - Johnny explains the plan to V at Victor's clinic 0:32:40 - Conversation with Misty and traveling to the roof 0:34:47 - V decides to let Johnny take control and call Rogue 0:35:49 - Johnny arrives at the Afterlife to meet Rogue 0:39:27 - Johnny convinces Rogue to join the Arasaka Tower raid 0:42:00 - Johnny meets Weyland and prepares gear for the mission 0:44:18 - Reviewing the tactical plan for infiltrating Arasaka Tower 0:46:16 - Johnny enters Cyberspace to seek Alt Cunningham's help 0:48:28 - Rogue and the team launch the AV for the air raid 0:51:09 - The crash landing in the Arasaka Tower jungle floor 0:53:44 - Navigating the jungle and searching for the access token 0:56:24 - Proceeding through the tower atrium and security labs 0:58:44 - The elevator ride and final approach to the core 0:59:40 - Reaching the Mikoshi entrance for the final phase
Splitgate 2
This video features gameplay from Splitgate 2, a first-person shooter with portal mechanics, specifically showcasing a Battle Royale mode. Viewers will see the game's startup sequence, character and loadout selection, and then dive into intense gameplay across various maps. The player actively engages in combat, utilizing different weapons and portal abilities to eliminate opponents. Throughout the video, there's a strong focus on strategic movement, aiming, and team coordination to achieve victory. The video highlights several successful engagements, including multiple kills and team wipes, culminating in a 'Placed 1st' victory in one match, followed by a 'Game Over' in another, demonstrating both success and failure in the fast-paced environment. 📖 Chapters: 0:00:00 - 0:00:13 - Game Warning and 1047 Games Intro 0:00:13 - 0:00:31 - Splitgate 2 Title Screen and Server Connection 0:00:31 - 0:01:14 - Main Menu Navigation and Loadout Customization (Match 1) 0:01:14 - 0:01:27 - Battle Royale Map Loading Screen 0:01:27 - 0:02:56 - Character and Loadout Selection Pre-Match (Match 1) 0:02:56 - 0:03:06 - Splitgate League Intro (Match 1) 0:03:06 - 0:03:26 - Drop Ship and Hot Drop Selection 0:03:26 - 0:04:00 - Initial Looting and Movement on Yellow Kanyon 0:04:00 - 0:04:50 - First Engagements and Enemy Team Wipe 0:04:50 - 0:05:30 - Continued Movement and Engaging Enemies 0:05:30 - 0:06:15 - Intense Firefights and Multiple Kills 0:06:15 - 0:06:50 - Team Wipe and Zone Closing 0:06:50 - 0:08:05 - Looting, Reloading and Progressing to Next Round 0:08:05 - 0:09:05 - Round 2 Starts, Looting and Movement 0:09:05 - 0:09:40 - Player Eliminated, Respawn and Teammate Revive 0:09:40 - 0:10:00 - Strategic Movement and Continued Engagements 0:10:00 - 0:10:30 - Another Enemy Team Eliminated 0:10:30 - 0:12:05 - Transition to Lava Map and Final Round Prep 0:12:05 - 0:12:30 - Final Round Begins, Air Drop Incoming 0:12:30 - 0:14:12 - Final Combat and Victory 0:14:12 - 0:14:36 - Victory Screen and Match Progression 0:14:36 - 0:14:58 - Game Startup and Menu Navigation (Match 2) 0:14:58 - 0:15:26 - Splitgate League Intro (Match 2) 0:15:26 - 0:17:14 - Battle Royale Map Overview and Character Selection 0:17:14 - 0:17:37 - Drop Ship and Landing in Cave 0:17:37 - 0:18:10 - Looting and First Engagement 0:18:10 - 0:19:15 - Zone Closing and Movement to New Biome 0:19:15 - 0:21:50 - Round 1 Combat and Advancing Through Map 0:21:50 - 0:22:15 - Round 2 Starts, New Biome and Objectives 0:22:15 - 0:23:25 - Combat and Progression in Round 2 0:23:25 - 0:27:35 - Intense Final Round Combat and Defeat 0:27:35 - 0:28:56 - Game Over Screen and Progression
GTA Online: From Street Scramble to CEO Success!
This video provides a comprehensive look into a Grand Theft Auto Online gameplay session. It begins with the player character navigating their apartment, then setting out to steal a white sports car and driving through the city at night, encountering a minor accident and a 'Mental State' warning. The player then switches to a black sedan from their spacious garage, customizes it at Los Santos Customs with a matte black finish and bulletproof tires, and proceeds to a Suburban clothing store to purchase a black hoodie and balaclava. The video then transitions into a 'Business Battle' where the player must assassinate targets to collect product, engaging in a shootout with another player. The session concludes with the player utilizing their CEO abilities, hiring associates, and managing their 'Rng gods' office, where they purchase Special Cargo (Film Reel) through the SecuroServ computer, demonstrating various aspects of GTA Online's open-world activities and business management. 📖 Chapters: 0:00:00 - 0:28:00 - Apartment Exploration & Waypoint Setting 0:28:00 - 1:12:00 - Car Theft and Night Driving Through the City 1:12:00 - 2:05:00 - Continued Driving, Accident, and Evading Trouble 2:05:00 - 2:12:00 - Loading Screen Transition 2:12:00 - 3:02:00 - Inside the Garage and Car Selection 3:02:00 - 3:06:00 - Loading Screen 3:06:00 - 4:11:00 - Driving to Los Santos Customs and Mission Briefing 4:11:00 - 5:07:00 - Vehicle Customization and Upgrades 5:07:00 - 5:56:00 - Post-Customization Drive to Clothing Store 5:56:00 - 7:10:00 - Shopping for New Apparel and Accessories 7:10:00 - 7:59:00 - Returning to Car and Business Battle Initiation 7:59:00 - 8:15:00 - Business Battle: Assassination Objective Commences 8:15:00 - 8:52:00 - Pursuing Targets and Driving Through City 8:52:00 - 9:34:00 - Engaging Targets in a Shootout 9:34:00 - 10:18:00 - Continued Target Pursuit and Gunplay 10:18:00 - 10:59:00 - CEO Activities: Hiring Associates 10:59:00 - 11:39:00 - Successful Associate Hiring and Office Waypoint 11:39:00 - 12:28:00 - Driving to Maze Bank Office 12:28:00 - 13:23:00 - Office Arrival and SecuroServ Login 13:23:00 - 14:09:00 - SecuroServ Business Management and Cargo Purchase
GTA Brothers
This gameplay video features high-performance drifting and urban exploration in Grand Theft Auto Online. The content begins with the demonstration of a customized Karin Futo driving through Los Santos, followed by a detailed look at adjusting in-game display settings such as the radar and targeting reticle. The video then transitions into an extended sequence of precise drifting maneuvers, a visit to a luxury clothing store, and high-speed driving through the city streets during a scenic sunset. Viewers will observe various driving techniques, including controlled skids and circular burnouts, highlighting the handling characteristics of the vehicle. 📖 Chapters: 0:00:00 - 0:00:15 - Initial driving sequence through Los Santos 0:00:15 - 0:00:45 - Adjusting display settings and targeting reticle options 0:00:45 - 0:01:27 - Intermission screen with status indicators 0:01:27 - 0:02:05 - Precision drifting maneuvers and arrival at a clothing store 0:02:05 - 0:02:50 - Interior exploration of the Ponsonbys luxury boutique 0:02:50 - 0:03:20 - Executing a 360-degree burnout and departing the area 0:03:20 - 0:03:59 - High-speed sunset cruise and final drifting demonstration
First day on the block
This video provides a detailed look at the interior and shopping experience within a Ponsonbys high-end clothing store in Grand Theft Auto V. The content demonstrates two player characters exploring the retail space, navigating through formal wear sections, and extensively browsing the footwear department. Viewers will see a comprehensive showcase of the character customization menu, focusing on various shoe categories such as sneakers, skate shoes, and sports shoes, highlighting the wide range of styles and colors available in the game. 📖 Chapters: 0:00:00 - 0:00:29 - Overview of the Ponsonbys store interior and displays 0:00:29 - 0:01:05 - Characters navigating through the suit and formal wear sections 0:01:05 - 0:01:45 - Characters positioning themselves to browse the footwear department 0:01:45 - 0:02:15 - Detailed showcase of the in-game shoe inventory and customization options 0:02:15 - 0:02:23 - Final store views and transition to concluding screen

Shadow Ops Skin Styles & New Emotes Showcase
The video provides a comprehensive overview of the Fortnite Season 9 interface, starting with the latest news regarding Overtime challenges and account security. Gameplay content demonstrates the Item Shop, specifically showcasing the Shadow Ops outfit and its white variant, along with the Slap Happy emote, Shard Break wrap, and Arcana glider. Viewers will see navigation through the locker, challenge menus, and the selection of the Wild West Duos limited-time game mode. The footage also covers social features such as receiving and accepting party invites, as well as performing synchronized emotes in the lobby before the recording transitions to a paused state screen at the end. 📖 Chapters: 0:00:00 - 0:00:10 - Fortnite Season 9 news and challenge notifications 0:00:10 - 0:00:28 - Item Shop showcase of Shadow Ops selectable styles 0:00:28 - 0:00:42 - Preview of Slap Happy emote and Shard Break weapon wrap 0:00:42 - 0:01:00 - Locker navigation and emote selection menu 0:01:00 - 0:01:25 - Selecting Wild West LTM and matchmaking queue 0:01:25 - 0:02:02 - Lobby social interaction and synchronized Billy Bounce emote 0:02:02 - 0:02:35 - Emote wheel usage and recording pause screen
Playing fortnite with randoms/Brother
This Fortnite gameplay video showcases a series of competitive matches within the Creative mode. It begins with lobby interactions and emote demonstrations before transitioning into several 1v1 and free-for-all build battles across various custom-designed arenas. Viewers will observe diverse gameplay mechanics, including advanced building techniques, strategic weapon selection from the creative inventory, and precise sniping sequences. The final segment demonstrates a high-intensity match of 'Enigma's Downhill Rivers' Zone Wars, highlighting tactical positioning and inventory management under pressure, eventually leading to a match victory. 📖 Chapters: 0:00:00 - 0:01:04 - Creative Hub interactions and emote display 0:01:04 - 0:03:02 - Fast-paced 1v1 build battle in a specialized arena 0:03:02 - 0:04:30 - Loading new islands and configuring weapon loadouts 0:04:30 - 0:07:43 - High-altitude combat and long-range sniping sequences 0:07:43 - 0:08:58 - Island setup and player permissions for group play 0:08:58 - 0:11:58 - Multi-player free-for-all engagement on custom maps 0:11:58 - 0:14:26 - Enigma's Downhill Zone Wars match and final victory Chapters: 0:00:00 - 0:01:04 - Creative Hub Emote Showcase 0:01:04 - 0:02:45 - 1v1 Build Battle Arena Tfue 0:02:45 - 0:04:04 - Weapon Customization and Hub Transition 0:04:04 - 0:05:28 - Multiplayer Free-for-All Sky Combat 0:30:00 - 0:31:05 - Creative Hub emotes and portal matchmaking 0:31:05 - 0:33:01 - 1v1 arena build battles and shotgun eliminations 0:33:01 - 0:34:15 - Configuring creative island permissions and game settings 0:34:15 - 0:35:28 - Zone Wars gameplay and final survival victory
Gta brothers pt 1
This gameplay video of Grand Theft Auto V showcases a diverse range of activities in the open-world sandbox of Los Santos and Blaine County. The footage begins at night with the character establishing a motorcycle club and performing stunts while riding through the city. Viewers will observe several convenience store robberies where the player utilizes the interaction menu to swap outfits mid-heist to evade police. The content then transitions to character customization at a high-end clothing store, followed by social interactions in a player apartment. The latter half of the video shifts to intense action, featuring a large-scale fistfight in the desert, a transport plane flight, and a high-stakes infiltration of Fort Zancudo. The video concludes with a lengthy segment of high-speed aerial combat and dogfighting after successfully stealing a military jet, demonstrating advanced flight maneuvers through Raton Canyon. 📖 Chapters: 0:00:00 - 0:02:30 - Motorcycle Club Formation and Night Riding 0:02:30 - 0:06:15 - Convenience Store Robberies and Police Evasion 0:06:15 - 0:09:45 - Urban Exploration and Street Brawling 0:09:45 - 0:13:00 - High-End Clothing Customization at Ponsonbys 0:13:00 - 0:16:45 - Rainy City Transit and Apartment Socializing 0:16:45 - 0:20:15 - Vinewood Hills Stunts and Desert Arrival 0:20:15 - 0:23:30 - Massive NPC Brawl in Sandy Shores 0:23:30 - 0:27:00 - Titan Transport Flight and Base Infiltration 0:27:00 - 0:31:15 - Military Jet Theft Attempts at Fort Zancudo 0:31:15 - 0:35:08 - Aerial Dogfighting and Canyon Flight Maneuvers

Fortnite creative,duos, and solo
This video provides a comprehensive look at a Fortnite session, starting from the initial login and lobby screens. Viewers will see the item shop offerings from Season X, followed by an extensive exploration of Creative mode. The footage demonstrates building techniques, editing drills, and various combat scenarios, including close-quarters shotgun fights and long-range sniping practice on custom islands. The video concludes with several 1v1 engagements and high-speed building demonstrations. Chapters: 0:00:00 - 0:00:54 - Initial Loading and Login Process 0:00:55 - 0:01:36 - Main Lobby Navigation and Emote Demonstration 0:01:37 - 0:01:51 - Browsing the Season X Item Shop 0:01:52 - 0:02:29 - Loading into the Creative Mode Environment 0:02:30 - 0:04:03 - Exploring the Creative Hub and Selecting Islands 0:04:04 - 0:05:44 - Weapon Selection and Initial Building Drills 0:05:45 - 0:06:37 - Hub Interactions and Playful Combat 0:06:38 - 0:07:18 - Custom Island Combat and Elimination Sequence 0:07:19 - 0:08:23 - Advanced Building and Editing Practice 0:08:24 - 0:09:08 - Long-Range Sniper Engagement Demonstration 0:09:09 - 0:10:05 - High-Intensity Build Fights and Combat Scenarios 0:10:06 - 0:11:05 - Final Building Drills and Close-Quarters Combat 0:11:06 - 0:11:18 - Concluding Outro Screen

From Momo Horror to NBA Hoops: A Mobile Gaming Journey
This video, titled "NBA Live stream," despite its title, primarily features mobile game content with background conversations. It begins with the presenter attempting to play a horror game called "Kill the Momo," showcasing the game's title screen, weapon selection, and initial gameplay. After a brief and somewhat chaotic encounter with a 'Momo' creature, the game crashes or is exited. The video then transitions to the presenter navigating their phone, attempting to play "NBA Live Mobile." This involves several loading screens, a short diversion to download "Madden NFL Mobile," and a persistent issue with age verification in NBA Live Mobile. Eventually, after numerous loading prompts and tutorial explanations, the video concludes with the presenter successfully completing basic movement, shooting, and dunking tutorials within the NBA Live Mobile game, demonstrating core gameplay mechanics. 📖 Chapters: 0:00:00 - 0:19:00 - Initial 'Kill the Momo' Game Screen and Background Chatter 0:19:00 - 1:55:00 - Momo Game Title Screen with Ads and Continued Discussion 1:55:00 - 2:18:00 - Game Glitches, Weapon Selection, and Starting 'Kill the Momo' Gameplay 2:18:00 - 3:18:00 - 'Kill the Momo' First-Person Shooter Gameplay and Zombie Encounter 3:18:00 - 4:10:00 - Exiting 'Kill the Momo' and Attempting to Load 'NBA Live Mobile' 4:10:00 - 4:33:00 - Browsing Play Store and Initiating 'Madden NFL Mobile' Download 4:33:00 - 5:50:00 - Returning to 'NBA Live Mobile' and Age Verification Issues 5:50:00 - 6:40:00 - Continued Loading of 'NBA Live Mobile' and Tutorial Prompts 6:40:00 - 9:20:00 - Extended Loading of 'NBA Live Mobile' Game Assets and Tutorial Hints 9:20:00 - 10:59:00 - NBA Live Mobile Gameplay Tutorial (Movement, Shooting, Dunking)
Fortnite Team Rumble: Mech Mayhem & Tactical Hiding!
This Fortnite gameplay video captures a player's journey from landing to strategic hiding in a Team Rumble match. The video begins with the player dropping from the battle bus, quickly acquiring a B.R.U.T.E (mech suit), and using it to efficiently demolish structures and gather materials. After destroying the mech, the player focuses on on-foot looting, collecting various weapons like a Suppressed Submachine Gun, Tactical Shotgun, Pump Shotgun, and a Drum Gun. They also prioritize healing with Mini Shield Potions and Chug Splashes, and gather utility items like Stink Bombs and Shockwave Grenades. The latter half of the video showcases the player's tactical approach in Salty Springs, where they meticulously gather more materials and strategically hide behind cover, observing the environment and waiting for opportune moments, while continuing to earn eliminations. 📖 Chapters: 0:00:00 - Fortnite Lobby Screen and Bus Flight 0:00:17 - Player Deploys Glider and Lands Near Structures 0:00:31 - Player Enters the B.R.U.T.E (Mech) 0:00:34 - Using B.R.U.T.E to Destroy Trees and Buildings 0:01:03 - Player Exits B.R.U.T.E and Harvests Materials 0:01:16 - Looting a Chest and Acquiring a Suppressed SMG 0:01:25 - Player Re-enters the B.R.U.T.E 0:01:35 - Self-Destructing the B.R.U.T.E 0:01:38 - Healing with Mini Shield Potions 0:01:52 - Harvesting Materials from a Large Tree 0:02:08 - Approaching a Wooden Watchtower 0:02:16 - Gliding Towards Salty Springs 0:02:22 - Looting a Rooftop Chest for Weapons and Stink Bombs 0:02:34 - Looting Inside a House and Gathering Ammo 0:02:47 - Acquiring a Tactical Shotgun 0:02:53 - Opening a Chest and Getting Shield Potions & Sniper 0:03:00 - Quick Building and Editing Practice 0:03:07 - Finding a Pump Shotgun and More Materials 0:03:14 - Player Elimination Notification 0:03:22 - Harvesting Materials from Outdoor Structures 0:03:36 - Looting a Barrel and Getting Chug Splash 0:03:44 - Picking up a Drum Gun 0:03:59 - Swapping Grenades for Storm Flip 0:04:08 - Finding Shockwave Grenades and Chug Splashes 0:04:15 - Moving Outside and Strategic Hiding 0:04:39 - Another Elimination while Hiding 0:05:00 - End of Video - Player Hiding

🔴Watch me stream NBA Live !
This video provides a comprehensive overview of early-game progression in NBA Live Mobile. It begins with fundamental training drills such as assisted scoring, passing, and dribbling within the Trail Blazers' Moda Center. The gameplay demonstrates mechanics for guarding and defensive play before transitioning into a high-stakes 'Showdown' match where the objective is to defend a lead in the 4th quarter. Viewers will also see the menu navigation required to complete player sets, resulting in the acquisition of an 85 OVR elite player. The latter half of the video covers specialized 'Elevate' shooting challenges and concludes with the user managing their mobile streaming application interface. Chapters: 0:00:00 - 0:02:15 - Initial Scoring and Passing Tutorials 0:02:15 - 0:04:10 - Advanced Dribbling and Guarding Mechanics 0:04:10 - 0:06:30 - Showdown Mode: 4th Quarter Gameplay Scenario 0:06:30 - 0:08:00 - Set Completion and Elite Player Reward Acquisition 0:08:00 - 0:09:55 - Elevate Event Shooting Drills and Challenges 0:09:55 - 0:11:27 - Post-Match Navigation and Stream Management
GTA Online Urban Warfare & CEO Cargo Missions
📖 Chapters: 0:00:00 - 0:02:45 - Initial area defense and motorcycle maneuvers in Los Santos 0:02:45 - 0:05:30 - Intense urban firefight involving police and rival players 0:05:30 - 0:08:15 - Strategic long-range sniper combat across city blocks 0:08:15 - 0:11:00 - Continuous street warfare and high-speed motorcycle chases 0:11:00 - 0:13:45 - Rooftop and ground-level tactical combat transitions 0:13:45 - 0:15:50 - Final high-stakes defense mission confrontation 0:15:50 - 0:18:30 - CEO operations and cargo acquisition at Maze Bank 0:18:30 - 0:21:15 - Initiating special cargo mission and traveling to targets 0:21:15 - 0:24:00 - Assassination of mission targets to reveal cargo location 0:24:00 - 0:26:30 - Hijacking the cargo van and high-pressure delivery drive 0:26:30 - 0:27:01 - Successful mission completion and cargo warehouse delivery
Mastering the Run and Gun: Killstreak Highlights
This video provides a complete walkthrough of a GTA Online Team Deathmatch session set on an athletic track. The analysis begins with the host configuring match settings such as time limits, weather, and weapon availability. Viewers will observe the process of inviting players and reviewing their statistics cards. After a brief loading period and pre-match betting phase, the gameplay demonstrates high-intensity 'Run and Gun' combat. The content highlights tactical movement, weapon pickups like the Advanced Rifle, and the strategic deployment of Bull Shark Testosterone to secure a dominant killstreak against opponents. 📖 Chapters: 0:00:00 - 00:00:33 - Match settings and initial player invites 00:00:33 - 00:01:14 - Intermission/loading screen sequence 00:01:14 - 00:02:18 - Extended matchmaking and player profile reviews 00:02:18 - 00:03:10 - Finalizing the lobby and gathering players 00:03:10 - 00:03:41 - Pre-match betting and team preparation 00:03:41 - 00:04:30 - Match start and initial combat engagements 00:04:30 - 00:05:39 - Killstreak performance with Bull Shark Testosterone boost Chapters: 0:00:00 - 0:03:40 - Lobby configuration and player invitations 0:03:40 - 0:04:30 - Match kickoff and initial combat defeats 0:04:30 - 0:05:40 - Tactical recovery and dominant killstreak Chapters: 0:00:00 - 0:03:10 - Lobby configuration and player matchmaking invitations 0:03:10 - 0:03:40 - Pre-match betting screen and character gear preparations 0:03:40 - 0:04:30 - Match initiation and initial tactical defeats on the track 0:04:30 - 0:05:39 - Power-up collection and successful combat turnarounds
Los Santos Life: From the Barber Shop to the Battlefield
This Grand Theft Auto Online gameplay video showcases a mix of urban combat, detailed character customization, and vehicle exploration in Los Santos. The footage begins with several combat encounters where the player character engages with others using sniper rifles and various firearms. A significant portion of the video is dedicated to character customization at a barber shop, illustrating the diverse range of hairstyles, face paints, and colored contact lenses available. Viewers will also see the initiation of Motorcycle Club 'Stand Your Ground' activities and a demonstration of a highly customized 'Cherry Popper' themed lowrider, including its hydraulic features and unique aesthetics while driving through the city. 📖 Chapters: 0:00:00 - 0:02:30 - Initial Urban Combat and Respawn Cycles 0:02:30 - 0:05:00 - Character Customization: Hairstyles and Colors 0:05:00 - 0:07:30 - Extended Customization and Motorcycle Club Activities 0:07:30 - 0:10:00 - Exploring Los Santos in a Custom Lowrider 0:10:00 - 0:11:15 - Final Combat Sequence and Snipping Gameplay
High Stakes Urban Warfare: Mastery of PvP in GTA Online
This video provides a comprehensive look at high-intensity player-versus-player (PvP) combat within Grand Theft Auto Online during an urban defense mission. The gameplay demonstrates a variety of tactical maneuvers, including rooftop sniping, close-quarters gunfights under highway overpasses, and the strategic use of explosives in street-level engagements. Throughout the full duration, the content covers weapon-switching techniques, the use of cover in complex architectural environments, and high-speed vehicle navigation. Viewers will also see the use of the interaction menu for rapid gear adjustments and tactical repositioning, culminating in a series of explosive standoffs and precision long-range engagements. 📖 Chapters: 0:00:00 - 0:02:07 - Initial rooftop defense and long-range sniper engagements 0:02:07 - 0:04:14 - Tactical positioning and equipment management via the interaction menu 0:04:14 - 0:06:11 - Close-quarters combat and gunfights under the highway overpass 0:06:11 - 0:08:28 - High-speed vehicle navigation and urban pursuit of hostile players 0:08:28 - 0:10:18 - Use of heavy weaponry for explosive takedowns and final standoffs
GTA Online: Intense Beach Sniper Battles & PvP
The video provides a comprehensive look at a high-level GTA Online gameplay session, focusing on character customization, traversal, and competitive player-versus-player (PvP) combat. Viewers will see the player navigate through various menus to manage CEO organizations and communicate with others in the lobby. The content highlights the character's aesthetic transition at a barber shop before moving into intense sniper and explosive-based combat on the beaches and piers of Los Santos. Throughout the session, the gameplay demonstrates various tactical maneuvers, including long-range sniping, strategic use of heavy weaponry, and motorcycle stunts. The video concludes with a high-speed driving sequence through the city streets as the sun rises, showcasing the game's environmental detail and vehicle mechanics. 📖 Chapters: 0:00:00 - 0:00:36 - Initial loading and game update screens 0:00:36 - 0:02:55 - Garage interior and player menu navigation 0:02:55 - 0:04:24 - Motorcycle transit through the city at night 0:04:24 - 0:05:00 - Character customization at the barber shop 0:05:00 - 0:08:21 - Navigating to the beach and initial PvP messaging 0:08:21 - 0:11:00 - Long-range sniper combat and tactical RPG use on the beach 0:11:00 - 0:14:00 - Continued PvP engagement on the Del Perro Pier 0:14:00 - 0:17:00 - Intense sniper duels and tactical suicide maneuvers 0:17:00 - 0:18:55 - Searching for opponents and pier exploration 0:18:55 - 0:20:48 - High-speed vehicle traversal during sunrise and conclusion
The Full GTA Online Experience: Combat, Clubs, and Cash
This comprehensive gameplay video features a typical session in Grand Theft Auto Online, showcasing a variety of competitive and cooperative activities. The footage begins with the viewer seeing the player navigating in-game menus to manage finances via Maze Bank before jumping into a custom 'Run And Gun Upgrade' Team Deathmatch. After winning the initial match, the content demonstrates freemode navigation where a Motorcycle Club is established. A significant portion of the video is dedicated to intense freemode combat, where the player engages with both law enforcement and other players using a diverse arsenal including RPGs and Heavy Snipers. Viewers will also see the completion of 'Headhunter' VIP work, demonstrating tactical approaches to taking out high-value targets across Los Santos at night. 📖 Chapters: 0:00:00 - 0:02:30 - Intro and In-Game Financial Management 0:02:30 - 0:05:00 - Deathmatch Matchmaking and Lobby Preparation 0:05:00 - 0:07:30 - Intense Run and Gun Team Deathmatch Gameplay 0:07:30 - 0:10:00 - Establishing a Motorcycle Club in Freemode 0:10:00 - 0:13:00 - Urban Combat Against Police and Rival Players 0:13:00 - 0:16:30 - Skirmishes at the Film Studio and City Streets 0:16:30 - 0:19:00 - Second Deathmatch Session and Winning Plays 0:19:00 - 0:21:30 - Initiating Headhunter VIP Work 0:21:30 - 0:23:15 - High-Stakes VIP Target Eliminations
Franklin's Grove Street Last Stand & Lester's Big News
The video presents gameplay from Grand Theft Auto V, showcasing both story mode action and the technical process of attempting to join GTA Online. Viewers will see an intense shootout involving Franklin Clinton on Grove Street, where he engages police and destroys a helicopter before being defeated. The content also features character-driven moments, such as Franklin receiving a phone call from Lester Crest about a new house in Vinewood Hills. Throughout the video, several attempts to join GTA Online sessions are shown, documenting common occurrences like connection errors, extended loading screens with promotional artwork, and character transitions between the single-player and multiplayer modes. 📖 Chapters: 0:00:00 - 0:00:57 - Initial GTA Online loading screens and news artwork 0:00:57 - 0:01:41 - Online session error and transition to story mode 0:01:41 - 0:02:36 - Franklin engaged in an intense police shootout on Grove Street 0:02:36 - 0:02:53 - Character death sequence and hospital respawn loading 0:02:53 - 0:03:45 - Franklin receives a phone call from Lester about a new Vinewood property 0:03:45 - 0:05:01 - Exploring character surroundings and re-entering GTA Online 0:05:01 - 0:06:36 - Extended loading for GTA Online and spawning at a safehouse 0:06:36 - 0:07:34 - Second session error and Michael's appearance at Vespucci Canals 0:07:34 - 0:08:07 - Final transition attempt into a GTA Online session 0:08:07 - 0:09:37 - Continuous overhead loading view of Los Santos at night Chapters: 0:00:00 - 0:01:42 - Loading into GTA V story mode after an online connection error 0:01:42 - 0:02:00 - Shootout on Grove Street with gang members 0:02:00 - 0:02:37 - Fighting the police and shooting down a helicopter 0:02:37 - 0:03:45 - Franklin respawns at Central Los Santos Medical Center and talks to Lester 0:03:45 - 0:05:01 - Franklin stands outside the hospital and transitions session 0:05:01 - 0:07:10 - Aerial loading screen to transition to Michael 0:07:10 - 0:07:34 - Michael stands up at Vespucci Canals and opens the game menu 0:07:34 - 0:09:37 - Transitioning back into a GTA Online session
GTA Online Sessions
This gameplay video documents multiple attempts to connect to a GTA Online session, showcasing the various loading screens, menu navigations, and common connection errors encountered in Grand Theft Auto V. The content highlights the process of character switching, browsing social club crew invitations, and the repetitive nature of session joining procedures. 📖 Chapters: 0:00:00 - 0:01:15 - Initial loading and character switch to Franklin 0:01:15 - 0:02:30 - Extended aerial loading screen during multiplayer join attempt 0:02:30 - 0:03:45 - Session error alert and return to Michael's residence 0:03:45 - 0:05:00 - Navigating online menus, crew lists, and invitations 0:05:00 - 0:06:17 - Final loading sequence and concluding connection failure

Mastering Los Santos: A GTA Online Gameplay Showcase
This comprehensive video provides an in-depth look at various gameplay elements in Grand Theft Auto Online. It begins with the initial setup and customization of a character before diving into high-intensity Team Deathmatch matches on custom maps. Viewers will see tactical combat, weapon switching, and strategic use of cover. The content then transitions to open-world freeroam, showcasing player interactions, driving through Los Santos, and engaging in diverse missions such as 'Headhunter' and cargo theft operations. The video concludes with advanced combat techniques, including long-range sniping and heavy weaponry use during chaotic street battles. 📖 Chapters: 0:00:00 - 0:02:20 - Match Setup and Lobby Menus 0:02:20 - 0:04:45 - First Team Deathmatch Engagement 0:04:45 - 0:07:30 - Intense Run and Gun Combat 0:07:30 - 0:10:15 - Match Results and Lobby Transitions 0:10:15 - 0:12:50 - Freeroam Driving and Player Interactions 0:12:50 - 0:15:20 - Mission Objective: Headhunter Shootout 0:15:20 - 0:17:40 - Hangar Operations and Aerial Missions 0:17:40 - 0:20:00 - Sniper Combat and Final Showdown
Master-Class Sniping and Tank Warfare in Los Santos
This video provides an extensive look at various gameplay elements within GTA Online, ranging from character management to competitive combat. Viewers will see the initial process of navigating the open world and car customization before transitioning into a character deletion sequence followed by a long loading phase. Much of the content is dedicated to the setup and execution of a Team Deathmatch titled 'Gang Bang,' showcasing arena-based combat strategies and gunplay. The latter half of the video shifts back to the open world, demonstrating high-level sniping skills against both ground and aerial targets like jets and Oppressors. Additionally, the footage features a rampage using the Khanjali military tank, highlighting the destructive potential of heavy armor in a city environment. 📖 Chapters: 0:00:00 - 0:02:15 - Initial exploration and car customization at Los Santos Customs 0:02:15 - 0:05:30 - Character selection, deletion process, and extended map loading 0:05:30 - 0:09:00 - Team Deathmatch lobby setup and player invitation process 0:09:00 - 0:11:30 - Arena Team Deathmatch gameplay featuring intense infantry combat 0:11:30 - 0:14:15 - Open world free-roam sniping against aerial and ground targets 0:14:15 - 0:17:00 - Urban tactical sniping and frequent player engagements 0:17:00 - 0:19:30 - Heavy armor destruction using the Khanjali military tank 0:19:30 - 0:20:34 - Final sniper duels at the beach and session conclusion
Ima be playing with my other boy character
This video provides a complete walkthrough of starting a new journey in GTA Online, beginning with the initial loading screens and event announcements. The content demonstrates character management, where an existing character is deleted to make room for a new creation. A significant portion of the video focuses on the comprehensive character creator, showcasing heritage selection, facial feature adjustments, and apparel customization. After finalizing the character, the gameplay transitions into the open world of Los Santos, preceded by a cinematic introduction to the Diamond Casino & Resort. The video concludes with the character spawning into the game world at Vinewood Hills and performing basic movements. 📖 Chapters: 0:00:00 - 0:01:21 - Initial loading screens and event news 0:01:21 - 0:02:43 - Character management and deletion of an existing slot 0:02:43 - 0:04:22 - Character creation: Heritage and resemblance settings 0:04:22 - 0:05:24 - Character creation: Customizing facial features and hair 0:05:24 - 0:06:01 - Character creation: Choosing apparel and final mugshot 0:06:01 - 0:06:41 - Loading transition to the Los Santos game session 0:06:41 - 0:08:00 - Diamond Casino & Resort introductory cinematic trailer 0:08:00 - 0:08:24 - Character spawn and initial world exploration at Vinewood Hills
🔴💰GTA Online: 1v1, RNG, and other stuff
This Grand Theft Auto Online compilation video provides an extensive look at several gameplay elements. It begins with the player preparing for a 'Run and Gun Upgrade' Team Deathmatch, showcasing the lobby and character customization. Viewers will then see several minutes of intense deathmatch gameplay, highlighting various weapons and combat tactics. Following the match, the video transitions into free-roam activities, where the player character navigates the streets of Los Santos, engages in spontaneous street fights with NPCs and police, and participates in a competitive 'Stand Your Ground' MC Club mission. The final segments of the video capture various attempts to complete a cargo theft mission at the airport, illustrating both successful maneuvers and common challenges faced in high-stakes missions. 📖 Chapters: 0:00:00 - 0:02:15 - Lobby and Setup for 'Run and Gun Upgrade' TDM 0:02:15 - 0:05:00 - Initial Team Deathmatch Combat 0:05:00 - 0:08:45 - Mid-Match TDM Weapon Showcase and Pushes 0:08:45 - 0:11:15 - Final TDM Push and Results Screen 0:11:15 - 0:13:45 - Free-Roam Exploration and NPC Encounters 0:13:45 - 0:16:30 - Escalating Police and Player Conflicts in the City 0:16:30 - 0:19:15 - Engaging in 'Stand Your Ground' MC Club Activity 0:19:15 - 0:21:45 - First Attempts at Airport Cargo Theft 0:21:45 - 0:24:30 - Continued Challenges during Airport Missions 0:24:30 - 0:27:15 - Intense Airport Combat and Failed Theft Attempts 0:27:15 - 0:28:31 - Final Free-Roam Moments and Video Conclusion
Fortnite Chapter 2: Intense Siphon Matches & Creative Practice
The video provides a comprehensive look at Fortnite Chapter 2 Season 1 gameplay, encompassing main menu navigation, Battle Royale combat, and intensive training in Creative mode. Viewers will see the initial login process, item shop browsing, and the selection of the Recon Specialist skin. The footage captures two distinct Battle Royale matches: one starting at Sweaty Sands in the Siphon duos mode, showing looting strategies and a leveling-up moment, and another at Lazy Lake featuring sniper play. A significant portion of the video is dedicated to high-level building and editing drills in a specialized Creative mode island, demonstrating rapid structural placement and precision editing techniques essential for competitive play. 📖 Chapters: 0:00:00 - 0:01:21 - Initial game login and main menu navigation 0:01:21 - 0:03:01 - Entering a Siphon match and jumping from the Battle Bus 0:03:01 - 0:06:53 - Battle Royale gameplay at Sweaty Sands: looting and first elimination 0:06:53 - 0:08:36 - Post-match results, lobby navigation, and Creative mode selection 0:08:36 - 0:11:30 - Fundamental building and editing practice in Creative mode 0:11:30 - 0:14:50 - Advanced structure editing drills and high-speed maneuvers 0:14:50 - 0:17:05 - Simulated 1v1 combat and precision sniper training in Creative 0:17:05 - 0:21:10 - Second Battle Royale match at Lazy Lake and final elimination 0:21:10 - 0:22:23 - Final loading screens and match wrap-up
GTA Online: MC President Adventures
This gameplay video for Grand Theft Auto V showcases various activities in a public online session. It begins with the character in an apartment, managing Motorcycle Club (MC) settings and recruiting prospects. The content then shifts to a motorcycle-based freemode challenge called the 'Longest Stoppie Challenge,' where the player attempts to balance on the front wheel for distance. Following this, the video demonstrates MC Work through the 'Stand Your Ground' mission, featuring extended PvP combat in a city plaza. Viewers will see sniping tactics, the use of heavy weapons like RPGs, and typical urban skirmishes. The final portion of the video covers the transition into a custom 'HOLE' Last Team Standing job, showing the lobby screens and a brief look at the unique arena gameplay involving vehicles and explosives on a circular platform. 📖 Chapters: 0:00:00 - 0:02:45 - Apartment Interaction and Stoppie Challenge Start 0:02:45 - 0:05:30 - Motorcycle Stoppie Attempts and Player List Review 0:05:30 - 0:08:15 - Initiating Stand Your Ground Mission and Initial Combat 0:08:15 - 0:11:00 - Intense Urban PvP Skirmishes and Snipe Duels 0:11:00 - 0:13:45 - Extended Sniper Gameplay from High-Ground Vantage Points 0:13:45 - 0:16:22 - Custom Job Lobby and 'HOLE' Last Team Standing Match
Effect and Cause Gameplay - Titanfall 2 Walkthrough
This video showcases an extensive gameplay session from the 'Effect and Cause' mission in Titanfall 2. The footage highlights the game's unique time-travel mechanic, where viewers see the player character switch between a ruined, fiery present and a pristine, enemy-filled past to solve environmental puzzles and gain tactical advantages in combat. The video covers initial combat encounters in facility hallways, the discovery of mission-critical data logs left by Major Anderson, and complex platforming sequences that require precise timing and wall-running while shifting through time. A significant portion of the later video documents repeated attempts at a challenging platforming section over a vast chasm, illustrating the trial-and-error nature of the mission's advanced movement mechanics. The gameplay concludes as the session moves through the research facility toward the Arc core objective. 📖 Chapters: 0:00:00 - 0:01:12 - Mission Briefing and Initial Facility Infiltration 0:01:12 - 0:05:00 - Introduction to Time-Travel Combat Mechanics 0:05:00 - 0:10:00 - Navigating Environmental Hazards Using Time Shifting 0:10:00 - 0:15:00 - Decoding Major Anderson's Data Logs and Lab Exploration 0:15:00 - 0:20:00 - Infiltrating the Arc Core and Vertical Platforming 0:20:00 - 0:25:00 - Extended Floating Platform Parkour Sequence 0:25:00 - 0:30:38 - Final Mission Progress and Gameplay Conclusion Chapters: 0:00:00 - 0:01:13 - Mission briefing screen and intro logistics 0:01:13 - 0:03:28 - First combat encounters in the lobby and subsequent player death 0:03:28 - 0:05:31 - Bypassing laser security grids using time shifts to flank guards 0:05:31 - 0:07:40 - Navigating elevator shafts by switching between past and present 0:07:40 - 0:09:40 - Navigating vertical shafts and avoiding fire hazards 0:09:40 - 0:11:11 - Retrieving Major Anderson's audio logs in the main facility chamber 0:11:11 - 0:13:48 - Clearing out the research labs and utilizing time shifts for safety 0:13:48 - 0:15:53 - Platforming across floating panels over the burning reactor core 0:15:53 - 0:17:10 - Combating automated turrets and soldiers in the past era 0:17:10 - 0:20:38 - Final complex wall-running sequence across shifting platforms
GTA 5 - 1v1 Beach or 1v1 Base invite me 1v1s
The video provides an extensive look into Grand Theft Auto Online gameplay, capturing a diverse range of activities within the Los Santos sandbox. Viewers will see detailed character customization as the player character browses and tries on numerous outfits and accessories at a high-end clothing store. Gameplay demonstrates the management of a Motorcycle Club (MC), including recruiting other players and initiating competitive events like 'Stand Your Ground.' The content also covers various combat scenarios, highlighting marksmanship with heavy snipers and the use of specialized vehicles like the amphibious APC. Throughout the full duration, the video shows the character navigating heist lobbies for missions like 'The Bogdan Problem,' performing stunt jumps on a motorcycle, and interacting with the game's social and financial systems through the in-game phone and menus. 📖 Chapters: 0:00:00 - 0:01:08 - Initial loading and artwork display 0:01:09 - 0:03:17 - Apartment management, MC recruitment, and city driving 0:03:18 - 0:05:40 - Extensive character customization at Ponsonbys clothing store 0:05:41 - 0:06:55 - Skirmish outside the store and overhead map transitions 0:06:56 - 0:09:18 - Character style adjustments and apartment navigation 0:09:19 - 0:11:15 - Nighttime driving and further club recruitment 0:11:16 - 0:14:45 - In-game phone usage and traveling to mission markers 0:14:46 - 0:16:45 - Sniper combat engagement near the beach area 0:16:46 - 0:18:40 - Open-world skrimishes and respawn demonstration 0:18:41 - 0:20:00 - Heist lobby interaction and player stats review 0:20:01 - 0:24:45 - Exploration of rural areas and job menu navigation 0:24:46 - 0:27:26 - Successive heist setup lobbies and location transitions 0:27:27 - 0:30:00 - Starting 'Stand Your Ground' and field combat 0:30:01 - 0:32:15 - Financial management, outfit finalization, and motorcycle stunt jump 0:32:16 - 0:33:22 - Amphibious APC gameplay and concluding combat sequence
TITANFALL 2 playing with dad
This video presents a complete multiplayer match of Titanfall 2 in Attrition mode on the map Forwardbase Kodai. Viewers will see a variety of gameplay styles, transitioning between high-mobility pilot combat on foot and heavy-hitting mech warfare inside various Titans. The footage demonstrates effective use of pilot abilities like the grappling hook and tactical positioning, alongside skilled gunplay with weapons such as the Volt SMG and Charge Rifle. Several impressive Titan executions and pilot-versus-Titan encounters are showcased throughout the match. The video demonstrates the core mechanics of the game, including pilot movement, Titan summoning, and team-based scoring. The match concludes with a post-game breakdown of the performance scores and overall statistics. 📖 Chapters: 0:00:00 - 0:02:15 - Initial Titan Deployment and Pilot Skirmishes 0:02:15 - 0:04:30 - Pilot Mobility and Close-Quarters Combat 0:04:30 - 0:06:45 - Heavy Minigun Tactics with the Legion Titan 0:06:45 - 0:09:00 - Extended Pilot Gunplay and Grapple Mechanics 0:09:00 - 0:11:15 - Advanced Titan Combat and Core Ability Usage 0:11:15 - 0:13:21 - Final Match Engagements and Post-Game Statistics
Solo cash cup
This Fortnite gameplay video showcases multiple matches during a Solo Cash Cup tournament, alongside a detailed look at the Ninja Icon Series skin in the Item Shop. Viewers will see tactical looting strategies at landmarks like Lockie's Lighthouse and Lazy Lake, high-speed building maneuvers, and intense close-quarters combat. The video demonstrates various weapon proficiencies including pistols, shotguns, and rocket launchers while navigating diverse terrain and engaging in complex build battles against competitive opponents. 📖 Chapters: 0:00:00 - 0:01:54 - First match highlights including exploration of the E.G.O. Science Station and a close-quarters build fight. 0:01:54 - 0:04:21 - Transition through tournament menus and an in-depth showcase of the Ninja Icon Series outfit and emote in the Item Shop. 0:04:21 - 0:07:05 - Beginning of the second match with a landing at Lockie's Lighthouse and initial resource gathering. 0:07:05 - 0:10:17 - Combat encounter at Homely Hills followed by a prolonged, high-ground build battle at Pleasant Park. 0:10:17 - 0:12:30 - Final match segments showing gameplay near Lazy Lake and the concluding skirmish in a residential building.
High-Tier Gameplay: Agency Infiltration and Build Battle Mastery
This comprehensive video showcases several matches of Fortnite gameplay during Chapter 2, Season 2. Viewers will observe a range of playstyles, beginning with a successful infiltration of the Agency vault to secure mythic-tier weapons like Midas' Drum Gun. The footage transitions through various Battle Royale matches, highlighting strategic positioning in bushes and intense build fights around key locations such as Frenzy Farm. The middle portion of the video features a deep dive into Creative Mode, demonstrating skill-based Box PVP and large-scale Red vs Blue scrims where high-speed building and editing are on full display. The final segments cover competitive Arena matches, concluding with rapid-paced combat encounters at The Rig and the Agency. Throughout the duration, the content provides a thorough look at weapon variety, building mechanics, and the social atmosphere of a team lobby. 📖 Chapters: 0:00:00 - 0:02:08 - Agency Vault Looting and High-Tier Item Acquisition 0:02:08 - 0:04:59 - Strategic Positioning and Monitoring Opponent Chat 0:04:59 - 0:06:05 - External Agency Combat and Player Elimination 0:06:05 - 0:07:38 - Spectating Opponents and Transitioning to New Match 0:07:38 - 0:08:45 - Spawn Island Activities and Battle Bus Deployment 0:08:45 - 0:10:10 - Landing at Landmark and Establishing Initial Loot 0:10:10 - 0:11:53 - Agency Infiltration Tactics and Cardboard Box Stealth 0:11:53 - 0:13:00 - Intense Close-Quarters Combat Inside Agency Structures 0:13:00 - 0:14:42 - Spectating Mid-Game Build Battles and Lobby Transitions 0:14:42 - 0:16:35 - Landing at Red Steel Bridge for Looting and Fishing 0:16:35 - 0:17:53 - Vertical Build Fight Engagement near Frenzy Farm 0:17:53 - 0:19:33 - Lobby Socialization and Cosmetic Item Shop Review 0:19:33 - 0:21:14 - Red Steel Bridge Tactical Re-run and Early Looting 0:21:14 - 0:23:31 - Creative Mode Navigation and Custom Map Loading 0:23:31 - 0:25:12 - Box PVP Competitive Rounds and Build Editing Drills 0:25:12 - 0:27:30 - Red vs Blue Scrims: Weapon Selection and Initial Skirmishes 0:27:30 - 0:31:20 - High-Intensity Scrimmage with Large-Scale Build Fighting 0:31:20 - 0:33:43 - Competitive Arena Match Start and Deployment to The Rig 0:33:43 - 0:34:45 - Final Combat Encounters at The Rig and The Agency
Fortnite Battle Royal -brothers music in bakground don't copyright please
The video provides a comprehensive showcase of high-level Fortnite gameplay across various modes. Viewers will see extensive footage from custom Creative mode sessions, focusing on technical 'box fights' and building maneuvers characterized by rapid edits and precise shotgun play. The content also features several standard Battle Royale matches, demonstrating efficient looting paths in locations like Pleasant Park and Frenzy Farm, as well as mid-game skirmishes and long-range sniping. Throughout the full duration, the video highlights competitive strategies, building techniques, and combat prowess, often synced to a fast-paced musical backdrop. 📖 Chapters: 0:00:00 - 0:01:28 - Lobby Navigation and Party Organization 0:01:28 - 0:02:56 - Loading Sequence for Creative Mode Session 0:02:56 - 0:04:33 - High-Speed Box Fight Mechanics in Custom Arena 0:04:33 - 0:05:07 - In-Game Menu Interaction and Settings Check 0:05:07 - 0:07:30 - Advanced Combat Practice with Varied Weaponry 0:07:30 - 0:09:48 - Long-Range Sniping Demonstrations in Creative Mode 0:09:48 - 0:12:25 - Technical Building and Rapid Edit Skirmishes 0:12:25 - 0:13:43 - Transition to Battle Royale: Pleasant Park Drop 0:13:43 - 0:15:16 - Early Game Looting and Initial Combat Encounters 0:15:16 - 0:16:21 - Return to Creative Mode for Intensive Box Fighting 0:16:21 - 0:18:43 - Mastery of Edit-Heavy Close Quarters Combat 0:18:43 - 0:20:41 - Final Combat Rounds and Arena Eliminations 0:20:41 - 0:21:17 - Lobby Return and Item Shop Browsing
Mastering Fortnite Sniping and Building Edits
The video provides a comprehensive look at a high-level Fortnite session, starting with a standard Solo match and transitioning into intense Creative mode 1v1s. Viewers will see gameplay begin at Frenzy Farm, where the character focuses on harvesting materials and completing local challenges. The early game moves into tactical mid-game positioning with long-range heavy sniper rifle shots. After a narrow defeat placing 11th, the content shifts to the lobby and then into Creative mode. The remainder of the video demonstrates advanced building and editing techniques during various 1v1 encounters in custom-built arenas, highlighting rapid wall placements, precise edits, and close-quarters combat skill. 📖 Chapters: 0:00:00 - 0:02:15 - Initial resource gathering and early combat at Frenzy Farm 0:02:15 - 0:04:30 - Tactical long-range sniper duel and final engagement in Solo mode 0:04:30 - 0:07:45 - Transition through the lobby into the Creative mode hub 0:07:45 - 0:10:30 - High-intensity 1v1 building battles in custom arenas 0:10:30 - 0:13:15 - Consecutive rounds of close-quarters box fighting and edits 0:13:15 - 0:15:46 - Final 1v1 matches followed by locker and item shop navigation

From The Agency to The Rig: A Complete Fortnite Compilation
The video provides an extensive compilation of Fortnite gameplay, featuring numerous matches across various locations on the Chapter 2 map. Viewers will see the player explore iconic points of interest such as The Agency, The Rig, The Yacht, and The Grotto while engaging in combat with henchmen, boss NPCs like Midas, and other human opponents. The content also showcases significant time spent in Creative mode, demonstrating advanced building and editing skills in 1v1 box fight scenarios. Throughout the duration, gameplay demonstrates looting strategies, weapon mastery with assault rifles and shotguns, and the use of season-specific mechanics like phone booth disguises and navigating vault access points. 📖 Chapters: 00:00:00 - 00:02:15 - Early match gameplay at The Agency and boss encounters 00:02:15 - 00:04:40 - Match sessions at Weeping Woods including looting and early combat 00:04:40 - 00:07:07 - Matchmaking transitions and lobby menu interactions 00:07:07 - 00:09:16 - Exploration and combat at The Grotto and surrounding areas 00:09:16 - 00:11:27 - High-action gameplay near Misty Meadows featuring aquatic combat 00:11:27 - 00:13:31 - Lobby management, battle pass progress, and item shop overview 00:13:31 - 00:15:58 - Creative mode sessions focusing on 1v1 building and combat 00:15:58 - 00:18:21 - Demonstration of advanced building and editing techniques 00:18:21 - 00:20:25 - Solo battle royale match deployment and initial looting 00:20:25 - 00:21:54 - Engaging henchmen at The Agency for high-tier equipment 00:21:54 - 00:23:31 - Navigating and fighting at The Rig map location 00:23:31 - 00:25:16 - Match transitions and loading screen intervals 00:25:16 - 00:26:37 - Gameplay at The Yacht featuring disguise mechanics 00:26:37 - 00:28:05 - Positioning and combat strategies at Slurpy Swamp 00:28:05 - 00:29:55 - Continued resource gathering and combat at Slurpy Swamp 00:29:55 - 00:31:13 - Lobby interactions and matchmaking between game sessions 00:31:13 - 00:33:01 - Efficient looting showcase at The Rig 00:33:01 - 00:34:55 - Combat sequences at The Agency followed by lobby downtime 00:34:55 - 00:36:38 - Intense combat at The Rig and securing vault keycards 00:36:38 - 00:38:37 - Box PvP matches in Creative mode with emphasis on speed 00:38:37 - 00:41:54 - Extended Creative mode highlights and technical edits 00:41:54 - 00:43:40 - Final gameplay clips and match conclusions
Fortnite Battle Royal
We begin with intense late-game action in a standard battle royale match, where sophisticated building and editing techniques are used to navigate the final storm circles. The player engages in multiple high-stakes build battles, utilizing high ground advantage and rapid structural manipulation to secure eliminations before narrowly finishing in second place. Transitions follow through the game menus and locker system, showing the customization of harvesting tools and character outfits. The focus then shifts to specialized creative maps designed for training and warm-ups. A large portion of the analysis covers 'Red vs Blue 2.0', a fast-paced team combat mode that emphasizes quick reactions and close-quarters gunplay. The final segments showcase high-intensity 1v1 build fights in a custom arena, highlighting exceptional mechanical prowess through complex piece control, fluid structural edits, and precise aim with a variety of weaponry, including pump shotguns and assault rifles. High-intensity Fortnite Creative mode gameplay featuring advanced box fighting and zone wars. Players engage in rapid-fire build battles, showcasing complex editing techniques and precise piece control to gain tactical advantages over opponents. The action takes place in a custom-built arena with various weapon loadouts including pump shotguns and assault rifles. Throughout the session, the gameplay highlights high-level mechanical skills, effective use of the grappler for positioning, and strategic defensive maneuvers during intense close-quarters skirmishes. The session concludes with players returning to the main lobby interface to manage party settings. Chapters: 0:00:00 - Final circle build battle in standard Battle Royale 0:05:45 - Navigating game menus and character customization 0:07:40 - Entering Red vs Blue 2.0 creative match 0:10:00 - Fast-paced team combat and continuous eliminations 0:12:30 - Demonstrating advanced building and editing mechanics 0:15:20 - Engaging in high-intensity build fights in practice arena 0:18:10 - Mechanical skill showcase through rapid structural manipulation 0:00:00 - Initial box fight skirmishes in the creative arena 0:04:30 - Demonstration of advanced building and rapid editing 0:09:00 - Vertical build battles and high-ground retake maneuvers 0:13:30 - Intense 1v1 combat with a focus on piece control 0:18:00 - Transition to fast-paced Zone Wars style rotations 0:22:30 - Tactical grappler usage during mid-air build fights 0:27:00 - High elimination streaks in the central hub area 0:31:30 - Final round of competitive creative skirmishing 0:35:45 - Match conclusion and return to main game lobby
How to Complete Tntina's Trial Challenges in Fortnite
This video features gameplay from Fortnite Chapter 2, Season 2, specifically focusing on completing various challenges associated with Tntina's Trial. Viewers will see gameplay that demonstrates unique mechanics like rocket riding and boat traversal to move across the map. The content covers looting strategies, weapon upgrades, and combat encounters at iconic locations such as Retail Row, Frenzy Farm, and Slurpy Swamp. The video highlights several eliminations using snipers and explosives, culminating in an intense build fight for a Solo Victory Royale. Finally, the content demonstrates a review of match performance statistics and navigation through the game's lobby menu interface. 📖 Chapters: 0:00:00 - 0:01:13 - Initial jump from the Battle Bus and early map traversal using a rocket 0:01:13 - 0:03:26 - Looting near Retail Row and utilizing a boat to move through river systems 0:03:26 - 0:05:40 - Engagement in a mid-game combat encounter at Frenzy Farm 0:05:40 - 0:07:22 - Return to the lobby menu and viewing in-game cinematic content 0:07:22 - 0:10:00 - Beginning of a new match with a landing near Slurpy Swamp and looting 0:10:00 - 0:13:00 - Exploration and completion of Shadow Safe House local challenges 0:13:00 - 0:15:30 - Demonstration of long-range sniper skills and completion of explosive weapon challenges 0:15:30 - 0:17:47 - End-game building battles leading to a Solo Victory Royale 0:17:47 - 0:20:04 - Final match statistics review and navigation of the game shop and locker
Fortnite: That's the main excuse for soccer skins!
The video presents a comprehensive look at various Fortnite gameplay scenarios, beginning with a duo utilizing a helicopter for mobility and combat advantages during ground skirmishes. After a survival phase involving navigating the storm and close-quarters combat at the Sweaty Sands location, the content transitions to high-level technical skills in a creative-style arena. The second half of the footage focuses on intense build battles characterized by rapid-fire editing, strategic height control, and precision marksmanship with both snipers and shotguns, illustrating the complex mechanical depth of competitive play. 📖 Chapters: 0:00:00 - 0:02:05 - Duo gameplay featuring helicopter combat and initial team fights 0:02:05 - 0:04:03 - Mid-game movement, storm survival, and a final skirmish in Sweaty Sands 0:04:03 - 0:06:00 - Transition to Creative mode featuring high-speed build battles and technical edits 0:06:00 - 0:08:00 - Extended 1v1 practice with a focus on height advantage and precision shooting 0:08:00 - 0:09:55 - Final rounds of intensive building and concluding gameplay moments Chapters: 0:00:00 - 0:01:20 - Chopper combat and building engagement 0:01:20 - 0:02:05 - Navigating the storm by helicopter 0:02:05 - 0:03:05 - Healing up and gathering materials 0:03:05 - 0:04:02 - Final battle in Sweaty Sands 0:04:02 - 0:05:45 - Creative mode 1v1 start and initial round 0:05:45 - 0:07:35 - High-ground building edits and shotgun duel 0:07:35 - 0:08:56 - Close-range build fights and clean elimination 0:08:56 - 0:09:56 - Settings optimization and final creative duel
Fortnite Duos - Splitscreen win!
This Fortnite gameplay video provides a comprehensive look at a full match from early-game skirmishes to a final Victory Royale. The content covers various essential gameplay elements, starting with immediate combat and looting at Frenzy Farm. Viewers will see techniques for rapid resource gathering, the use of upgrade stations to improve weapon rarity, and map rotation strategies using launch pads. The mid-to-late game sections demonstrate high-level building skills, strategic positioning for long-range sniper engagements, and tactical decision-making during the final closing circles. The video concludes with an intense build battle leading to a successful Victory Royale. Chapters: 0:00:00 - 0:01:40 - Early game combat and looting at Frenzy Farm 0:01:40 - 0:02:30 - Launch pad traversal and map rotation 0:02:30 - 0:03:15 - Mid-game looting and exploration near Risky Reels 0:03:15 - 0:04:40 - Resource gathering and weapon upgrade station usage 0:04:40 - 0:05:15 - Healing up and reorganizing inventory in safety 0:05:15 - 0:06:55 - Strategic positioning and long-distance engagement attempts 0:06:55 - 0:08:20 - Late-game build battles and precision sniping exchanges 0:08:20 - 0:09:00 - Navigating the final circles with high-ground advantage 0:09:00 - 0:09:55 - Final intense showdown with building and close-range combat 0:09:55 - 0:10:11 - Securing the Victory Royale and match results screen
Koji gets destroyed by me at end of the game
This video showcases competitive Brawlhalla gameplay featuring two distinct ranked 1v1 matches. The content begins with an extended idle period on the main menu before transitioning into the first match. Viewers will see a player using Xull, a high-strength character, competing against Yumiko on a futuristic city-themed stage. This match demonstrates the use of heavy axe and cannon attacks to maintain stage control. The second half of the video features the character Mordex facing off against Koji on a castle-inspired map. This segment highlights fast-paced scythe and gauntlet mechanics, showcasing aggressive combos and edge-guarding techniques. The video concludes with post-match results screens for both games. 📖 Chapters: 0:00:00 - 0:06:18 - Main Menu Idle and Background Audio 0:06:18 - 0:06:40 - Character Selection for First Ranked Match 0:06:40 - 0:06:56 - Pre-Match Warm-up and Loading 0:06:56 - 0:09:00 - Xull vs. Yumiko: Initial Stock Exchanges 0:09:00 - 0:10:34 - Conclusion of First Match and Victory Screen 0:10:34 - 0:11:01 - Character Selection for Second Ranked Match 0:11:01 - 0:12:30 - Mordex vs. Koji: Castle Stage Gameplay 0:12:30 - 0:14:02 - Final Stock Battle and Match Conclusion
High-Stakes Brawlhalla: Mordex vs Azoth Duel
This video showcases high-level Brawlhalla gameplay, specifically a Ranked 1v1 match featuring the legend Mordex. The video demonstrates the initial menu navigation, character selection process, and a full match against an Azoth opponent on a forest-themed stage. Viewers will see various combat techniques including weapon tosses, scythe combos, and platform positioning. The content concludes with a detailed match replay, providing a closer look at the combat mechanics and winning strategies employed throughout the duel. 📖 Chapters: 0:00:00 - 0:01:43 - Menu Navigation and Match Preparation 0:01:43 - 0:03:15 - Ranked Match Start: Initial Exchanges and Map Control 0:03:15 - 0:04:14 - Climax of the Duel and Match Victory 0:04:14 - 0:07:17 - Post-Match Rewards and Comprehensive Replay Analysis Chapters: 0:00:00 - 0:00:25 - Main Menu and Mode Selection 0:00:25 - 0:01:22 - Character Selection Screen 0:01:22 - 0:01:42 - Pre-Match Loading and Lobby 0:01:42 - 0:03:05 - Match Start and First Stock Battle 0:03:05 - 0:04:13 - Final Stock Exchanges and Victory 0:04:13 - 0:04:36 - Post-Match ELO and Rewards Screen 0:04:36 - 0:07:18 - Match Replay and Gameplay Analysis Chapters: 0:00:00 - 0:01:15 - Main menu navigation and matchmaking search 0:01:15 - 0:01:43 - Character selection screen and match loading 0:01:43 - 0:03:05 - Opening combat exchanges and first stock taken 0:03:05 - 0:03:35 - Aggressive aerial combos leading to second stock 0:03:35 - 0:04:13 - Final stock elimination and victory screen 0:04:13 - 0:04:36 - Post-match rewards and ELO progression 0:04:36 - 0:07:18 - Detailed game replay showcasing scythe combos

Grand Theft Auto V - Crazy Story
This video features extensive gameplay from Grand Theft Auto Online, focusing on car showcases and player-versus-player combat. It begins with an overview of player statistics and menus before transitioning into high-speed driving with several luxury and muscle cars, including the Benefactor Krieger, Truffade Thrax, and Declasse Vigero ZX. Viewers will see off-road maneuvers on the beach, car stunts, and navigation of the in-game internet to browse vehicle dealerships. The final portion of the video shifts to tactical combat on a coastal pier, demonstrating weapon proficiency with scoped pistols and heavy snipers featuring thermal optics during a nighttime engagement. 📖 Chapters: 0:00:00 - 0:01:50 - Initial Menu Navigation and Krieger Off-Roading 0:01:50 - 0:04:05 - First-Person Beach Driving and Thrax Request 0:04:05 - 0:06:30 - Truffade Thrax Showcase and Vigero ZX Delivery 0:06:30 - 0:09:15 - Testing the Vigero ZX and Browsing Car Dealerships 0:09:15 - 0:11:20 - Pier Firefight and Scoped Pistol Combat 0:11:20 - 0:13:25 - Tactical Night Sniping and Pier Defense

From Mordex to Volkov: A Brawlhalla Champion's Journey
This video showcases multiple Brawlhalla matches, primarily focusing on one player's perspective across various characters and opponents. Viewers will see a range of gameplay, from quick KOs and aggressive plays to defensive strategies and close-call recoveries. The video cycles through different maps, character selections, and 1v1 and Free-for-All modes, giving a good overview of competitive Brawlhalla gameplay. It captures moments of intense combat, strategic weapon usage, and the satisfaction of victory. 📖 Chapters: 0:00:00 - 0:00:12 - Match Intro and Character Selection 0:00:12 - 0:00:58 - First Match Begins - Mordex vs Diana on Ben 10 Stage 0:00:58 - 0:01:45 - Intense Mid-Game Combat and Weapon Play 0:01:45 - 0:02:56 - Final KOs and Victory Screen for Mordex 0:02:56 - 0:03:28 - Post-Match Rewards and Next Character Selection (Rayman) 0:03:28 - 0:04:38 - Second Match Begins - Rayman vs Mako on Bloomhalla Stage 0:04:38 - 0:05:25 - Rayman's Aggressive Plays and Stage Control 0:05:25 - 0:06:15 - Mako's Defeat and Rayman's Victory 0:06:15 - 0:06:39 - Post-Match Rewards and Next Character Selection (Brynn) 0:06:39 - 0:07:37 - Third Match Begins - Brynn vs Wu Shang on Apocalypse Stage 0:07:37 - 0:08:26 - Strategic Weapon Pickups and Combos 0:08:26 - 0:09:42 - Close Combat and Wu Shang's Victory 0:09:42 - 0:10:03 - Post-Match Rewards and Next Character Selection (Nix) 0:10:03 - 0:10:50 - Fourth Match Begins - Nix vs Artemis on Bloomhalla Stage 0:10:50 - 0:11:21 - Nix's Aggressive Weapon Attacks and Finish 0:11:21 - 0:11:41 - Match End and Character Selection (Volkov) 0:11:41 - 0:12:40 - Fifth Match Begins - Volkov vs Fait on Enchanted Forest Stage 0:12:40 - 0:14:03 - Volkov's Dominant Gameplay and Finish 0:14:03 - 0:14:39 - Final Victory Screen and Match Statistics Chapters: 0:00:00 - 0:03:00 - Mordex takes on Diana in a fast-paced opening match 0:03:00 - 0:06:15 - Rayman utilizes heavy weapons to defeat Mako on the beach stage 0:06:15 - 0:09:45 - Brynn and Wu Shang engage in a tactical duel at the Clock Tower 0:09:45 - 0:11:20 - Nix faces Artemis in a scythe-focused aerial skirmish 0:11:20 - 0:14:04 - Volkov secures a dominant win against Fait in the final arena match
Grand Theft Auto V - 360 Entry/Drifting between limos
The video showcases extensive drifting gameplay in Grand Theft Auto Online, primarily set within the industrial dockyard of Elysian Island. It features two highly customized vehicles: a blue Karin Remus with roof-mounted tires and a teal Annis Elegy Retro Custom. Throughout the duration, the footage demonstrates various drifting techniques, including high-speed cornering around shipping containers, precision maneuvers near port machinery, and tandem-style driving. The content highlights different perspectives, shifting from standard third-person cameras to an immersive first-person cockpit view, while also capturing brief moments of character interaction and menu navigation. 📖 Chapters: 0:00:00 - 0:00:40 - Initial drifting showcase with the blue Remus 0:00:40 - 0:01:40 - Switching to the teal Elegy Retro Custom and port navigation 0:01:40 - 0:02:22 - Aerial donut maneuvers and precision handling tests 0:02:22 - 0:03:36 - Drifting through narrow gaps and trailer park navigation 0:03:36 - 0:03:55 - Player stats check and interaction menu navigation 0:03:55 - 0:04:22 - First-person cockpit drifting showcase at sunset
Tactical Combat and Team Deathmatch Victory in GTA V
The video provides a comprehensive look at diverse gameplay activities within Grand Theft Auto Online. It begins with a character idling at the Los Santos International Airport, demonstrating weapon models and basic movement. Following an initial skirmish and respawn, the gameplay shifts to vehicular combat, featuring a modified van and a Buzzard helicopter engaging targets over the city. The second half of the video is dedicated to a full 'Run and Gun' Team Deathmatch session set in a rainy industrial environment. Viewers will see tactical movement, weapon swapping, interaction menu usage for outfit changes, and a series of firefights culminating in a match victory. 📖 Chapters: 0:00:00 - 0:02:30 - Character Showcase and Airport Skirmish 0:02:30 - 0:05:00 - Respawn Sequence and Vehicular Gameplay 0:05:00 - 0:07:30 - Aviation Combat and Deathmatch Invitation 0:07:30 - 0:10:00 - Team Deathmatch Opening Rounds 0:10:00 - 0:13:00 - Mid-Match Combat and Outfit Customization 0:13:00 - 0:15:07 - Final Firefights and Match Victory

Grand Theft Auto V: Easy chill day...
This comprehensive gameplay video showcases a session in Grand Theft Auto Online, beginning with character selection and transitioning into high-speed vehicle exploration across the Los Santos coastline. Viewers will see various supercars being tested on both asphalt and sandy beach terrain, including a green performance car and a custom purple-and-white vehicle. The latter half of the video shifts focus to intense player-versus-player (PvP) combat centered around a coastal pier. The gameplay demonstrates tactical weapon selection, long-range sniping techniques, and close-quarters firefights, providing a detailed look at both the automotive and combat mechanics of the game. Chapters: 00:00:00 - 00:02:30 - Character Selection and Initial Green Car Drive 00:02:30 - 00:05:15 - Beach Stunts and Cockpit View Exploration 00:05:15 - 00:08:00 - Interaction Menu Management and Pier Scouting 00:08:00 - 00:10:45 - Switching Vehicles and Acceleration Testing 00:10:45 - 00:13:30 - In-game Internet Browsing and Vehicle Logistics 00:13:30 - 00:16:15 - Initial Combat Engagement and Sniping from the Pier 00:16:15 - 00:19:51 - Extended Firefight and Tactical Sniper Showdown
Tactical Rooftop Defense Strategy in GTA Online
This video features extensive GTA Online gameplay focused on tactical combat and territory defense in Los Santos. Viewers will observe a player character dressed as a festive fighter navigating the city on an Oppressor Mk II. The gameplay covers the initial scouting of the map, the recruitment of a large group for a Motorcycle Club, and the execution of a 'Stand Your Ground' event. The latter half of the video demonstrates expert-level rooftop sniping using thermal optics and explosive weaponry to hold off numerous rival players throughout the in-game night cycle. 📖 Chapters: 00:00:00 - 00:00:30 - Initial aerial scouting over the hills 00:00:30 - 00:03:30 - Navigating Los Santos and monitoring player activity 00:03:30 - 00:05:40 - Recruiting prospects for Motorcycle Club work 00:05:40 - 00:07:20 - Initiating the 'Stand Your Ground' event in Downtown 00:07:20 - 00:10:30 - Defensive aerial combat using vehicle-mounted missiles 00:10:30 - 00:15:03 - Rooftop sniping and thermal optics combat mastery

High-Intensity Gunfights and Racing in Sleeping Dogs
The video shows a sequence of high-intensity gameplay moments from Sleeping Dogs. Viewers will see several attempts at an aggressive racing event using a police SUV, followed by a transition into a core story mission. The content covers city traversal, a timed driving challenge, and a prolonged shootout through multiple levels of a hospital, showcasing both cover-based gunplay and cinematic takedowns. 📖 Chapters: 0:00:00 - 0:00:38 - Initial traversal to a race event 0:00:38 - 0:01:56 - First attempt at a police SUV racing event 0:01:56 - 0:03:35 - Second attempt at the race ending in failure 0:03:35 - 0:05:03 - Third attempt at the race with aggressive ramming maneuvers 0:05:03 - 0:06:07 - Safehouse visit and traversal through the city to a taxi stand 0:06:07 - 0:07:44 - Fast travel and timed driving sequence toward the hospital 0:07:44 - 0:08:47 - Cutscene of a hostage situation and initial lobby firefight 0:08:47 - 0:09:43 - Shootout within the hospital corridors and MRI suite 0:09:43 - 0:10:25 - Clearing enemies while advancing toward the elevator 0:10:25 - 0:11:32 - Elevator sabotage sequence and post-elevator combat 0:11:32 - 0:11:50 - Narrative cutscene featuring key characters 0:11:50 - 0:13:19 - Final mission segment repeat showing high-stakes gunplay Chapters: 0:00:00 - 0:00:34 - Stealing a car and initiating the Detour street race 0:00:34 - 0:02:05 - First attempt at the street race in a police SUV 0:02:05 - 0:03:35 - Second race attempt ending in failure 0:03:35 - 0:05:03 - Third attempt and subsequent exit from the race 0:05:03 - 0:06:08 - Navigating the rainy streets from the safehouse 0:06:08 - 0:06:44 - Starting the hospital mission and restarting checkpoint 0:06:44 - 0:07:45 - High-speed taxi ride to the Central Hospital 0:07:45 - 0:08:46 - Arriving at the hospital and starting the lobby shootout 0:08:46 - 0:09:44 - Combat progression through medical wards and corridors 0:09:44 - 10:25 - Clearing the corridor near the elevator zone 10:25 - 11:32 - Elevator ambush and failed attempt at the corridor gunfight 11:32 - 11:49 - Story cutscene explaining Uncle Po's critical condition 11:49 - 13:19 - Final push to the security center to restore hospital power Chapters: 0:00:00 - 0:00:35 - Acquiring a vehicle and initiating the Detour street race 0:00:35 - 0:01:58 - Racing through rainy streets in a police SUV and failing the event 0:01:58 - 0:02:30 - Transitioning from the safehouse to hail a taxi 0:02:30 - 0:03:18 - Arriving at the hospital and engaging in a shootout with 18K triads Chapters: 0:00:00 - 0:00:38 - Navigating the streets and starting the race 0:00:38 - 0:02:02 - First race attempt in the police SUV 0:02:02 - 0:03:35 - Second race attempt and subsequent failure 0:03:35 - 0:05:02 - Third race attempt and quitting the activity 0:05:02 - 0:06:07 - Exploring the harbor and catching a taxi 0:06:07 - 0:07:45 - Beginning the Intensive Care mission and driving to the hospital 0:07:45 - 0:09:33 - Infiltrating the hospital and initiating the lobby shootout 0:09:33 - 0:11:32 - Clearing the MRI room and facing heavy resistance near the elevator 0:11:32 - 0:13:19 - Restarting the segment and pushing toward the security center Chapters: 0:00:00 - 0:02:02 - Race Start and First Attempt 0:02:02 - 0:03:35 - Second Race Attempt and Failure 0:03:35 - 0:05:00 - Third Race Attempt 0:05:00 - 0:06:07 - Exploring Hong Kong Streets 0:06:07 - 0:07:44 - Taxi Drive to Central Hospital 0:07:44 - 0:08:46 - Hospital Lobby Shootout 0:08:46 - 0:10:25 - Clearing Corridors and Reaching the Elevator 0:10:25 - 0:11:32 - Elevator Gunfight and Mission Defeat 0:11:32 - 0:13:19 - Checkpoint Restart and Reaching Uncle Po
Sleeping Dogs: Shaolin Showdown walkthrough
This video provides an extensive gameplay analysis of Sleeping Dogs: Definitive Edition, showcasing a variety of mechanics from start to finish. The footage begins with a detailed look at Legendary Outfits in a clothing shop, highlighting the diverse aesthetic options and gameplay bonuses available. Viewers will then see intense martial arts combat in the rainy street markets of Hong Kong, demonstrating the game's focus on environmental interactions and brutal finishing moves. The middle section covers vehicle customization at a garage and high-speed night driving through the city's neon-lit streets. The final portion of the video is dedicated to an extended 'Shaolin Showdown' mission at a temple, featuring multiple waves of combat against monks that highlight the sophisticated counter-system and advanced striking techniques. 📖 Chapters: 00:00:00 - 00:01:30 - Legendary Outfit Customization and Stat Bonuses 00:01:31 - 00:02:30 - Martial Arts Combat in the Night Market 00:02:31 - 00:03:05 - Vehicle Selection and Paint Customization 00:03:06 - 00:04:10 - High-Speed Driving Through Neon Hong Kong 00:04:11 - 00:06:45 - Temple Arrival and Initial Shaolin Combat 00:06:46 - 00:08:30 - Advanced Counter-Attacks and Combo Chains 00:08:31 - 00:10:45 - Map Navigation and Objective Tracking 00:10:46 - 00:13:00 - Extended Courtyard Battle with Multiple Monks 00:13:01 - 00:14:59 - Final Combat Wave and Finishing Techniques Chapters: 0:00:00 - 0:01:30 - Legendary outfit customization inside the clothing store 0:01:30 - 0:02:29 - Street brawl against local thugs in the rain 0:02:29 - 0:03:05 - Navigating to the parking garage and selecting a vehicle 0:03:05 - 0:04:15 - Driving through the rainy city streets to the temple 0:04:15 - 0:08:35 - First attempt at the Shaolin Showdown martial arts fight 0:08:35 - 0:10:48 - Menu navigation, map viewing, and resetting the mission 0:10:48 - 0:14:59 - Second attempt at the Shaolin Showdown to defeat all monks
Brawlhalla - Practice Round (No sound)
This video features competitive gameplay from the platform fighter Brawlhalla, showcasing two full matches between the legends Plague Knight and Val. The first segment covers a battle on a sprawling sky-map where legends utilize various gadgets and signature moves to control the stage. After a transition through the character selection and loading screens, the second half of the video presents a rematch on a smaller, floating platform. Viewers will see diverse combat strategies including edge-guarding, aerial combos, and the effective use of weapons like gauntlets, swords, and hammers to achieve knockouts. 📖 Chapters: 0:00:00 - 0:00:39 - First match between Plague Knight and Val on a sky-themed stage 0:00:39 - 0:01:13 - Post-match rewards, menu navigation, and legend selection 0:01:13 - 0:02:02 - Start of the second match and lead-up to the first knockout 0:02:02 - 0:02:45 - Intense mid-match exchanges and high-speed aerial maneuvers 0:02:45 - 0:03:00 - Final combat sequences and match conclusion

Injustice 2 - Epic fight scene
This video provides a comprehensive showcase of Harley Quinn's combat mechanics and gameplay in Injustice 2. The content covers a series of full matches where Harley Quinn faces various iconic DC characters, including Poison Ivy, Green Arrow, Black Adam, Batman, Deadshot, and Blue Beetle. Throughout the video, gameplay demonstrates Harley Quinn's agile fighting style, featuring complex combo strings, meter-burn special moves, and interactive stage transitions. Viewers will see character-specific intro dialogues, intense round-by-round action in diverse arenas like Arkham Asylum and the Fortress of Solitude, and final victory sequences for each match. Chapters: 0:00:00 - 0:00:13 - Post-match rewards and world map navigation 0:00:13 - 0:01:53 - Harley Quinn vs. Poison Ivy: Combat and victory 0:01:53 - 0:02:15 - Loading screen and control layout overview 0:02:15 - 0:03:45 - Harley Quinn vs. Green Arrow: High-speed combo showcase 0:03:45 - 0:04:05 - Menu transition and opponent selection 0:04:05 - 0:05:15 - Harley Quinn vs. Black Adam: Arena combat and meter-burn moves 0:05:15 - 0:05:30 - Transition with gameplay tips and loading 0:05:30 - 0:06:35 - Harley Quinn vs. Batman: Stage transitions and environmental interaction 0:06:35 - 0:06:50 - Post-fight rewards and next match setup 0:06:50 - 0:08:15 - Harley Quinn vs. Deadshot: Long-range vs. close-quarters battle 0:08:15 - 0:08:45 - Final match preparation and selection 0:08:45 - 0:09:55 - Harley Quinn vs. Blue Beetle: Technical combo execution 0:09:55 - 0:10:30 - Final rewards summary and concluding cinematic

JUMP FORCE - Beating the final boss Prometheus Without Special Moves
This video showcases multiple attempts to defeat the final boss, Prometheus, in JUMP FORCE, with the specific challenge of not using any special moves. The player, controlling Gohan, relies on basic attacks, combos, and awakened abilities. The video highlights the struggles and eventual success of overcoming Prometheus through pure skill and timing, adapting strategies across different rounds. Viewers will see intense combat sequences, dramatic arena changes, and various in-game tips during loading screens as the player perseveres to achieve the unique challenge. 📖 Chapters: 0:00 - 0:06 - Previous Match Results & Rematch Decision 0:06 - 0:14 - Loading Screen: High-Speed Dodges Tip 0:14 - 0:58 - First Fight Attempt (Phase 1) - Gohan vs. Prometheus 0:58 - 1:15 - First Fight Attempt (Phase 2) - Gohan's Defeat 1:15 - 1:30 - Post-Match & Loading Screen: Escape Counters Tip 1:30 - 2:00 - Second Fight Attempt (Phase 1) - Gohan's Aggression 2:00 - 2:45 - Second Fight Attempt (Phase 2) - Gohan's Defeat Again 2:45 - 3:00 - Post-Match & Loading Screen: High-Speed Dodges Tip 3:00 - 3:19 - Third Fight Attempt - Quick Defeat 3:19 - 3:33 - Post-Match & Loading Screen: Perfect Smashes Tip 3:33 - 4:05 - Fourth Fight Attempt (Phase 1) - Strong Start 4:05 - 4:40 - Fourth Fight Attempt (Phase 2) - Prometheus Defeated! 4:40 - 5:00 - Successful Match Results & Video End
GTA Online - How to dodge a rocket with a Scramjet
The video showcases high-action gameplay from Grand Theft Auto V set during a winter snow event in Los Santos. The footage begins with a tactical overview of the map before the player calls for a Scramjet vehicle. Once the vehicle arrives, the gameplay demonstrates the car's unique rocket boost capabilities, allowing it to soar over city skyscrapers and perform aerial maneuvers. The latter half of the video transitions to ground-based combat, where the player uses an assault rifle and a sniper rifle to engage an opponent near a residential complex, highlighting urban combat tactics and positioning in snowy conditions. 📖 Chapters: 0:00:00 - 0:00:15 - Map Navigation and Tactical Setup 0:00:15 - 0:00:35 - Vehicle Request and Arrival of the Scramjet 0:00:35 - 0:00:55 - Aerial Boost Maneuvers Over Snowy Los Santos 0:00:55 - 0:01:20 - Transition to Ground Combat and Player Communication 0:01:20 - 0:01:44 - Urban Shootout and Sniper Engagement
GTA Online - Perico Heist Vault
This video showcases a high-stakes execution of the Diamond Casino Heist in Grand Theft Auto Online. Viewers will see the infiltration process through the casino's secure areas, the simultaneous keycard swipe to enter the vault, and the subsequent looting phase. The gameplay demonstrates efficient fingerprint hacking on security keypads and the careful cutting of valuable artwork. Following the theft, the content follows the crew's escape through the staff entrance, leading into intense firefights with security guards and police forces. The final segment of the video highlights a tactical retreat as the team evades a 5-star wanted level, eventually securing a police helicopter to fly across Los Santos and deliver the loot to the buyer, concluding the mission successfully. Chapters: 00:00:00 - 00:00:53 - Initial Infiltration and Mantrap Entry 00:00:53 - 00:02:03 - Opening the Vault and First Keypad Hack 00:02:03 - 00:03:10 - Artwork Collection and Secondary Security Bypass 00:03:10 - 00:04:45 - Final Looting Phase and Vault Exit Coordination 00:04:45 - 00:06:05 - Stealthy Maneuvers through Maintenance Tunnels 00:06:05 - 00:07:24 - Escaping the Loading Bay and Armed Resistance 00:07:24 - 00:09:05 - Navigating Casino Grounds Under Police Fire 00:09:05 - 00:10:55 - High-Speed Vehicle Escape and Rooftop Access 00:10:55 - 00:13:40 - Aerial Evasion and Successful Loot Delivery

Sleeping Dogs: Definitive Edition (Big Smile Lee) - Final Mission
This video captures an intense gameplay walkthrough of a martial arts-themed action-adventure game, focusing on a character's journey through dangerous challenges. Viewers will see the protagonist navigate a tropical, rocky island, engage in various hand-to-hand combat scenarios against multiple opponents, and utilize environmental elements to their advantage. The narrative includes the character being poisoned, seeking and finding an antidote, participating in brutal fighting tournaments with unique environmental hazards like dropping spiked ceilings and grinding gears, and ultimately confronting a powerful 'Tournament Master'. The video showcases fluid combat mechanics, environmental interaction, and key story progression points, culminating in a dramatic final showdown during a rainstorm. 📖 Chapters: 0:00:00 - 0:00:31 - Initial Movement and Dialogue with Little Fu 0:00:31 - 0:01:05 - Beach Ambush and Combat Sequence 0:01:05 - 0:01:43 - Exploring the Island and Finding a Fire Opal Statue 0:01:43 - 0:02:15 - Continuing Through the Rocky Path, More Combat 0:02:15 - 0:03:44 - Formal Beach Fight Against an Opponent ('Defeat George') 0:03:44 - 0:04:10 - Post-Fight Conversation and New Objective 0:04:10 - 0:05:08 - Boating to Retrieve the Antidote 0:05:08 - 0:05:39 - Collecting the Antidote and Finding Another Fire Opal 0:05:39 - 0:06:17 - Journey to the Main Arena 0:06:17 - 0:07:29 - Introduction to the Spiked Ceiling Arena Challenge 0:07:29 - 0:09:16 - Arena Fight against Multiple Opponents (Failed Attempt) 0:09:16 - 0:10:28 - Arena Fight against Multiple Opponents (Successful Attempt) 0:10:28 - 0:11:53 - Chasing the Tournament Master Through the Jungle 0:11:53 - 0:13:30 - Boss Battle Against the Tournament Master 0:13:30 - 0:14:59 - Defeating the Tournament Master and Final Cutscene Chapters: 0:00:00 - 0:00:30 - Meeting with Little Fu on the beach 0:00:30 - 0:01:05 - Surviving the beach ambush 0:01:05 - 0:02:15 - Navigating the island path to find the Fire Opal Statue 0:02:15 - 0:03:45 - Arena battle against George 0:03:45 - 0:04:10 - Recovering and planning with an ally 0:04:10 - 0:05:03 - Navigating the boat to the next island shore 0:05:03 - 0:05:37 - Retrieving the antidote 0:05:37 - 0:06:17 - Returning to the main temple area 0:06:17 - 0:08:26 - Entering the spiked ceiling arena and discussing rules 0:08:26 - 0:09:16 - First attempt at the spiked ceiling arena fight 0:09:16 - 10:28 - Successful run of the spiked ceiling arena fight 10:28 - 11:53 - Chasing the escaping Tournament Master through the rain 11:53 - 15:00 - Final showdown and defeating the Tournament Master
Sleeping Dogs: Meet the New Boss walkthrough
This comprehensive gameplay analysis of Sleeping Dogs features a silver-skinned protagonist engaging in various high-intensity activities across a neon-lit Hong Kong. The video showcases a blend of tactical gunplay in clubs and streets, cinematic vehicle pursuits, agile urban parkour, and brutal hand-to-hand combat systems. Viewers will see the protagonist confront criminal thugs, engage in high-speed car and motorcycle chases, and navigate the social hierarchy of the Triads through key story cutscenes. The footage also demonstrates open-world elements such as vehicle customization in garages and free-roam driving, culminating in an explosive mission finale involving a motorcycle shootout and the destruction of enemy assets. 📖 Chapters: 00:00:00 - 00:00:43 - Gulag Club Skirmish and Street Ambush 00:00:43 - 00:02:30 - Tactical Street Gunfight with Thugs 00:02:30 - 00:04:55 - Cinematic High-Speed Car Chase and Shootout 00:04:55 - 00:06:07 - Agile Foot Pursuit through Hong Kong Backstreets 00:06:07 - 00:07:25 - Hand-to-Hand Combat and Environmental Finishers 00:07:25 - 00:08:16 - Evading Police and Meeting Madam Red Pole 00:08:16 - 00:11:47 - Free-Roam Driving and Vehicle Customization Showcase 00:11:47 - 00:13:46 - Meeting Naz and Industrial Zone Infiltration 00:13:46 - 00:15:01 - Explosive Motorcycle Pursuit and Mission Conclusion

Sasuke, Hancock, Trunks vs Blackbeard, Asta, Aizen (Jump Force)
This video features high-intensity gameplay from Jump Force, showcasing characters like Boa Hancock and Trunks in a series of fast-paced arena battles. The footage demonstrates various combat mechanics, including standard combos, tag-team assists, and cinematic ultimate abilities. Viewers will observe Boa Hancock utilizing her petrification-based attacks against opponents like Aizen and Blackbeard, followed by Trunks showcasing his sword-fighting prowess and energy-based blasts against Asta. The match concludes with a victory screen and character experience progression, all set within a detailed volcanic environment. 📖 Chapters: 0:00:00 - 0:00:05 - Channel introduction for Eli the Goat 0:00:05 - 0:01:15 - Boa Hancock vs. Aizen & Blackbeard - Round 1 highlights featuring the Perfume Femur ultimate 0:01:15 - 0:01:42 - Round 2 begins with Boa Hancock's offensive strategy and special moves 0:01:42 - 0:02:45 - Trunks takes point, demonstrating advanced sword combos and powerful energy finishers 0:02:45 - 0:03:00 - Match conclusion, victory animation, and results screen 0:03:00 - 0:03:17 - Channel outro with links to additional content

Grand Theft Auto Online - Stunt Pier Race
This gameplay video showcases two complete high-speed stunt races in Grand Theft Auto Online. The first segment features a Benefactor Krieger on the 'Pier Race' track, demonstrating intricate maneuvers through specialized stunt tubes and over massive aerial jumps. Following a brief menu transition, the video shifts to the 'In the City' track, where an Ocelot Pariah is used to navigate a complex urban course high above the Los Santos skyline. Viewers will see expert-level stunt driving, precise landings, and the unique challenges presented by custom stunt race tracks from start to finish. 📖 Chapters: 0:00:00 - 0:00:28 - Menu and vehicle selection for the first race 0:00:28 - 0:02:40 - Start of Stunt - Pier Race, Lap 1 0:02:40 - 0:05:39 - Stunt - Pier Race, Lap 2 and finish 0:05:39 - 0:07:22 - Race results, spectating, and voting for the next track 0:07:22 - 0:08:29 - Menu navigation and vehicle selection for the second race 0:08:29 - 0:11:15 - Start of Stunt - In the City race, Lap 1 0:11:15 - 0:14:10 - Stunt - In the City race, Lap 2 progression 0:14:10 - 0:15:47 - Final lap completion and race finish

Grand Theft Auto V - Playing around in Director mode
This gameplay footage from Grand Theft Auto V's Director Mode demonstrates a series of extreme physics-based stunts performed in Los Santos at night. A shirtless character in camouflage pants executes several high-altitude jumps from various structures, showcasing the game's ragdoll physics and impact animations. The sequence begins with a dramatic fall from a tall apartment complex onto a patio. The character recovers and proceeds to jump from a balcony into a nearby parking lot. The final stunt shows a leap over a perimeter fence into the water near a marina. Throughout the video, viewers can observe the effects of gameplay modifiers, specifically moon gravity, which is deactivated as the character swims to and climbs onto a wooden dock to conclude the session. Chapters: 0:00:00 - 0:00:12 - Initial high-altitude skyscraper fall and recovery on a patio 0:00:12 - 0:00:24 - Secondary jump from a terrace ledge into a commercial parking lot 0:00:24 - 0:00:34 - Final leap over a perimeter fence into the marina harbor 0:00:34 - 0:00:46 - Swimming sequence and moon gravity cheat deactivation on the dock

Grand Theft Auto Online - Pulling out the drift cars with friends
This video features an extensive GTA Online gameplay session centered on vehicle mechanics and urban chaos in Los Santos. The content begins with a character observing the environment near Los Santos Customs before a sudden vehicle explosion leads to a respawn. Viewers will then see a period of observation where the character watches intense police activity and frequent explosions caused by other players in the Rockford Hills area. The second half of the video transitions into a showcase of the Annis Remus, demonstrating its drifting capabilities in a synchronized session with another player. Finally, the video covers a customization sequence inside Los Santos Customs, highlighting interior modifications like roll cages and racing seats, followed by a high-speed drifting demonstration through the city streets. Chapters: 00:00:00 - 00:01:10 - Introductory scene near Los Santos Customs 00:01:10 - 00:01:28 - Gameplay demonstrating vehicle explosion and character death 00:01:28 - 00:02:15 - Character respawn and review of in-game phone messages 00:02:15 - 00:05:10 - Observation of street chaos and police activity in Rockford Hills 00:05:10 - 00:06:15 - Passive gameplay observing nearby explosions and traffic flow 00:06:15 - 00:09:55 - Synchronized drifting demonstration featuring the Annis Remus 00:09:55 - 00:11:15 - Vehicle customization session at Los Santos Customs 00:11:15 - 00:12:30 - High-speed urban drifting through city intersections 00:12:30 - 00:12:58 - Final street maneuvers and conclusion of the session

Grand Theft Auto V - Taking the Grotti Itali GTO for a spin
This video features a comprehensive session of Grand Theft Auto V gameplay, highlighting high-end vehicle customization and the seasonal Halloween event. The footage begins with a detailed tour of a three-story executive garage, showcasing a diverse collection of modified supercars and motorcycles. Following this, the gameplay shifts to the streets of Los Santos, characterized by a unique green-tinted sky and a heavy storm indicative of the Halloween event. Viewers will see extended driving sequences through the city, including a successful stunt jump and navigation through busy traffic. The experience concludes with a cinematic encounter at Del Perro Pier, where the character is abducted by a UFO and subsequently wakes up in a remote desert location with a newly unlocked themed item. 📖 Chapters: 0:00:00 - 0:01:38 - Character introduction and entering executive garage 0:01:38 - 0:04:03 - Comprehensive multi-story vehicle garage showcase 0:04:03 - 0:04:30 - Transition from interior garage to city streets 0:04:30 - 0:08:22 - Driving through Los Santos during the Halloween green sky event 0:08:22 - 0:11:55 - City navigation, stunt jump performance, and highway driving 0:11:55 - 0:12:40 - Stop at beachfront shop and interaction with NPC traffic 0:12:40 - 0:14:08 - Arrival at Del Perro Pier and arrival of the UFO 0:14:08 - 0:14:20 - Cinematic UFO abduction sequence 0:14:20 - 0:15:01 - Post-abduction awakening in Sandy Shores with unlocked reward

GTA Online - Hunting with my drift car
This video showcases continuous freestyle drifting in Grand Theft Auto Online, primarily within an industrial port area. The gameplay begins during twilight, featuring a customized drift car navigating roads, tight spaces between shipping containers, and open sections of the port. Initially, the player is engaged in a 'Defend the targets against Sylvester' VIP Work mission, facing active opposition and incurring a police wanted level, which is then removed by calling Lester. Following the mission's successful completion, the player continues to drift, demonstrating vehicle control and skill through various maneuvers like tight turns, figure-eights, and long slides. The environment transitions from dusk to night, with the port lights illuminating the intricate driving path. Throughout the video, on-screen notifications highlight dynamic online session events such as player kills and bounties. The footage occasionally shifts to a first-person perspective from inside the car, emphasizing the driving experience. Towards the end, the player character is seen briefly exiting the vehicle, changing attire to a black suit and hat, and then resuming the elaborate drifting sequence, culminating in a prolonged display of car control within the port. 📖 Chapters: 0:00:00 - Initial Driving & Objective Start 0:00:15 - Engaging Targets & Police Pursuit 0:00:50 - Evading Police with Lester's Help 0:01:15 - Port Area Drifting & Exploration 0:02:15 - Navigating Container Stacks 0:03:15 - Continued Drifting in the Dark 0:04:15 - Mission Completion & Post-Mission Activity 0:05:15 - Persistent Drifting and Player Interactions 0:06:15 - Navigating Tight Spaces 0:07:15 - More Drifting and Evening Transition 0:08:15 - Sustained Drifting & Dynamic Online Events 0:09:17 - Continuous Drifting & Time Progression 0:09:45 - Character Interaction & Resumption of Drifting 0:10:25 - Interior View & Stance Adjustment 0:11:25 - Extended Port Drifting & Waypoint Set 0:12:25 - Final Drifting and Character Change

BlackBeard, Luffy, Zoro VS BlackBeard, Luffy, Zoro - Jumpforce
This video showcases high-intensity gameplay from an anime-style fighting game featuring iconic characters from the One Piece series. Viewers will see multiple competitive matches primarily focusing on Marshall D. Teach (Blackbeard), Monkey D. Luffy, and Roronoa Zoro. The content demonstrates a wide array of signature special moves, including Blackbeard's 'Dark Vortex', Luffy's 'Red Hawk' and 'Gear Fourth: Bounce Man' transformation, and Zoro's ultimate 'Three Thousand Worlds' technique. The analysis covers the cinematic character introductions, the flow of multi-round combat, and the execution of complex combos and finishers across different urban-themed arenas. 📖 Chapters: 0:00:00 - 0:00:15 - Channel introduction and cinematic character face-off 0:00:15 - 0:01:16 - Match 1, Round 1: Blackbeard's offensive strategies against Luffy and Zoro 0:01:16 - 0:02:05 - Match 1, Round 2: Zoro's counter-offensive and round victory 0:02:05 - 0:02:30 - Match results and loading transition for the next engagement 0:02:30 - 0:04:13 - Match 2, Round 1: Intense exchanges featuring Luffy's speed and Zoro's sword techniques 0:04:13 - 0:05:00 - Match 2, Round 2: Mid-round combat and tactical character switching 0:05:00 - 0:05:48 - Match 2 Conclusion: Luffy's Gear Fourth transformation and final finishing move 0:05:48 - 0:06:15 - Final match results and channel outro

GTA Online - Sniping them out of their B11 Strikeforce plane
This video showcases intense ground-to-air combat in Grand Theft Auto Online. The gameplay demonstrates a player successfully defending against a B-11 Strikeforce jet using a variety of heavy weaponry. Viewers will see tactical use of the Heavy Sniper, Homing Launcher, and Combat MG as the player tracks the low-flying aircraft through a residential neighborhood. The video culminates in the successful destruction of the hostile jet, highlighting the effectiveness of ground-based anti-air tactics. Chapters: 0:00:00 - 0:00:15 - Initial engagement with Heavy Sniper and Grenade Launcher 0:00:15 - 0:00:35 - Tactical deployment of Homing Launcher missiles 0:00:35 - 0:00:55 - Switching to Combat MG and Sniper for consistent pressure 0:00:55 - 0:01:15 - Repeated missile lock-ons as the jet circles back 0:01:15 - 0:01:27 - Final destruction of the B-11 Strikeforce

GTA Online - RNG and Airport fun
This video showcases a variety of gameplay activities in GTA Online, primarily set at the Los Santos International Airport and within a competitive Team Deathmatch. The content begins with a free-roam segment at the airport, demonstrating weapon idle animations and interactions with other players. Viewers will see an explosive rocket attack followed by a brief vehicular chase in a black van. The gameplay then shifts to aerial combat as a character pilots a Buzzard helicopter over the city. Finally, the video provides a complete look at a Team Deathmatch titled 'Run and Gun Run and Gun,' highlighting intense close-quarters combat, frequent player respawns, outfit changes mid-match, and the eventual victory results screen. Chapters: 0:00:00 - 0:00:47 - Initial character demonstration and weapon inspection at the airport 0:00:47 - 0:03:05 - Player interactions and extended idle periods on the runway 0:03:05 - 0:04:15 - Rocket attack on a player followed by a van excursion and its destruction 0:04:15 - 0:05:39 - Navigation across the airport grounds to board a helicopter 0:05:39 - 0:06:50 - Aerial flight and combat engagement over the Los Santos skyline 0:06:50 - 0:08:31 - City free-roam and transitioning into a Team Deathmatch session 0:08:31 - 0:11:30 - Opening phase of the 'Run and Gun' Team Deathmatch 0:11:30 - 0:15:15 - Concluding combat segments, match victory, and reward screens
Grand Theft Auto Online - Defending the area with an oppressor
This comprehensive gameplay video showcases a high-intensity session in GTA Online, focusing on aerial dominance and tactical rooftop defense. Viewers will see expert navigation using the Oppressor Mk II, including dogfights against large aircraft and other players. The footage covers the management of a Motorcycle Club, specifically the 'Stand Your Ground' mission in Little Seoul. Throughout the latter half, the demonstration emphasizes precision long-range combat using the Heavy Sniper Mk II equipped with thermal optics, providing a clear look at effective defensive positioning and target prioritization in a competitive lobby environment. 📖 Chapters: 0:00:00 - 0:02:30 - Aerial Navigation and Initial Dogfight 0:02:30 - 0:05:15 - City Traversal and Session Player Review 0:05:15 - 0:08:00 - Motorcycle Club Recruitment and Mission Start 0:08:00 - 0:10:45 - High-Speed Defensive Combat in Little Seoul 0:10:45 - 0:13:30 - Rooftop Tactical Defense and Thermal Sniping 0:13:30 - 0:15:59 - Advanced Long-Range Combat and Objective Completion
From Vector to Wu Shang: Masterclass in Character Switching
This video showcases high-level Brawlhalla gameplay across two separate matches. The first match features the robotic character Vector engaging in a intense battle against a Thor crossover character known as The Undertaker. Viewers will observe the strategic use of the Rocket Lance and Bow, focusing on air control and edge-guarding techniques. Following Vector's victory, the content transitions through the post-match rewards and character selection menus, where the player switches to Wu Shang. The second match demonstrates a shift in playstyle to aggressive Gauntlet and Spear combinations, culminating in a rapid first strike against the same opponent. 📖 Chapters: 0:00:00 - 0:00:45 - Initial Skirmish: Vector vs. The Undertaker 0:00:45 - 0:01:28 - Match Conclusion and Victory for Vector 0:01:28 - 0:01:58 - Post-Match Statistics and Rewards Screen 0:01:58 - 0:02:30 - Character Selection and Map Voting 0:02:30 - 0:03:00 - Second Match Start: Wu Shang's Quick First Strike
Escalating Tensions with the LSPD in Los Santos
This gameplay footage from Grand Theft Auto Online depicts a player character dressed in a tactical vest and helmet engaging in hand-to-hand combat with various non-player characters (NPCs) along Vinewood Boulevard. The video demonstrates the game's physical combat mechanics, the reaction of the surrounding environment, and the escalation of police presence following an assault on a law enforcement officer. The sequence concludes with the character seeking cover in a semi-enclosed hallway to evade the responding police units while a two-star wanted level is active. 📖 Chapters: 0:00:00 - 0:00:15 - Initial physical altercations with pedestrians on the sidewalk 0:00:15 - 0:00:30 - Continued sidewalk brawling as police sirens begin to blare in the background 0:00:30 - 0:00:45 - Direct assault on a responding police officer and gaining a wanted level 0:00:45 - 0:01:00 - Character retreats into a building hallway to evade law enforcement
Dio,Kaguya, Kurapika VS Sauske,Zoro and Shishio
This video showcases high-paced gameplay from the fighting game Jump Force, featuring a 3v3 team battle. Viewers will see characters like Zoro from One Piece, Sasuke from Naruto, and Shishio from Rurouni Kenshin face off against Kaguya, Dio, and Kurapika. The footage highlights various combo strings, character switches, and cinematic ultimate abilities. Key moments include Sasuke's Susanoo-enhanced attacks, Kaguya's massive arena-clearing explosions, Dio's iconic 'The World' time-stop with the road roller, and Shishio's relentless fire-based techniques. The analysis covers the entire match across two rounds, concluding with a victory for Player 1 and the final win screen. Chapters: 0:00:00 - 0:00:05 - Channel Introduction 0:00:05 - 0:00:30 - Round 1 Start: Zoro vs. Kaguya 0:00:30 - 0:01:01 - Sasuke Enters the Battle and Kaguya's Ultimate Attack 0:01:01 - 0:01:39 - Combat Against Dio and Round 1 Conclusion 0:01:39 - 0:02:17 - Round 2: Sasuke vs. Kurapika Combos 0:02:17 - 0:02:35 - Sasuke's Ultimate Awakening Ability 0:02:35 - 0:03:01 - Makoto Shishio vs. Kaguya Combat 0:03:01 - 0:03:21 - Dio's Time-Stop and Road Roller Ultimate Move 0:03:21 - 0:04:05 - Shishio's Flame-Based Offensive Chains 0:04:05 - 0:04:33 - Match Climax and Final Knockout 0:04:33 - 0:04:42 - Victory Screen and Team Pose 0:04:42 - 0:04:59 - Channel Outro and Recommendations
Arcadia and Onyx Showcase Powerful Team Synergy
This video showcases a fast-paced 2v2 Brawlhalla match on the Florence-themed map. Viewers will see Arcadia and Onyx (Red Team) facing off against Jiro and Tezca (Blue Team). The gameplay demonstrates various weapon combos, edge-guarding techniques, and strategic use of environmental platforms. Mid-match, a disconnection occurs for the Blue Team, leading to an AI takeover, while the Red Team maintains dominance. The video concludes with a decisive victory for the Red Team, highlighted by a series of powerful knockouts and a final score summary. 📖 Chapters: 0:00:00 - 0:00:15 - Initial 2v2 Engagement and Combat Setup 0:00:15 - 0:00:30 - Opponent Disconnection and Adjusted Battle Flow 0:00:30 - 0:00:45 - Red Team Aggression and Mid-Match Pressure 0:00:45 - 0:00:54 - Final Knockout Sequence and Match Conclusion 0:00:54 - 0:00:59 - Match Results and Statistical Breakdown

Zoro,Kakashi,Dio VS Frieza,Aizen and Dio
This video features high-intensity gameplay of the anime crossover fighting game, Jump Force. Viewers will observe multiple rounds of combat featuring iconic characters such as Roronoa Zoro, Kakashi Hatake, Dio Brando, Frieza, and Sosuke Aizen. The footage demonstrates various combos, ultimate abilities like Dio's 'The World' and 'Road Roller', and the strategic use of assist characters. The video includes a full match and a complete rematch, showcasing both victories and defeats for the featured team, ultimately concluding with a hard-fought win. Chapters: 00:00:00 - 00:00:28 - Intro and Character Intros 00:00:29 - 00:01:25 - First Match: Round 1 - Zoro's Initial Offensive 00:01:26 - 00:03:22 - First Match: Round 2 and Transition to Rematch 00:03:23 - 00:05:27 - Rematch: Rounds 1 and 2 - Back-and-Forth Action 00:05:28 - 00:06:52 - Final Round: The Decisive Victory and Outro

Grand Theft Auto V Deluxo fail/Rng
A comprehensive 20-minute gameplay session of Grand Theft Auto Online featuring diverse activities from freestyle stunts to competitive missions. The video begins with aggressive street driving in a pink Vigilante across snowy Los Santos, involving numerous police chases and high-speed collisions. Following this, the character successfully completes the 'Longest Wheelie Challenge' on a motorcycle, securing a first-place victory on the open highway. The mid-section shows the character utilizing a flying Deluxo and engaging in spontaneous skirmishes near a car showroom. The final half of the video is dedicated to a 'Run and Gun' Team Deathmatch mission set in a snowy arena packed with shipping containers. Viewers will observe tactical gameplay involving a variety of weaponry, including assault rifles, sniper rifles, and RPGs, as the character achieves multiple killstreaks and ultimately wins the match. Chapters: 0:00:00 - 0:04:20 - Vigilante Street Mayhem and Police Chases 0:04:20 - 0:07:25 - Motorcycle Longest Wheelie Challenge Victory 0:07:25 - 0:10:20 - Deluxo Flight and Showroom Skirmishes 0:10:20 - 0:13:40 - Transition to 'Run and Gun' Deathmatch Lobby 0:13:40 - 0:16:30 - Deathmatch Opening and Assault Rifle Firefights 0:16:30 - 0:19:15 - Tactical Sniper Play and Mid-Match Combat 0:19:15 - 0:20:45 - RPG Finale and Match Victory Screens Chapters: 0:00:00 - 0:02:20 - Driving the pink Vigilante through snowy streets during a police chase 0:02:20 - 0:04:48 - Evading police in the vehicle before getting trapped and respawning on foot 0:04:48 - 0:07:38 - Succeeding in the wheelie challenge on a motorcycle, reaching over 6000 feet 0:07:38 - 0:08:43 - Flying a Deluxo during a client job before being shot down 0:08:43 - 0:10:20 - Navigating the city in the flying Deluxo car 0:10:20 - 0:11:43 - Attacking NPCs inside the Premium Deluxe Motorsport showroom 0:11:43 - 0:13:28 - Setting up the custom Run and Gun deathmatch lobby 0:13:28 - 0:18:00 - Competing in the container yard deathmatch and scoring pistol kills 0:18:00 - 0:21:18 - Engaging in combat amidst containers during the snow storm 0:21:18 - 0:23:36 - Securing final kills in the deathmatch to clinch the team victory 0:23:36 - 0:25:00 - Reviewing the match scoreboard and setting up the next lobby
Tactical Snowy Combat in Los Santos
This video showcases high-intensity GTA Online gameplay set in a snowy Los Santos during a winter event. Viewers will see a variety of combat tactics and weapon demonstrations, ranging from long-range precision sniping with a Heavy Sniper Mk II to explosive engagements using Grenade Launchers and Homing Launchers. The gameplay highlights include bridge skirmishes, tactical movement through urban areas, and the effective use of thermal optics to locate and eliminate targets in low-visibility conditions. Throughout the video, the content covers various player-versus-player and player-versus-environment interactions, demonstrating common combat loops and weapon swapping techniques in the game's open-world environment. 📖 Chapters: 0:00:00 - 0:02:15 - Initial Sniping and Bridge Combat 0:02:15 - 0:04:30 - Navigation and Player Profile Identification 0:04:30 - 0:06:45 - Urban Skirmishes with Explosives and Automatic Weapons 0:06:45 - 0:09:15 - Heavy Weaponry Engagements in Open Snow 0:09:15 - 0:11:45 - Advanced Sniping with Thermal Optics 0:11:45 - 0:13:15 - Final Combat Sequences and Session Conclusion
Sleeping Dogs Action: Rainy Hong Kong Races & Hospital Gunfights
This video provides a complete gameplay walkthrough of a mission sequence in Sleeping Dogs, featuring a character using a bronze/gold skin. The content begins with the character navigating the rainy streets of Hong Kong to participate in the 'Detour' street race. Viewers will see two attempts at this high-speed race through city traffic. Following the racing segments, the gameplay demonstrates exploration of the character's apartment before transitioning to a major mission. The final half of the video focuses on an intense sequence at Central Hospital, starting with a taxi ride to the location and escalating into a large-scale shootout. Gameplay covers hand-to-hand combat, cover-based shooting mechanics, and tactical movement through hospital corridors to reach a key target. 📖 Chapters: 0:00:00 - 0:00:38 - City exploration and transit to race starting point 0:00:38 - 0:02:03 - Initial attempt at the 'Detour' street race 0:02:03 - 0:05:03 - Second race attempt and subsequent failed run 0:05:03 - 0:06:08 - Interior exploration of the character's apartment 0:06:08 - 0:07:44 - Commute to Central Hospital via taxi 0:07:44 - 0:10:25 - Hospital lobby shootout and combat sequence 0:10:25 - 0:13:37 - Upper floor gunfight and mission completion
Brawlhalla: Intense 2v2 Competitive Gameplay
This video features extensive gameplay from the popular fighting game Brawlhalla. It showcases several high-energy 2v2 matches across various colorful and dynamic maps, including a stone temple environment and a futuristic floating platform. Viewers will see detailed character interactions, a variety of combat styles, and the strategic use of weapon pickups and signature moves. The footage also covers match transitions, including character selection screens, post-game result displays, and player emote interactions within the game menus. 📖 Chapters: 0:00:00 - 0:01:00 - Initial 2v2 match highlights on a Mayan-themed map 0:01:00 - 0:02:00 - Combat escalation and red team victory in the first match 0:02:00 - 0:03:10 - Match results, menu navigation, and lobby character selection 0:03:10 - 0:04:15 - Second match begins on a sci-fi platform with Artemis and Cross 0:04:15 - 0:05:00 - Intense finish of the second match and final result screen

Ranked 1s full gameplay
This video captures intense 1v1 gameplay in Brawlhalla, showcasing a player's skill across multiple matches. Viewers will see various characters, weapon combos, and strategic maneuvers on different maps. The video begins with Sir Roland vs Xull on the Demon Island map, followed by a rematch with Mordex vs Xull on the same map. It then proceeds to a match between Artemis vs Wu Shang on Twilight Grove, and finally Sidra vs Wu Shang on Demon Island, and Koji vs Zariel on Twilight Grove, with each match being a best of 3 or individual games. The player demonstrates mastery of multiple legends and their unique kits, highlighting precise movements, attack sequences, and tactical decisions leading to victory in most of the shown matches. 📖 Chapters: 0:00:00 - 0:03:10 - Sir Roland vs Xull - Match 1 (Demon Island) 0:03:10 - 0:03:30 - Post-match screen and character selection 0:03:30 - 0:06:05 - Mordex vs Xull - Match 2 (Demon Island) 0:06:05 - 0:06:15 - Post-match screen and character selection 0:06:15 - 0:07:05 - Artemis vs Random CPU characters - Free-for-all warm-up 0:07:05 - 0:09:55 - Artemis vs Wu Shang - Match 3 (Twilight Grove) 0:09:55 - 0:10:12 - Post-match screen and character selection 0:10:12 - 0:11:47 - Sidra vs Wu Shang - Match 4 (Demon Island) 0:11:47 - 0:12:18 - Post-match screen and character selection 0:12:18 - 0:15:00 - Koji vs Zariel - Match 5 (Twilight Grove)
Elite 2v2 Build Battles: Fortnite Creative Arena Highlights
This video showcases high-level competitive Fortnite gameplay in a 'Finest Realistic 2v2' creative arena. The content features multiple rounds of intense build battles, highlighting advanced mechanics such as rapid editing, piece control, and strategic high-ground retakes. Viewers will see various map environments and loadout choices, providing a comprehensive look at tactical 2v2 combat scenarios. The gameplay demonstrates effective communication and coordination between teammates, along with precision shooting and clever use of structures to outmaneuver opponents throughout the entire duration. 📖 Chapters: 0:00:00 - 0:01:21 - Initial lobby preparation, loadout voting, and map selection 0:01:21 - 0:02:12 - Round 1: Intensive building and close-quarters combat in an open field 0:02:12 - 0:03:32 - Round 2: Vertical build fighting and strategic high-ground retention 0:03:32 - 0:04:15 - Round 3: Advanced editing and structural piece control on mountainous terrain 0:04:15 - 0:04:45 - Rounds 4 & 5: Rapid-fire combat sequences and diverse tactical engagements 0:04:45 - 0:05:14 - Final round highlights and concluding gameplay demonstrations
Complete Fortnite Match: Rowdy Acres to Victory
The video provides a complete walkthrough of a Fortnite Duo match, beginning with the pre-match preparations and landing at Rowdy Acres. Gameplay demonstrates detailed looting strategies, resource management, and the use of the reality augment system. The content transitions through various map sectors, including Frenzy Fields, a lush jungle environment, and the Slap N' Gone station. The latter half of the video emphasizes tactical movement and positioning within the snowy mountain region. The match concludes with a high-intensity build battle near Brutal Bastion, where the duo successfully eliminates the remaining opponents to claim a Victory Royale. The final minutes showcase the match statistics and ranking improvements. 📖 Chapters: 00:00:00 - 00:01:15 - Pre-match preparations, battle bus deployment, and landing at Rowdy Acres 00:01:15 - 00:04:30 - Initial looting and resource gathering within the farmstead area 00:04:30 - 00:07:00 - Movement across the plains and strategic reality augment selection 00:07:00 - 00:11:00 - High-speed vehicle traversal and exploration of the jungle biome 00:11:00 - 00:14:15 - Tactical looting at Slap N' Gone and transition to the winter biome 00:14:15 - 00:17:30 - Navigating the Hall of Whispers and established elevated tactical positioning 00:17:30 - 00:20:20 - Final combat engagement near Brutal Bastion and Victory Royale achievement 00:20:20 - 00:21:34 - Post-match statistics display and rank progression review
High-Octane Action in Los Santos: Chopper Combat and Tactical PvP
This comprehensive gameplay analysis follows a character in Grand Theft Auto Online across several high-action scenarios. It begins at Los Santos International Airport with weapon testing and vehicular combat using a customized Speedo van. The content then shifts to aerial maneuvers over the city skyline in a Buzzard Attack Chopper, demonstrating missile engagements. The final and most extensive part of the video features a full 'Run and Gun' Team Deathmatch session, where viewers will see tactical movement, cover-to-cover fire, and precise gunplay during an intense competitive match in rainy conditions. 📖 Chapters: 0:00:00 - 0:01:30 - Initial character stand-off and equipment display at the airport 0:01:30 - 0:03:10 - Equipment management and navigation through the pause menus 0:03:10 - 0:04:15 - Vehicular combat and mine deployment with the Speedo Custom 0:04:15 - 0:05:35 - On-foot traversal and parkour through airport hangars 0:05:35 - 0:07:00 - Aerial combat maneuvers over Los Santos in a Buzzard helicopter 0:07:00 - 0:08:30 - Transitioning to a dedicated 'Run and Gun' Team Deathmatch 0:08:30 - 0:10:45 - Early stage of the deathmatch highlighting initial skirmishes 0:10:45 - 0:13:00 - Mid-match tactical engagements and multiple kill streaks 0:13:00 - 0:15:26 - Final combat sequences leading to the team victory

Grand Theft Auto Online: From Urban Streets to Desert Stunts
This video provides a comprehensive look at various gameplay elements in Grand Theft Auto Online, beginning with an extensive series of loading screen updates detailing new game modes and vehicles. Viewers will observe the process of navigating menus to join new public sessions, managing social features like friends lists, and interacting with the urban environment of Los Santos. The footage demonstrates real-time world interactions, including observing NPC behavior at busy intersections during different times of day. The analysis continues with a transition to the rural Grand Senora Desert, where the gameplay covers Motorcycle Club management, prospect recruitment, and off-road biking. The video concludes with high-speed motorcycle stunts and building infiltration in a desert setting. 📖 Chapters: 0:00:00 - 0:00:40 - Game Initialization and Loading Sequence 0:00:40 - 0:03:58 - Showcase of GTA Online Weekly News and Content Updates 0:03:58 - 0:06:26 - Session Transitions and Social Menu Navigation 0:06:26 - 0:08:50 - Urban Environment Observation and Inventory Management 0:08:50 - 0:11:20 - In-Depth Analysis of NPC Traffic Patterns and Pedestrian Behavior 0:11:20 - 0:12:32 - Map Navigation and Rural Territory Transition 0:12:32 - 0:13:21 - Motorcycle Club Recruitment and Desert Exploration 0:13:21 - 0:13:49 - Off-Road Motorcycle Stunts and Building Entry
Full Snowman Hunt & Outfit Unlock Gameplay
This gameplay video captures a complete session of the limited-time winter event in Grand Theft Auto Online, focusing on the collectible 'Snowmen' hunt. The footage begins with a period of inactivity leading to a session timeout, followed by the complete loading process back into a public session. Once active, the gameplay demonstrates the player utilizing an Oppressor Mk II hoverbike to traverse the snowy map of San Andreas, systematically locating and destroying snowmen. Viewers will see the player navigate through various regions including Vinewood Hills, the Grand Senora Desert, and Paleto Bay. The video also features spontaneous player-vs-player combat encounters and concludes with the destruction of the final snowman, unlocking the exclusive Snowman Outfit reward and providing a final night flight over the snow-covered city. 📖 Chapters: 0:00:00 - 0:04:36 - Initial idle period and session disconnect alert 0:04:36 - 0:11:39 - Detailed loading sequence for joining a new GTA Online session 0:11:39 - 0:12:50 - Session entry and starting the snowman hunt on an Oppressor Mk II 0:12:50 - 0:14:36 - Locating and destroying snowmen 13 and 14 in residential areas 0:14:36 - 0:16:40 - Cross-country flight to destroy snowmen 15 and 16 0:16:40 - 0:18:42 - Aerial navigation through Vinewood Hills for snowmen 17 and 18 0:18:42 - 0:21:50 - Systematic collection of snowmen 19, 20, and 21 across rural zones 0:21:50 - 0:24:55 - Combat encounter with another player and respawn sequence 0:24:55 - 0:27:04 - Final stretch of the hunt, destroying snowmen 23 and 24 0:27:04 - 0:27:51 - Destruction of the 25th snowman and Snowman Outfit unlock 0:27:51 - 0:28:13 - Conclusion and night flight over snowy Los Santos
Sleeping Dogs Gameplay: Urban Traversal and Brutal Brawls
This video provides a comprehensive demonstration of gameplay from Sleeping Dogs: Definitive Edition, focusing on urban traversal and martial arts combat. The footage begins with the protagonist leaving a safehouse and navigating the vibrant, rain-slicked streets of Hong Kong toward a mission objective. Viewers will see various movement mechanics, including parkour and vehicle hijacking, as the character makes their way to a temple complex. The latter half of the video is dedicated to an extensive combat sequence during the 'Shaolin Showdown' mission, highlighting the game's fluid counter-based melee system and the strategic use of environmental objects for cinematic takedowns against multiple waves of opponents. 📖 Chapters: 00:00:00 - 00:00:30 - Intro logos and main menu navigation 00:00:30 - 00:00:48 - Loading screen and gameplay tips 00:00:48 - 00:01:21 - Character safehouse and idle movement demonstration 00:01:21 - 00:01:42 - Exiting the safehouse into the urban environment 00:01:42 - 00:03:00 - Pedestrian traversal through Hong Kong streets 00:03:00 - 00:03:32 - Vehicle hijacking and health shrine interaction 00:03:32 - 00:04:06 - Final approach to the temple complex 00:04:06 - 00:05:40 - Initial combat wave against temple monks 00:05:40 - 00:07:15 - Courtyard brawl featuring environmental fountain attacks 00:07:15 - 00:10:09 - Large-scale melee confrontation in the main temple area

Mastering the Snow: Tactical Sniping and High-End Car Tuning
This video showcases a comprehensive session of Grand Theft Auto Online gameplay set during a winter snow event in Los Santos. The footage begins with intense urban combat where the player engages law enforcement using various firearms, including a heavy sniper and special carbine. Following the initial skirmish, the content transitions to vehicle utility and exploration, featuring the flight of a Deluxo over the snow-covered cityscape. Viewers will see the interior of a Mobile Operations Center, where weapons are upgraded to Mk II versions with specialized tactical attachments. The video further demonstrates high-end property ownership with a tour of an office garage filled with modified vehicles. A significant portion of the video is dedicated to the deep customization of an Annis Elegy Retro Custom at Benny's Original Motor Works, showing every modification from engine tunes to liveries and rims. The final segment covers Freemode activities, including the management of a Motorcycle Club and defensive sniper maneuvers during a high-stakes 'Executive Search' event under a highway interchange. 📖 Chapters: 0:00:00 - 0:02:30 - Urban combat and calling in a personal vehicle 0:02:30 - 0:05:15 - Deluxo flight mechanics and Mk II weapon upgrades in the MOC 0:05:15 - 0:08:00 - Office garage showcase and cruising through snowy streets 0:08:00 - 0:10:15 - Extensive vehicle customization at Benny's Original Motor Works 0:10:15 - 0:11:32 - Motorcycle Club activities and tactical bridge combat

Im back
The video features a series of Fortnite matches across different game modes, including Siphon Duos, Arena, and Creative. The content showcases various gameplay aspects such as skydiving into popular locations like Pleasant Park, looting for weapons, engaging in building battles, and participating in intense combat scenarios. Viewers will also see interactions with other players in the pre-game lobby and a Creative session featuring custom islands and game rules. Throughout the full duration, the video demonstrates different playstyles from competitive arena matches to relaxed creative builds and combat challenges. Chapters: 0:00:00 - 0:00:51 - Navigating game menus and selecting Siphon Duos 0:00:51 - 0:01:49 - Loading screen and pre-game lobby on the map 0:01:49 - 0:02:37 - Deploying from the Battle Bus and landing in Pleasant Park 0:02:37 - 0:04:43 - First match gameplay at Pleasant Park featuring looting and combat 0:04:43 - 0:06:06 - Loading screen and deployment for a second match 0:06:06 - 0:07:14 - Second match gameplay at Pleasant Park and returning to lobby 0:07:14 - 0:08:44 - Selecting Arena mode and waiting through the loading screen 0:08:44 - 0:09:51 - Arena match pre-game lobby and deployment 0:09:51 - 0:11:44 - Brief Arena gameplay followed by loading into Creative mode 0:11:44 - 0:13:21 - Navigating the Creative hub and joining a custom island 0:13:21 - 0:14:43 - Exploring custom Creative islands and interacting with other players 0:14:43 - 0:15:53 - Pickaxe and weapon combat on a custom grid-based island 0:15:53 - 0:17:33 - Starting a new round on the island with advanced building and looting 0:17:33 - 0:18:48 - Ranged combat and NPC interactions on the custom island 0:18:48 - 0:20:13 - Intense final building battle and conclusion of the Creative session

Winning Stand Your Ground in GTA Online
The video covers a session of GTA Online gameplay. It starts with loading screens and the character in their apartment. The player then visits a high-end clothing store, Ponsonbys, to customize their character's appearance and save new outfits, browsing through various utility vests, combat pants, and footwear. After some city exploration on a motorcycle, the character participates in a competitive freemode event titled 'Stand Your Ground,' which involves tactical combat using sniper rifles and rocket launchers to capture and hold an area. Following a victory in this event, the remainder of the video predominantly shows the character engaging in intense player-vs-player (PvP) conflict. This phase is characterized by repetitive use of the 'Easy Way Out' suicide mechanic to reset positions and avoid giving kills to opponents, often accompanied by competitive text messaging between players. The video concludes with the character joining a lobby for a custom user-created 'Run and Gun' match and waiting for other players to join. 📖 Chapters: 0:00:00 - 0:00:40 - Initial loading screens for Grand Theft Auto Online 0:00:40 - 0:01:50 - Character interactions within their apartment 0:01:50 - 0:02:48 - Exiting the apartment and traveling through Los Santos on a motorcycle 0:02:48 - 0:04:40 - Detailed character customization and outfit saving at Ponsonbys 0:04:40 - 0:05:10 - Reviewing saved outfits before returning to free-roam 0:05:10 - 0:06:15 - Cruising the city streets and an accidental motorcycle crash 0:06:15 - 0:07:05 - Loading transition while switching game sessions 0:07:05 - 0:08:05 - Brief apartment visit and heading back into the city 0:08:05 - 0:09:10 - Riding to a dynamic freemode event location 0:09:10 - 0:10:28 - Engaging in and winning the 'Stand Your Ground' event 0:10:28 - 0:12:02 - Ongoing PvP combat and multiple character deaths 0:12:02 - 0:12:15 - Managing in-game funds via the Maze Bank mobile website 0:12:15 - 0:15:13 - Competitive text messaging and traveling to new combat zones 0:15:13 - 0:18:46 - Intensive PvP gameplay featuring frequent use of the suicide mechanic 0:18:46 - 0:21:00 - Continued long-range combat and tactical positioning 0:21:00 - 0:23:13 - Final free-roam actions before initiating a custom job 0:23:13 - 0:25:01 - Waiting in the 'Modded Run and Gun Map #1' job lobby
Arena Grind: Sniper Plays and Interior Skirmishes
Rooftop sniping and tactical building maneuvers open this session of Fortnite Arena mode, where close-quarters combat leads to early eliminations. The action transitions to the game menu to showcase Battle Pass rewards, including the Storm Shredder music track, and a quick browse through the Item Shop's featured skins like Bushranger. Multiple competitive matches follow, featuring drop-ins at various locations across the Chapter 2 map. Strategic landings occur at Misty Meadows, Holly Hedges, and Craggy Cliffs, demonstrating efficient looting paths and immediate defensive building when engaged by opponents. The gameplay highlights different weapon tiers, from basic pistols to Bolt-Action Sniper Rifles found in hidden attic chests. Tactical maneuvers and rapid construction define the early moments of the session as resources are gathered under pressure. Following a swift elimination, a new match begins with a calculated landing at Holly Hedges to secure essential loot and building materials. The progression through the mid-game involves careful navigation of the suburban environment, punctuated by long-distance sniper exchanges and aggressive pushes into enemy-held structures. Precise aim and quick editing skills are demonstrated during high-intensity build fights as the player strives for a dominant position. Inventory management remains a priority throughout the match, ensuring a balance of offensive power and defensive utility. The final stages emphasize the importance of positioning and awareness as the play area constricts, forcing the remaining competitors into close-range conflict. 📖 Chapters: 0:00:00 - High-ground sniping and warehouse combat 0:02:10 - Menu navigation and Item Shop overview 0:03:45 - Deployment and early skirmish at Misty Meadows 0:06:45 - Tactical drop and interior fighting at Holly Hedges 0:09:25 - Rooftop landing and looting at Craggy Cliffs 0:00:00 - Early game skirmish and inventory setup 0:02:30 - Strategic landing and looting in Holly Hedges 0:05:00 - Resource harvesting and suburban exploration 0:07:30 - Long-range sniping from rooftop positions 0:10:00 - Tactical breach and close-quarters elimination 0:12:30 - High-ground tower construction for area control 0:15:00 - Dynamic build battle with explosive utility 0:17:30 - Endgame rotation and final circle pressure 0:20:00 - Final highlights and match conclusion

Gta insane and missions
This video captures the Grand Theft Auto V loading process from start to finish, showcasing various character artworks and promotional information for Rockstar Social Club and GTA Online. The sequence features high-quality illustrations of the game's protagonists—Trevor, Michael, and Franklin—alongside side characters like Lamar and Chop. After the loading sequence completes at approximately 1 minute and 35 seconds, the video shows character Franklin Clinton standing in an interior apartment environment. The footage is then interrupted by a blue 'on air' pause screen, briefly returns to the game world, and concludes with a final pause screen. Chapters: 0:00:00 - 0:00:28 - Initial loading sequence featuring Trevor and Michael artwork 0:00:28 - 0:01:00 - Loading continues with Franklin and Lamar promotional slides 0:01:00 - 0:01:35 - Final loading phase with Michael and Franklin character art 0:01:35 - 0:01:38 - Game loads successfully into an interior apartment with Franklin 0:01:38 - 0:01:48 - Stream interruption screens with a brief return to gameplay
GTA 5 - First day on the block
This video details a complete gameplay session in Grand Theft Auto V Online, showcasing a player's journey from a casual apartment hangout to a full-blown crime spree and intense police chases. Viewers will follow the character, distinguished by bright blue dreadlocks and a black tactical outfit, as they prepare for a day on the 'block.' The adventure begins with the player and a companion leaving an apartment, driving to a suburban clothing store for extensive outfit customization, and then heading to an Ammu-Nation to upgrade and tint a wide array of firearms. The narrative quickly escalates as the duo embarks on a mission, leading to a high-speed police pursuit through diverse Los Santos landscapes, from upscale Vinewood Hills to gritty industrial zones and mountainous terrain. Along the way, the video features a chaotic gas station robbery, further intensifying the wanted level and leading to multiple shootouts with law enforcement and rival players. The player attempts various evasion tactics, including switching cars and engaging in prolonged firefights on foot, ultimately culminating in their demise during a final, desperate confrontation with multiple police units and helicopters near a dam. The video offers a comprehensive look at the dynamic open-world action, character progression, and the consequences of criminal activity within the GTA Online universe. 📖 Chapters: 0:00:00 - Apartment hangout and character introduction 0:00:20 - Leaving the apartment and getting into the first vehicle 0:00:40 - Setting a GPS destination and beginning the drive 0:01:45 - Driving through West Vinewood, first minor car crash 0:02:18 - Switching vehicles and continuing the journey 0:02:40 - Arrival at the Suburban clothing store 0:03:17 - Detailed character outfit customization (hoodie, jeans, shoes, mask) 0:04:08 - Finalizing the new outfit and leaving the clothing store 0:05:15 - Arrival at Ammu-Nation 0:05:25 - Customizing pistol upgrades and tints 0:05:56 - Customizing SMGs and shotgun upgrades 0:06:17 - Customizing rifle and heavy sniper upgrades 0:06:50 - Customizing special weapons and futuristic firearms 0:08:00 - Finalizing weapon purchases and exiting Ammu-Nation 0:08:40 - Driving away from Ammu-Nation and encountering other players 0:09:40 - Beginning a new mission, 'Turf Wars V' 0:10:20 - Engaging in an initial police chase with a 3-star wanted level 0:11:00 - Player crashes car, switches back to their original vehicle 0:11:15 - Shootout with other players in the street 0:12:00 - Intense police chase continues with heavy gunfire 0:12:30 - Driving through industrial areas, attempting to evade police 0:13:00 - Entering Los Santos Customs for vehicle repairs and upgrades 0:13:40 - Customizing car armor and general repairs 0:14:50 - Exiting Los Santos Customs with a repaired vehicle 0:15:30 - Driving through the city during sunset 0:16:00 - The second player, TSM_bellz08, enters the player's vehicle 0:16:30 - Erratic driving through city streets, dodging traffic and police 0:17:30 - Arriving at the Vanilla Unicorn strip club 0:18:10 - Player and TSM_bellz08 enter the strip club, brief combat inside 0:18:30 - Leaving the strip club, initiating another 3-star police chase 0:19:20 - Driving through residential areas, evading police vehicles 0:20:00 - Engaging police in a shootout within a residential complex 0:20:20 - Leaving the residential complex, continuing the police pursuit 0:21:00 - Driving through urban streets at night 0:21:50 - Arriving at a gas station, attempting a robbery 0:22:20 - Successfully robbing the gas station clerk 0:22:45 - Exiting the gas station, initiating another police chase 0:23:25 - Driving through city streets with active police pursuit 0:24:20 - Escaping into the mountainous terrain, evading police cars 0:25:20 - The police chase extends into rugged mountain roads 0:26:20 - Police helicopters join the pursuit, player takes evasive action 0:27:00 - Player crashes vehicle, exits to continue on foot and hides among rocks 0:27:40 - Engaging in a shootout with police officers on foot 0:28:40 - Player is killed by police gunfire, 'Wasted' screen appears 0:29:20 - Player respawns at a nearby location, orders a motorcycle 0:30:20 - Driving the motorcycle through the city, engaging in combat 0:31:00 - Player exits the motorcycle and engages in a shootout near a dam 0:32:00 - Player hides behind rocks, continues fierce shootout with police and helicopters 0:33:00 - Player is ultimately killed by police/helicopter fire, 'Wasted' screen appears
Fortnite trios,duos - Join Me and subscribe!
Relive the action of Fortnite Chapter 1 Season X in this ultimate gameplay compilation! Experience a throwback journey through iconic drop zones, high-stakes matches, and classic mechanics. Key Highlights: • Salty Springs & Dusty Depot: Dropping into classic residential houses and warehouse skirmishes with intense early-game looting and rapid-build battles. • Tilted Town Rift Zone: Adapting to the classic Western-themed no-build/no-harvest zone for pure, traditional gunplay. • Snowy Biome & Viking Village: Navigating frozen wastes, using campfires, and executing high-score Driftboard stunts during rotations. • B.R.U.T.E. Mechs: Facing the overwhelming firepower of Season X's most controversial vehicle. 📖 Chapters: 0:00:00 - Welcome and Connection Errors 0:01:05 - Navigating the Item Shop 0:01:35 - Lobby and Loading Screen 0:02:17 - Match 1: Dropping into Salty Springs 0:04:22 - Returning to Lobby 0:06:19 - Match 2: Landing at Y Shores 0:07:45 - Close-quarter Combat in Tilted 0:09:15 - Matchmaking Intermission 0:10:02 - Match 3: Tilted Town Showdown 0:13:43 - Spectating & Loading Screen 0:15:15 - Match 4: Exploring Happy Hamlet 0:17:40 - Lazy Lagoon Shootout 0:19:15 - Lobby & Matchmaking 0:21:15 - Match 5: Dusty Depot Landing 0:23:01 - Match 6: Hoverboard Tricks & Traversal 0:25:00 - Skirmish by the Shoreline 0:26:37 - Matchmaking & Outro 0:30:00 - Game Startup & Error Screen 0:31:05 - Exploring the Item Shop & Lobby 0:32:17 - Landing & Looting at Salty Springs 0:33:20 - Salty Springs Close Quarters Combat 0:34:45 - Returning to Lobby & Queueing Up 0:36:19 - Dropping into Tilted Town 0:37:44 - Firefights & Revives in Tilted Town 0:40:02 - Navigating to Viking Vessel 0:41:45 - Snowy Biome Exploration and Looting 0:43:15 - Mid-Game Rotations & Map Navigation 0:44:40 - Squad Battles Near Shifty Shafts 0:45:45 - Campfire Healing & Strategic Prepping 0:47:15 - Skirmish in Tilted Town 0:48:35 - Driftboard Action & Stunt Showcase 0:49:12 - Defeated by B.R.U.T.E. Mech 0:49:42 - Lobby Matchmaking & Queueing 0:50:52 - Dusty Depot Match Preparation

Ghostwire: Tokyo
The gameplay begins with Akito, the protagonist, in a rain-slicked Tokyo street, surrounded by eerie, faceless men in suits wielding umbrellas, known as Visitors. Combat initiates, introducing Akito's 'Ethereal Weaving' abilities, allowing him to launch spectral attacks from his fingertips. A tutorial guides the player through attacking and blocking enemy strikes. After defeating the initial Visitors, Akito finds himself disoriented and learns he must reach a hospital to find his sister, Mari. Navigating the desolate, fog-shrouded streets, Akito discovers scattered clues and collectibles, piecing together the mystery of the city's vanishing population. Upon reaching the Shibuya Central Hospital, the game introduces 'Ether' and 'Crystallized Ether' as vital resources. Inside the hospital, Akito encounters more Visitors in a reception area, engaging in combat that highlights stealth and powerful charge attacks, leading to a level-up and unlocking new skills. The game's skill tree is showcased, detailing various upgrades for Akito's supernatural abilities. As Akito progresses deeper into the hospital, the environment grows increasingly unsettling, with spectral distortions and further combat encounters. He finds more collectibles, revealing panicked messages from the vanished. A dramatic cutscene unfolds as Akito locates Mari in a hospital bed, only to find her connected to a sinister device and confronted by a masked antagonist, Hannya. Hannya, revealing himself to be a malevolent spirit, uses his powers to bind and drain Akito, subsequently abducting Mari. Akito awakens in a surreal, dreamlike landscape of red flowers and water, where he encounters KK, a spectral detective who now shares Akito's body. KK explains Akito's predicament and the dire consequences for Mari if they fail to act. Akito awakens once more in KK's apartment, which serves as a makeshift investigation hub. He discovers a case containing a spectral bow and arrow, embracing his new role as a ghost hunter. The mission continues back in the streets of Shibuya, still blanketed in hazardous fog. Akito battles more Visitors and learns to cleanse Torii gates, restoring parts of the city. A friendly Shiba Inu guides Akito to a phone booth, which doubles as a 'Spirit Transmission Device,' allowing him to transfer collected spirits for experience and currency. The video concludes with Akito, now more determined, preparing to confront the escalating supernatural threat engulfing Shibuya. Chapters: 0:00 - Akito Faces the Visitors 0:09 - Ethereal Weaving Combat Tutorial 0:44 - Exploring Game Menu Options 1:49 - Navigating Foggy Shibuya Streets 2:03 - Map Menu Introduction and Objective Update 3:31 - Reaching Shibuya Central Hospital 3:50 - Ether and Crystallized Ether Explained 4:00 - Mission Complete: The Vanishing & New Objective 4:25 - Hospital Combat & Level Up 5:02 - Skills Menu and Spirit Skill Unlocks 5:22 - Hospital Exploration and Collectibles 5:57 - Charge Attack and Grab Core Tutorial 6:15 - Continued Hospital Navigation and Combat 8:27 - Cafeteria Combat and Environmental Distortion 9:05 - Reaching Mari's Hospital Room 9:58 - Cinematic: Mari's Abduction by Hannya 12:55 - Akito's Bargain with KK 14:45 - Akito Awakens in KK's Apartment 15:30 - Akito Retrieves the Spirit Bow 16:18 - Mission Complete: City of Shadows 16:30 - Chapter 2: Trouble Begins 17:15 - Hazardous Fog and Map Exploration 18:07 - Torii Gate Combat Encounter 19:18 - Cleansing the Torii Gate 20:00 - Dog Guides Akito and More Combat 21:18 - Finding the Spirit Transmission Device 22:00 - Using the Spirit Transmission Device and Level Up 22:58 - Surreal Encounter with Hannya 24:00 - Returning to KK's Apartment 24:25 - Akito Unlocks the Spirit Bow
GTA Online: Competitive Run and Gun Deathmatch Full Gameplay
This video provides a comprehensive look at a full Team Deathmatch session in Grand Theft Auto Online, specifically showcasing the 'Run And Gun Upgrade' job. The content begins with the initial loading sequence and the process of navigating the in-game menus to join a match from a free-roam session. Viewers see the pre-match lobby where player lists, team assignments, and betting options are configured. The main portion of the video demonstrates high-intensity third-person combat on a specialized arena map, featuring various shooting techniques, the use of cover, and tactical positioning. The gameplay highlights multiple kill streaks and power plays, concluding with the final victory announcement and a detailed summary of the Job Points (JP), cash rewards, and Reputation Points (RP) earned by the participants. 📖 Chapters: 00:00:00 - 00:00:51 - Initial loading screens and entry into GTA Online session 00:00:52 - 00:01:14 - Menu navigation to join the Team Deathmatch job 00:01:15 - 00:02:00 - Pre-match lobby configuration and team preparation 00:02:01 - 00:03:30 - Opening combat phase with aggressive play and early eliminations 00:03:31 - 00:04:55 - Mid-match highlights featuring kill streaks and tactical map control 00:04:56 - 00:05:02 - Match conclusion, victory announcement, and reward summary

WATCH DOGS 2 introductory
This video details the initial infiltration mission of Marcus Holloway into a ctOS data center in Watch Dogs 2. Viewers will see Marcus using stealth, hacking, and melee combat to bypass security, disable security systems, and ultimately wipe his personal profile from the ctOS database. The mission includes navigating rooftops, server rooms, and control centers, highlighting the game's core gameplay mechanics. The narrative expands to reveal DedSec's role in fighting against the pervasive surveillance of ctOS and Marcus's motivation to join them. The video concludes with Marcus successfully infiltrating the system, deleting his profile, installing a backdoor, and officially joining the DedSec crew to fight against Blume's oppressive technology, all set against the iconic backdrop of San Francisco. 📖 Chapters: 0:00:00 - Introduction to the ctOS Data Center and DedSec Initiation 0:00:10 - Beginning the Infiltration: Rooftop Access 0:00:30 - Stealth Navigation and Hacking Opportunities 0:01:00 - First Melee Takedown and Camera Hacking 0:01:30 - Continued Infiltration and Strategic Takedowns 0:02:00 - Advancing Through the Secured Perimeter 0:02:30 - Hacking a Closed Circuit Terminal 0:02:54 - Cutscene: DedSec Members Monitor Marcus Holloway's Progress 0:03:30 - Infiltrating the Interior of the Data Center 0:04:00 - Locating and Acquiring the Access Key 0:04:30 - Navigating Offices and Performing Stealth Takedowns 0:05:00 - Acquiring an Access Key from a Laptop 0:05:30 - Further Infiltration into the Server Tower 0:06:00 - Hacking Access Points in the Server Tower 0:06:30 - Strategic Takedowns and Server Room Navigation 0:07:00 - Accessing Computers and Collecting Audio Files 0:07:30 - Eliminating Security and Progressing Upwards 0:08:00 - Reaching Higher Levels of the Server Tower 0:08:30 - Initiating the Server Shutdown 0:09:00 - Climbing Inside the Server Tower 0:09:39 - Physical Hacking of the Server 0:10:00 - Completing the Server Shutdown 0:10:41 - Accessing the ctOS Database in the Control Room 0:11:00 - Hacking the Network Bypass 0:11:19 - Marcus Holloway Wipes His Profile from ctOS (Cutscene) 0:12:04 - Deleting Criminal Records and Creating a New Profile (Cutscene) 0:13:03 - New Online Profile Creation and Backdoor Installation (Cutscene) 0:13:34 - Escaping the Server Tower Basement 0:14:04 - Setting Traps and Continuing the Escape 0:14:34 - Reaching the Ventilation Shaft and Final Escape 0:14:58 - Confrontation with Security and Hacking Escape (Cutscene) 0:15:22 - The Rise of ctOS 2.0: Surveillance and Control (Cinematic) 0:16:05 - Big Brother No Longer Works Alone: Data Surveillance 0:17:00 - The New Reality: Threats to Personal Freedom 0:17:23 - Marcus Holloway Joins DedSec (Cutscene) 0:18:20 - DedSec's Mission: Fighting Against Blume's Surveillance 0:19:19 - Marcus's Call to Action: Tear Down Blume 0:20:05 - The Aftermath: Marcus Wakes Up Disoriented 0:20:55 - New Phone, New Mission: Meet at the Hackerspace 0:22:04 - Watch Dogs 2 Title Card and Open World Introduction
Blasphemous
This video provides a comprehensive look at the early gameplay of Blasphemous, an atmospheric action-platformer. It begins with the opening cinematic and a brief tutorial sequence that leads directly into the first major boss encounter against the Warden of the Silent Sorrow. Following the boss's defeat, the footage demonstrates exploration through stylized, gothic environments, where the protagonist meets key NPCs like Deogracias, who provides narrative context for the main quest. The gameplay showcases various combat mechanics, including basic attacks, parrying, and the use of special items. Viewers will also observe character progression through the Mea Culpa sword upgrades at a shrine and the collection of collectible items. The video concludes with further exploration and combat in increasingly challenging areas. Chapters: 00:00:00 - 00:02:20 - Opening cinematic and the first boss encounter with the Warden of the Silent Sorrow 00:02:21 - 00:05:50 - Introduction of the main quest and lore through dialogue with Deogracias in The Holy Line 00:05:51 - 00:09:10 - Combat demonstrations in the Wasteland of the Buried Churches and the first death sequence 00:09:11 - 00:12:30 - Reaching the settlement of Albero and utilizing a Mea Culpa Shrine for sword upgrades 00:12:31 - 00:15:00 - Continued exploration and combat against more complex enemy types leading to the end of the footage Chapters: 0:00:00 - 0:01:08 - Awakening in the Brotherhood 0:01:08 - 0:02:54 - Warden of the Silent Sorrow Boss Fight 0:02:54 - 0:05:50 - Meeting Deogracias on The Holy Line 0:05:50 - 0:07:41 - Navigating the Desolate Forest 0:07:41 - 0:09:12 - Unlocking Prayers and Air Impulses 0:09:12 - 10:52 - Arriving in Albero and Meeting Tirso 10:52 - 12:48 - Upgrading at the Mea Culpa Shrine 12:48 - 14:21 - Exploring the Ruins of Albero 14:21 - 16:44 - Entering the Wasteland and First Death 16:44 - 20:12 - Conquering the Wasteland and Cathedral Traps

Grand Theft Auto V
This Grand Theft Auto V gameplay video showcases various chaotic and action-packed moments within GTA Online. The player primarily engages in combat with other online players, utilizing a range of weapons and tactics. Viewers will see the player's character driving a customized red sports car, navigating the city, and participating in an online 'Business Battle' cargo mission. A significant portion of the video features the player repeatedly engaging in long-range sniper combat, often resulting in player kills and frequent 'Wasted' screens, sometimes due to self-inflicted damage or enemy attacks. The player employs diverse weaponry, including a heavy sniper rifle with thermal scope, a railgun, a grenade launcher, and sticky bombs, against rival CEOs and other players. The gameplay also includes the use of special abilities like 'Bull Shark Testosterone' and 'Ghost Organization,' and remote-controlled vehicles like the RC Bandito for offensive maneuvers. The video documents persistent player-versus-player conflict, highlighting the fast-paced and often brutal nature of GTA Online's open-world interactions, including bounties and rival CEO battles. The setting transitions from daytime to dusk and nighttime, adding a dynamic visual element to the continuous combat. 📖 Chapters: 0:00:00 - GTA Online Loading Screens 0:00:37 - Player Loads into GTA Online in Red Sports Car 0:00:44 - Player Views Online Player List and Stats 0:01:23 - Driving the Red Sports Car Through the City 0:01:37 - Setting a Waypoint on the Map 0:02:08 - First Enemy Encounter & Car Destruction 0:03:00 - Exiting the Vehicle and Preparing for Combat 0:03:17 - Sniping First Enemy with Thermal Scope 0:03:32 - RPG Attack and Accidental Suicide 0:04:17 - Engaging in 'Business Battle' and Sniping 0:05:04 - Another Self-Inflicted 'Wasted' 0:05:10 - Continued Sniping from Freeway Overpass 0:06:17 - Third Accidental Suicide 0:06:24 - Requesting Personal Vehicle and Sniping from Distance 0:07:50 - Sniped by Enemy Player 0:08:44 - Killed by REX_Dragonnn 0:09:20 - Killed by REX_Dragonnn Again 0:10:17 - Grenade Launcher Attack and Self-Elimination 0:11:15 - Commits Suicide After Attack 0:11:43 - Killed by Enemy Player 0:12:17 - Activating and Deploying RC Bandito 0:12:35 - RC Bandito Detonation 0:12:57 - Using Bull Shark Testosterone & Ghost Organization 0:13:58 - Killed by Enemy Player (Car Attack) 0:14:30 - Text Message About Ball Office 0:15:20 - RPG Attack & Suicide 0:15:40 - Second RPG Attack & Suicide 0:16:03 - Sticky Bomb & Suicide 0:16:40 - Sniper Combat & Bribe Authorities 0:17:20 - Railgun & Sniper Kills 0:18:15 - Bull Shark Testosterone & Sustained Sniper Combat 0:19:03 - Killed by Enemy Player 0:19:35 - Intense Sniper Engagements 0:20:23 - Suicide to Evade Enemies 0:21:03 - Suicide After Multiple Kills 0:21:40 - Killed by Enemy with Machine Gun 0:22:20 - Sniped by Enemy 0:22:48 - Sniped by Enemy (Second Time) 0:23:44 - RC Bandito Chaos 0:24:10 - Player Leaves Session Chapters: 0:00:00 - 0:01:23 - Session entry and checking the lobby player list 0:01:23 - 0:03:17 - Driving through Los Santos and executing a sticky bomb car attack 0:03:17 - 0:05:10 - Sniper combat at the park using thermal scopes and explosives 0:05:10 - 0:07:28 - Vinewood highway sniping and restocking heavy ammunition 0:07:28 - 0:09:25 - Deploying Bull Shark Testosterone and sniping near the Vinewood bridge 0:09:25 - 0:10:00 - Activating Ghost Organization and patrolling with the RC Bandito

Splitgate 2
This video serves as an in-depth preview and gameplay demonstration for Splitgate 2, the next iteration of the popular portal-based first-person shooter. Viewers are first introduced to the game's core mechanics through a comprehensive tutorial covering fundamental movement techniques like mantling, jetpacking, and sliding, as well as the innovative use of portals for traversal and combat. The tutorial also guides players through melee kills, grenade usage, smart wall deployment, power weapons, and advanced portal maneuvers like launch portals. Following the tutorial, the video delves into the main menu, showcasing the battle pass, event details, extensive loadout customization for different factions (Aeros, Meridian, Sabrask) including character skins, weapon variants, and equipment perks, and options for player cards and communication wheels. The latter half of the video features full Battle Royale gameplay, demonstrating a drop into the 'Split Worlds' map, which dynamically changes biomes (Drought, Glacier, Inferno, Fracture) between rounds. The gameplay highlights intense firefights, strategic portal usage, loot collection from chests and airdrops, and the eventual victory of the player's squad, culminating in a celebratory post-game lobby. 📖 Chapters: 0:00:00 - Warning and Studio Logos 0:00:12 - Splitgate 2 Loading Screen 0:00:23 - Tutorial Introduction and Movement Basics 0:00:44 - Portals Tutorial: Basic Usage and Destruction 0:01:04 - Combat Tutorial: Melee and Weapon Firing 0:01:18 - Combat Tutorial: Grenades and Portal Shooting 0:01:47 - Abilities Tutorial: Smart Wall and Power Weapon 0:02:04 - Advanced Movement: Ping and Launch Portals 0:02:19 - Tutorial Completion and Game Main Menu 0:02:39 - Battle Pass and Character Selection Overview 0:02:45 - Aeros Character Customization Showcase 0:03:24 - Loadout Customization for Aeros 0:04:15 - Meridian Loadout Customization 0:04:36 - Sabrask Loadout Customization 0:04:52 - Weapon Skin Customization for Factions 0:05:22 - Portal Skins, Player Cards & Emotes 0:05:40 - Battle Royale Matchmaking Begins 0:06:21 - Battle Royale Lobby and Character Selection 0:06:54 - In-Game Drop Sequence and Map Zones 0:07:56 - Initial Drop into Yellow Kanyon (Fracture Biome) 0:08:26 - First Engagements and Team Wipe 0:08:50 - Looting Airdrops and Biome Transition 0:09:54 - Continuing in Continuum Courtyard 0:10:29 - Gameplay Highlights and Looting 0:11:00 - Engagements and Team Positioning 0:12:09 - Round 2 Begins: Continued Engagements 0:13:00 - Biome Change to Inferno, Intense Combat 0:13:50 - Multi-kills and Strategic Retreat 0:14:40 - Looting and Preparation for Final Round 0:16:09 - Final Round: Double Damage Event 0:17:10 - Climax of Battle Royale and Victory 0:18:25 - Post-Game Celebration and Lobby

Athenas Full Mission Walkthrough - Borderlands 3 Amara Gameplay
This video provides a complete gameplay walkthrough of the planet Athenas in Borderlands 3, focusing on the main mission 'The Impending Storm'. The content covers the initial arrival in the district, meeting the character Ava, and exploring various tombs and crypts to locate Burial Eridium. Gameplay demonstrates combat against Maliwan forces and local Ratch creatures, showcasing the Siren character Amara's elemental abilities and varied weaponry. Viewers will see the progression through the Windward Plaza and the Anchorhold, leading up to the major boss encounter with Captain Traunt. Following the battle, the video follows the characters Maya and Ava as they open the vault to retrieve a Vault Key Fragment. The final portion of the video features the start of the side mission 'Holy Spirits', where the player helps Brother Mendel clear the Holy Distillery of pests. Chapters: 0:00:00 - 0:02:10 - Initial Combat and Meeting Ava 0:02:10 - 0:04:35 - Searching Tombs and Crypts for Eridium 0:04:35 - 0:06:45 - Progressing through Windward Plaza 0:06:45 - 0:10:00 - The Anchorhold and Crimson Radio Challenge 0:10:00 - 0:11:45 - Captain Traunt Boss Encounter 0:11:45 - 0:13:30 - Opening the Vault and Retrieving the Key Fragment 0:13:30 - 0:15:55 - Exploration and Inventory Management 0:15:55 - 0:18:32 - Holy Spirits Side Mission and Distillery Clearance
Ghost Recon Wildlands: Amaru's Rescue - Full Tactical Gameplay & Extraction
This video captures a complete gameplay session of Tom Clancy's Ghost Recon Wildlands, focusing on the 'Amaru's Rescue' mission in the Itacua region. Viewers will witness a full tactical operation from start to finish, beginning with initial game hints and objective briefing. The player and their squad navigate rugged mountainous terrain, engaging in intense vehicle combat, executing stealth takedowns, and utilizing drone reconnaissance to identify enemy positions. Key moments include intercepting and interrogating Santa Blanca cartel members for vital intel, conducting supply raids to gather resources, and engaging in firefights within a small village and an enemy outpost. The mission culminates in the successful rescue of Amaru, followed by a dramatic helicopter extraction across the region. Along the way, the player levels up, acquires new skills, and customizes weapons, showcasing various gameplay mechanics and the open-world environment of Bolivia. 📖 Chapters: 0:00:00 - Game Hints & Mission Briefing 0:00:26 - Initial Drive and Vehicle Engagement 0:01:36 - Enemy Interrogation and Supply Intel 0:02:22 - Supply Raids Tutorial 0:02:40 - Village Reconnaissance and Stealth Takedowns 0:03:08 - Firefight and Supply Collection 0:03:55 - Travel to Santa Catalina Chapel 0:04:50 - Chapel Recon and Synchronized Combat 0:05:25 - Collecting Medication 0:05:56 - Driving to Outpost & Enemy Encounters 0:06:50 - Discovering Wiphala Flag Legend 0:07:05 - Skill Point Acquired & Drone Upgrades 0:07:50 - Outpost Infiltration and Enemy Engagements 0:09:10 - Collecting Gasoline and Tactical Movement 0:09:55 - Watchtower Takedown and Building Search 0:10:20 - Interrogating Santa Blanca Lieutenant 0:11:00 - Amaru's Rescue and Helicopter Extraction 0:12:30 - Mission Complete: Amaru Extracted 0:12:40 - Post-Mission Review: Loadout and Skills Customization Chapters: 0:00:00 - 0:02:30 - Infiltration and Vehicle Travel 0:02:30 - 0:05:00 - Lieutenant Interrogation and Intel Gathering 0:05:00 - 0:08:00 - Santa Catalina Chapel Reconnaissance 0:08:00 - 0:11:00 - Skill Upgrades and Outpost Entry 0:11:00 - 0:14:00 - Outpost Clearance and Resource Tagging 0:14:00 - 0:18:00 - Weapon Loadout and Gunsmith Customization 0:18:00 - 0:21:00 - Atollo Farm Scouting Operations 0:21:00 - 0:24:00 - Farm Firefight and Accessory Collection 0:24:00 - 0:27:00 - Amaru Extraction and Helicopter Flight 0:27:00 - 0:30:00 - Mission Completion and Culta Village Firefight 0:30:00 - 0:31:30 - Tactical Insertion and Off-road Driving 0:31:30 - 0:32:40 - Vehicle Chases and Interrogation 0:32:40 - 0:34:30 - Drone Reconnaissance and Outpost Raid 0:34:30 - 0:35:55 - Securing Supplies and Roadblock Clearance 0:35:55 - 0:37:03 - Chapel Infiltration and Skill Upgrades

Bleach: Brave Souls
This comprehensive video provides an in-depth look at the initial progression and character management within the mobile game Bleach: Brave Souls. It begins with cinematic cutscenes from the 'Thousand-Year Blood War' arc, followed by a detailed demonstration of the user interface. Viewers will see the collection of numerous login rewards, celebration gifts, and massive quantities of power-up materials. The content features an extensive character summoning session where several high-rarity five-star units are obtained. The video then shifts to character development, showcasing the 'Soul Tree' upgrade system, character Ascension to raise level caps, and rapid leveling using EXP crystals for multiple units like Genryusai and Senjumaru. The latter half of the video focuses on gameplay, demonstrating high-level characters efficiently clearing early story mode chapters and engaging in boss battles with spectacular special ability animations. The video serves as a guide for understanding account setup, unit optimization, and the fast-paced combat mechanics of the game. Chapters: 0:00:00 - 0:01:35 - Opening sequence and dramatic anime cutscenes 0:01:35 - 0:04:10 - Menu navigation and beginner reward collection 0:04:10 - 0:06:20 - Character summoning session and obtaining five-star units 0:06:20 - 0:08:50 - Initial character power-ups and Soul Tree upgrades 0:08:50 - 0:11:20 - Character Ascension and rapid leveling demonstration 0:11:20 - 0:14:45 - Team organization and story mode mission preparation 0:14:45 - 0:17:10 - Story mode gameplay featuring Genryusai and Senjumaru 0:17:10 - 0:19:40 - Clearing successive story chapters and boss battles 0:19:40 - 0:20:32 - Final mission clearance and player rank advancement

Roblox boxing beta
This video provides a comprehensive look at the Roblox game 'Boxing Beta.' Viewers will see the player navigate through various sections of the game's bustling arena, including the shop where different glove skins are showcased and acquired through crates. The core of the video demonstrates multiple boxing matches against other players, highlighting punching, dodging, and knockout mechanics. The player also explores the intricate multi-level map, performing parkour on beams and traversing different server zones (ELO servers, private servers, DAZN map). The video features the player's personal stats, including wins, win rate, KOs, and ELO rating, as they participate in several intense ranked and non-ranked matches, often resulting in satisfying knockouts. The progression showcases the dynamic gameplay and various interactive elements within the Roblox Boxing Beta experience. 📖 Chapters: 0:00:00 - Introduction to the Boxing Arena and Shop Exploration 0:00:23 - Opening a Mystery Crate and Acquiring New Gloves 0:00:34 - First Ranked Boxing Match Begins 0:01:04 - Arena Exploration and Emote Showcase 0:01:09 - Second Boxing Match and Knockout Victory 0:01:25 - Post-Match Arena Movement 0:01:59 - Parkour and Exploration of Upper Arena Levels 0:02:18 - Observing an Opponent's Knockout 0:02:55 - Attempting to Join a Match - ELO Level Difference Too High 0:03:25 - Multi-Opponent Match with Multiple Knockouts 0:04:29 - Further Arena Exploration and Movement 0:06:22 - Engaging in another Ranked Match 0:06:56 - Match Victory and ELO Rank Update 0:07:06 - ELO Level Difference Block Again 0:07:22 - Another Multi-Round Match with Successive Knockouts 0:09:44 - Final Match Victory and Match Results Screen 0:10:25 - Exploring the DAZN Map and Climbing to the Roof 0:11:06 - Inside the DAZN Map - Social Hub and Shop 0:11:10 - Navigating Server Areas and Player Stats Showcase 0:11:27 - Final Ranked Match and Decisive Victory

Roblox backrooms gameplay
The video provides a complete walkthrough of a Roblox horror-themed escape game. Viewers will see the progression through three distinct levels: a dark office with checkered corridors, a sprawling sewer system, and a complex facility. The gameplay demonstrates cooperative efforts to find keycards, activate machinery like Tesla Coils and generators, and avoid various anomalies and jumpscares that populate the environment. Each level features unique environmental hazards and audio-visual cues that heighten the tension as the characters work toward the final exit into a forested area. Chapters: 0:00:00 - 0:01:41 - Navigating Level 0 and activating Tesla Coils 0:01:41 - 0:04:34 - Entering Level 1 (Sewers) and finding initial keycards 0:04:34 - 0:07:52 - Completing Level 1 objectives and escaping the sewer 0:07:52 - 0:10:39 - Progressing to Level 2 (Facility) to locate necessary items 0:10:39 - 0:13:00 - Navigating complex facility corridors and activating systems 0:13:00 - 0:15:00 - Final push to complete objectives and reach the game's exit
Grand Theft Auto V cemetery survival
📖 Chapters: 0:00:00 - 0:03:30 - Initialization and Early Wave Combat 0:03:30 - 0:06:45 - Introduction of Possessed Animal Variants 0:06:45 - 0:09:30 - Tactical Positioning and Wave Five Survival 0:09:30 - 0:13:00 - Increasing Intensity and Player Defeat 0:13:00 - 0:16:30 - Spectating Teammates and Gas Hazard Management 0:16:30 - 0:20:06 - Late-Stage Wave Progression and Conclusion This video showcases a comprehensive gameplay session of the Ludendorff Cemetery Survival mode in Grand Theft Auto Online. Viewers will observe a team of four players battling consecutive waves of undead enemies within a snowy, atmospheric cemetery environment. The analysis covers the session from the initial lobby setup through the first nine waves of the challenge. Key elements demonstrated include tactical outfit customization, the strategic use of thermal vision goggles for target identification, and the utilization of various weapon classes like carbines and sniper rifles. The gameplay highlights the introduction of increasingly difficult enemy types, such as possessed bears, pigs, and deer, alongside standard zombie hordes. The video also captures moments of teammate coordination and the shift to a spectator perspective after the player character is defeated in the later waves.

JUMP FORCE
This comprehensive gameplay compilation features high-intensity battles from the anime fighting game Jump Force. Throughout the full duration, viewers will observe various teams of legendary characters—such as Gaara, Naruto, Goku, and Gon Freecss—engaging in fast-paced arena combat. The video demonstrates the use of complex combos, strategic character swapping, and powerful 'Awakened' ultimate abilities. Significant matches occur across diverse environments including a temple ruin, snowy mountains, and a metropolitan cityscape, showcasing the game's cinematic visual style and diverse roster of anime icons. Chapters: 0:00:00 - 00:04:15 - Gaara and Team vs. Madara and Dio Clashes 0:04:16 - 00:05:05 - Interface Navigation and Mission Selection 0:05:06 - 00:09:12 - Dragon Shiryu and Naruto Uzumaki Gameplay 0:09:13 - 00:10:00 - Loading Tips and Match Initialization 0:10:01 - 00:13:30 - Gon Freecss vs. Kaguya and Aizen Battle 0:13:31 - 00:15:10 - Character Management in the Hub World 0:15:11 - 00:18:15 - Perfect Cell and Goku's Transformation Showcase 0:18:16 - 00:20:00 - Results Processing and Loading Final Challenges 0:20:01 - 00:21:03 - Final Combat Segments with Killua and Hisoka Chapters: 0:00:00 - 0:04:14 - Gaara, Dragon Shiryu, and Kane Crossover Clash 0:04:14 - 0:08:42 - Dragon Shiryu and Naruto Uzumaki Snowy Mountain Duel 0:08:42 - 13:23 - Gon Freecss Ultimate Jajanken Showdown 13:23 - 18:22 - Goku and Yusuke Tournament Battle 18:22 - 22:53 - Cell, Killua, and Deku City Combat 22:53 - 29:50 - Kurapika, Jotaro, and Trunks Golden Gate Bridge Duel

Clipped in the first 10 seconds
This gameplay footage captures the high-intensity opening moments of a four-player Brawlhalla match set on a snowy, oriental-themed arena. The video demonstrates the standard start-of-match countdown, followed immediately by aggressive movement as legends dash to secure weapon spawns. Viewers will see complex aerial maneuvers and the use of scythe weapons to initiate combos. The action quickly moves from the central platforms to the edge of the stage, highlighting off-stage recovery tactics and edge-guarding attempts in a competitive multiplayer setting. Chapters: 0:00:00 - 0:00:03 - Match Countdown and Legend Positioning 0:00:03 - 0:00:06 - Initial Engagement and Weapon Acquisition 0:00:06 - 0:00:08 - Central Platform Scythe Combo Execution 0:00:08 - 0:00:10 - Off-Stage Combat and Recovery Sequence
Epic Brawlhalla Fights: Uncut 2v2 Matches
This video captures a series of 2v2 online matches in Brawlhalla, showcasing various characters and gameplay styles across different maps. Viewers will see the player engaging in competitive combat, utilizing different legends and weapons, and experiencing both victories and defeats. The video includes transitions between matches, character selection screens, and post-match statistics, providing a full picture of several casual queue sessions. It highlights dynamic combat, strategic plays, and the overall experience of playing Brawlhalla in a team setting. 📖 Chapters: 0:00:00 - Brawlhalla Client Launch & Main Menu Navigation 0:08:00 - Selecting 'Friendly 2v2' Mode and Character Selection 0:29:00 - Match 1 Loading Screen: Imugi (Player) & Onyx vs Two Wu Shangs 0:38:00 - Match 1 Gameplay on 'Ramen' Map - Player's Team Wins 2:54:00 - Post-Match 1 Rewards & Character Selection for Next Match (Dusk) 3:15:00 - Match 2 Loading Screen: Dusk (Player) & Val vs Cross & Lord Vraxx 3:20:00 - Match 2 Gameplay on 'Clocktower' Map - Player's Team Loses 6:58:00 - Post-Match 2 Rewards & Character Selection for Next Match (Imugi) 7:24:00 - Match 3 Loading Screen: Imugi (Player) & Diana vs Jaeyun & Orion 7:29:00 - Match 3 Gameplay on 'Mammoth Fortress' Map - Player's Team Wins 10:41:00 - Post-Match 3 Rewards & Character Selection for Next Match (Seven) 11:09:00 - Match 4 Loading Screen: Seven (Player) & Jiro vs Brynn & Bödvar 11:15:00 - Match 4 Gameplay on 'Small Brawlhaven' Map - Player's Team Loses 13:42:00 - Post-Match 4 Rewards & Character Selection for Next Match (Specter Knight) 14:21:00 - Match 5 Loading Screen: Specter Knight (Player) & Wu Shang vs Nix & Bödvar 14:30:00 - Match 5 Gameplay on 'Mammo Fortress' Map - Player's Team Loses 18:48:00 - Post-Match 5 Rewards & Character Selection for Next Match (Petra) 19:31:00 - Match 6 Loading Screen: Petra (Player) & Onyx vs Nix & Yumiko 19:37:00 - Match 6 Gameplay on 'Small Blackguard Keep' Map - Player's Team Wins 22:46:00 - Post-Match 6 Rewards & Character Selection for Next Match (Volkov) 23:17:00 - Match 7 Loading Screen: Volkov (Player) & Nix vs Hattori & Red Raptor 23:22:00 - Match 7 Gameplay on 'Shipwreck Falls' Map - Player's Team Wins 30:44:00 - End Screen and Final Rewards Chapters: 0:00:00 - 0:02:52 - Imugi and Onyx vs Wu Shang Duo on Ramen Stage 0:02:52 - 0:07:03 - Dusk and Val vs Cross and Lord Vraxx on Clocktower Stage 0:07:03 - 0:10:45 - Imugi and Diana vs Jaeyun and Orion on Black Hole Stage 0:10:45 - 0:13:47 - Seven and Jiro vs Brynn and Bodvar on Trash Can Stage 0:13:47 - 0:17:46 - Specter Knight and Wu Shang vs Nix and Bodvar on Sewer Stage 0:17:46 - 0:24:45 - Petra and Onyx vs Nix and Yumiko on Mushroom Cave Stage 0:24:45 - 0:30:45 - Volkov and Nix vs Hattori and Red Raptor on Sky Platforms Stage Chapters: 0:00:00 - 0:02:54 - Imugi and Onyx battle two Wu Shangs on the Neo-Soul stage 0:02:54 - 0:07:03 - Dusk and Val control the Clock Tower against Lord Vraxx and Cross 0:07:03 - 0:10:45 - Imugi and Diana take on Jaeyun and Orion in the Space Arena 0:10:45 - 0:13:46 - Seven and Jiro face Brynn and Bodvar in the Alleyway stage 0:13:46 - 0:18:59 - Specter Knight and Wu Shang duel Nix and Bodvar on the Brick Wall stage 0:18:59 - 0:23:45 - Nix and Petra dominate the Crystal Cave stage in the final rematch

World War Z Aftermath
This video provides a complete gameplay walkthrough of 'World War Z: Aftermath', specifically focusing on the 'Episode 1: New York, Chapter 1: Descent' mission. Viewers will experience the initial game startup, menu navigation, and mission selection, setting the stage for the zombie apocalypse. The core content involves intense cooperative survival gameplay as players traverse a devastated New York City, starting from a high-rise rooftop and descending through zombie-infested office buildings and a sprawling shopping mall. Key segments include navigating through crowded, blood-soaked corridors, engaging various zombie types (including special infected like Screamers, Bombers, Gasbags, and the formidable Bull), and strategically utilizing defensive equipment like turrets and electric grids to hold positions against massive zombie swarms. The objective is to make it to a subway station, gather crucial supply crates for a train driver, and ultimately escape the city by boarding a departing train. The video showcases continuous action, tactical combat, and the overwhelming nature of the zombie hordes in a post-apocalyptic urban environment, culminating in a successful mission completion. 📖 Chapters: 0:00:00 - Video Introduction & Game Startup 0:00:18 - World War Z Title Screen & Main Menu 0:00:26 - Menu Navigation and Episode/Mission Selection 0:01:03 - Loading Episode 1: New York - Chapter: Descent 0:01:29 - Initial City Overview and Gameplay Start - Rooftop Descent 0:02:40 - Navigating Zombie-Infested Offices and Cafeteria 0:04:09 - Reaching and Descending the Elevator, Fighting Zombies 0:04:58 - Exploring the Shopping Mall and Initial Zombie Encounters 0:06:29 - Engaging a Massive Zombie Swarm in the Atrium 0:08:20 - Clearing Atrium and Preparing Defenses with Turrets and Grids 0:10:50 - Defending Position Against Incoming Zombie Horde 0:12:40 - Moving Through City Streets Towards the Subway Station 0:14:15 - Entering Subway Station and Clearing Zombie Threat 0:15:30 - Encountering and Defeating a Bull Zombie in the Subway 0:16:00 - Locating the Train Driver and Receiving Supply Crate Objective 0:16:20 - Retrieving First Supply Crate, Battling Zombies 0:17:40 - Finding Remaining Supply Crates Amidst Zombie Attacks 0:19:00 - Delivering Supplies and Boarding the Evacuation Train 0:21:00 - Mission Complete - Successful Escape from New York Chapters: 0:00:00 - 0:01:29 - Game launch, menu navigation, and episode selection 0:01:29 - 0:03:14 - Infiltration of the office building and stealthy pistol takedowns 0:03:14 - 0:04:10 - Neutralizing the Screamer and pushing toward the elevator 0:04:10 - 0:04:58 - Looting equipment and descending to the lower mall level 0:04:58 - 0:06:30 - Securing the shopping center corridors and locating the atrium horde 0:06:30 - 0:08:24 - Atrium battle against the horde, a Bull, and an Infector 0:08:24 - 0:09:40 - Reaching the subway station area and collecting defense kits 0:09:40 - 0:11:18 - Defending the station on the mounted machine gun and escaping on the train
Borderlands 3: Head Case Side Mission Gameplay Walkthrough
This video features gameplay from the 'Head Case' side mission in Borderlands 3, featuring the Siren character, Amara. The content begins with a brief overview of the galaxy map and mission logs on the planet Pandora before transitioning to active ground combat in the Ascension Bluff region. Viewers will see the character engage in fast-paced gunfights against Children of the Vault enemies using various weapons. The gameplay demonstrates a key mission mechanic where the character enters a blue-tinted digital simulation to retrieve memory fragments. Throughout the video, the analysis covers environment exploration, looting, intense combat encounters both inside and outside the simulation, and the retrieval of the first two mission-critical memory fragments. Chapters: 0:00:00 - 0:00:14 - Galaxy Map and Mission Menu Navigation 0:00:15 - 0:01:26 - Ground Combat and Exploration in Ascension Bluff 0:01:27 - 0:02:11 - Entering the Digital Simulation and Locating the First Fragment 0:02:12 - 0:03:15 - Intense Firefight within the Simulated Reality 0:03:16 - 0:04:34 - Combat Progression and Environment Scouring 0:04:35 - 0:05:00 - Second Memory Fragment Retrieval and Menu Pause

Blasphemous Fighting Our Lady of the Charred Visage
This video provides a complete walkthrough of a specific segment in the game Blasphemous, titled "Blasphemous Fighting Our Lady of the Charred Visage". Viewers will first see the player navigating through a snowy, mountainous region filled with challenging enemies and environmental puzzles. The gameplay showcases exploration, platforming, and combat against various foes, including floating bell-like creatures and armored adversaries. Along the way, the player collects several items, such as "Knot of Rosary Rope" and "Sternum of Vitas, the Performer," and interacts with NPCs for lore exposition. The video builds up to a significant boss encounter, "Our Lady of the Charred Visage," demonstrating the boss's attack patterns, the player's strategies to counter them, and ultimately, the boss's defeat. The successful completion of this boss battle rewards the player with a health increase and a "Cloistered Sapphire." The video ends with further exploration and combat, culminating in another boss fight against Our Lady of the Charred Visage, showcasing multiple attempts and different strategies to overcome the challenge, eventually defeating the boss again and acquiring a "Small Bead of Blue Wax." The overall video is a detailed guide through this challenging section of Blasphemous, highlighting perseverance and strategic gameplay. 📖 Chapters: 0:00:00 - Game start and save file selection 0:00:10 - Player begins exploration in "Graveyard of the Peaks" area 0:00:37 - Transition to a snowy, icy environment 0:00:48 - First combat encounter against an armored enemy 0:01:10 - Encounter with a floating bell-like enemy 0:01:30 - Engaging multiple floating enemies simultaneously 0:02:10 - Dealing with a large, slow, coffin-wielding enemy 0:02:40 - Navigating platforming challenges in the snowy peaks 0:03:10 - More combat against flying and ground enemies 0:03:28 - Player finds and uses the 'Oil of the Pilgrims' to increase Fervour 0:03:40 - Combat sequence featuring ranged attacks 0:04:18 - Navigating a section with multiple flying enemies and platforming 0:05:27 - Player acquires 'Piece of a Tombstone' 0:05:54 - Encountering an NPC who gives lore, mentioning 'The Miracle' 0:06:17 - Entering the "Convent of Our Lady of the Charred Visage" 0:06:45 - Combat against a cloaked enemy wielding a flail and summoning projectiles 0:07:23 - Navigating vertical shafts with platforms and ladders 0:07:49 - Player activates a bell-gondola to traverse a large gap 0:08:24 - Player acquires 'Knot of Rosary Rope' 0:08:31 - Visual lore cutscene showing a character impaled with swords, talking about 'Six stinging pains' 0:09:11 - Checking inventory for newly acquired items and upgrades 0:09:44 - Another bell-gondola ride across a chasm 0:10:21 - Interaction with another kneeling statue, possibly for upgrades or healing 0:10:41 - Returning to the "Convent of Our Lady of the Charred Visage" 0:10:57 - Encountering environmental hazards: molten gold pouring from pots 0:11:09 - Combat against a cloaked enemy in a room with molten gold hazards 0:11:30 - Vertical ascent through more rooms with molten gold and enemies 0:11:51 - More combat with cloaked enemies and molten gold 0:12:12 - Player uses a magical ability for defense/attack 0:12:47 - More challenging combat with multiple cloaked enemies and molten gold 0:13:20 - Engaging flying enemies while avoiding molten gold streams 0:13:44 - Navigating a vertical section with ladders, flying enemies, and molten gold 0:13:54 - Acquiring 'Sternum of Vitas, the Performer' 0:14:04 - Molten gold streams clearing the path, enabling further progression 0:14:24 - Combat against more cloaked enemies while dodging molten gold 0:14:48 - More intense combat and platforming over molten gold 0:15:10 - Challenging combat against cloaked enemies on a narrow platform 0:15:33 - Additional combat and platforming 0:16:16 - Final cloaked enemy encounter before the boss area 0:17:16 - Exemplaris Excommunicatonis title screen, indicating a boss fight completed or an achievement unlocked 0:17:23 - Returning to the game world 0:17:28 - Returning to the bell-gondola 0:18:29 - Another interaction with a kneeling statue 0:18:31 - Lore cutscene about 'tormented heart' and 'mortal stains of the soul' 0:19:11 - Inventory check, highlighting a 'Knot of Rosary Rope' and abilities 0:20:20 - Exemplaris Excommunicatonis screen 0:20:56 - Acquiring a 'Small Bead of Blue Oar' 0:21:46 - Acquiring a 'Guilt Fragment' after defeating a flying enemy 0:22:20 - Defeating a cloaked enemy in a lava-filled chamber 0:22:31 - Another encounter with a cloaked enemy in a lava room 0:22:50 - More lava-room combat and platforming 0:23:13 - Challenging platforming and combat in the Convent's lava-filled rooms 0:23:41 - Final fight against cloaked enemies and acquiring 'Exemplaris Excommunicatonis' Chapters: 0:00:00 - 0:02:10 - Scaling the Graveyard of the Peaks 0:02:10 - 0:03:55 - Precarious Platforming and Fervour Upgrade 0:03:55 - 0:05:55 - Encountering the NPC and Reaching the Convent 0:05:55 - 0:07:06 - Exploring the Convent of Our Lady of the Charred Visage 0:07:06 - 0:08:31 - Dodging Molten Gold and Acquiring Health Upgrades 0:08:31 - 0:09:04 - Boss Fight: Our Lady of the Charred Visage
Borderlands 3 cartel fight
Dive into a full Borderlands 3 mission playthrough, packed with continuous first-person shooter action and objective progression. Witness intense combat against diverse foes like Psychos, Fanatics, and Maliwan troops, showcasing efficient weapon usage, critical hits, and elemental damage across varied environments. Experience thrilling vehicle combat in an Outrunner as you traverse zones like Ascension Bluff. Track the player's progression through leveling up, acquiring new gear, and completing various in-game challenges. The journey climaxes in the opulent Villa Ultraviolet, where meticulous fountain piece collection leads to a challenging boss battle against Joey Ultraviolet. This video offers a detailed look at strategic gameplay, weapon management, and character development, culminating in a hard-fought victory. Chapters: 0:00 - Engaging enemies in The Droughts with a multi-barreled weapon 0:45 - Driving an Outrunner through the arid landscape of Pandora 1:29 - Utilizing specialized weaponry to eliminate clusters of hostiles 2:33 - Exploration of the various industrial complexes on the map 3:42 - Upgrading character skills through the interactive menu 4:43 - Combat sequence involving aerial targets and ground units 5:32 - Intense close-quarters combat inside a dilapidated structure 6:51 - Navigating the rocky terrain while searching for loot 7:34 - Engaging in combat across various outdoor environments 8:47 - Using fast travel points to move between different map zones 9:36 - Reviewing and managing gear within the character's inventory 10:10 - Testing out newly acquired weapons in the hub area 11:15 - Aerial view and approach to the opulent Villa Ultraviolet 12:15 - Battling against elite guard members outside the villa gates 13:31 - Deployment and combat using the Iron Bear mech suit 14:48 - Exploring the luxurious interior segments of the mansion 15:43 - Eliminating waves of Cartel Thugs within the villa halls 16:51 - Continued exploration and searching for mission objectives 18:21 - Confronting powerful mini-bosses alongside standard enemies 19:54 - Collecting specialized items like the Golden Mask 21:13 - Engaging large groups of enemies in the mansion ballroom 22:15 - Final preparation and clearing remaining villa areas 23:55 - Entering the boss arena for the final encounter 25:27 - Introductory sequence for the boss Joey Ultraviolet 26:09 - High-stakes boss fight involving multiple combat phases 27:32 - Final showdown with Joey Ultraviolet and his minions 28:34 - Post-battle loot collection and mission completion sequence Chapters: 0:00:00 - 0:02:15 - Hunting Cartel Operatives in Ascension Bluff 0:02:15 - 0:04:15 - Vehicular Traversal and Leveling Up 0:04:15 - 0:06:45 - Clearing Outposts and Collecting Coordinates 0:06:45 - 0:09:15 - Fast Travel to Sanctuary and Inventory Management 0:09:15 - 0:11:30 - Deciphering Coordinates with Maurice 0:11:30 - 0:14:00 - Infiltrating Villa Ultraviolet's Front Gates 0:14:00 - 0:17:15 - Assaulting the Main Courtyard with Iron Bear 0:17:15 - 0:20:30 - Securing Fountain Pieces Inside the Mansion 0:20:30 - 0:23:45 - Grand Ballroom Skirmish and Level 12 Upgrade 0:23:45 - 0:26:00 - Assembling the Golden Mask Puzzle 0:26:00 - 0:28:30 - The Final Battle Against Joey Ultraviolet 0:28:30 - 0:30:00 - Claiming Loot and Completing the Event Chapters: 0:00:00 - 0:00:38 - Outpost Skirmish and Looting 0:00:38 - 0:01:48 - Canyon Drive and Vehicular Combat 0:01:48 - 0:02:25 - Fast Travel Gate Navigation 0:02:25 - 0:03:22 - Exploring Ascension Bluff 0:03:22 - 0:03:56 - Menu Management and Leveling Up 0:03:56 - 0:05:14 - Holy Broadcast Center Showdown 0:05:14 - 0:07:15 - Elevated Platform Skirmish 0:07:15 - 0:08:46 - Defeating Boba Yaga and Collecting Legendary Drops 0:08:46 - 0:09:28 - Fast Travel to Sanctuary III 0:09:28 - 0:10:00 - Turning in the Quest to Maurice Chapters: 0:00:00 - 0:01:45 - Clearing Out Enemies in The Droughts and Grabbing Early Loot 0:01:45 - 0:03:30 - Driving the Outrunner through Ascension Bluff and Leveling Up 0:03:30 - 0:05:10 - Clearing Out Cartel Thugs on the Elevated Walkways 0:05:10 - 0:07:14 - Fast Traveling to Sanctuary and Adjusting Loadout Options 0:07:14 - 0:08:50 - Gate-Crashing Villa Ultraviolet with Iron Bear Mech Combat 0:08:50 - 0:10:00 - Defeating Joey Ultraviolet and Completing the Cartel Quest with Maurice

UNO Domination! Watch ZeroR-Bello's Strategic Masterclass
This video features a full game of UNO played digitally with four AI opponents: Hill_Figure, verajon06, PermanDAK, and ZeroR-Bello. The gameplay spans multiple rounds, showcasing various strategic card plays including number cards, skip cards, reverse cards, draw two cards, and wild draw four cards. Viewers will observe the dynamic flow of the game, including card stacking, strategic skips and reverses, and the gradual accumulation of cards by unlucky players. The video progresses through several rounds, with different players winning individual rounds and accumulating scores, ultimately culminating in a final round where ZeroR-Bello achieves victory, highlighting the competitive and unpredictable nature of UNO. The match settings include stacking, 7-0, jump-in, force play, no bluffing, draw-to-match, and a score limit of 1000. 📖 Chapters: 0:00:00 - Match Information Display 0:00:06 - Game Setup and Player Introduction 0:00:07 - Round 1 Begins - Initial Card Plays 0:00:13 - Strategic Green Card Plays and Draw 4 0:00:30 - Draw 2 and Blue Cards Played 0:00:39 - Blue Skip and Reverse Cards 0:00:46 - Wild Card to Green and Reverse 0:00:56 - Red Cards and UNO Call by LABOULETTE52 0:01:04 - Red Cards and ZeroR-Bello Plays Wild 0:01:12 - Red Skip and Draw 2 Cards 0:01:20 - Yellow Cards and ZeroR-Bello Wins Round 1 0:01:41 - Round 1 Summary: LABOULETTE52 Wins 0:01:46 - Round 2 Begins - Initial Green Plays 0:02:02 - Wild Draw 4 and Reverse Cards 0:02:15 - Yellow Cards and ZeroR-Bello Wins Round 2 0:02:35 - Round 2 Summary: PermanDAK Wins 0:02:39 - Round 3 Begins - Wild Draw 4 and Skips 0:03:16 - Yellow Cards and ZeroR-Bello Wins Round 3 0:03:39 - Round 3 Summary: ZeroR-Bello Wins 0:03:42 - Round 4 Begins - Green Card Plays 0:04:19 - Yellow Cards and ZeroR-Bello Wins Round 4 0:04:47 - Round 4 Summary: ZeroR-Bello Wins 0:04:50 - Round 5 Begins - Green Card Plays and Wild 0:05:27 - Yellow Cards and ZeroR-Bello Wins Round 5 0:05:57 - Round 5 Summary: ZeroR-Bello Wins 0:06:00 - Round 6 Begins - Green Card Plays and Wild 0:06:37 - Yellow Cards and ZeroR-Bello Wins Round 6 0:07:07 - Round 6 Summary: ZeroR-Bello Wins 0:07:10 - Round 7 Begins - Green Card Plays and Wild 0:07:48 - Yellow Cards and ZeroR-Bello Wins Round 7 0:08:18 - Round 7 Summary: ZeroR-Bello Wins 0:08:21 - Round 8 Begins - Green Card Plays and Wild 0:09:00 - Yellow Cards and ZeroR-Bello Wins Round 8 0:09:30 - Round 8 Summary: ZeroR-Bello Wins 0:09:33 - Round 9 Begins - Green Card Plays and Wild 0:10:11 - Yellow Cards and ZeroR-Bello Wins Round 9 0:10:41 - Round 9 Summary: ZeroR-Bello Wins 0:10:44 - Round 10 Begins - Green Card Plays and Wild 0:11:22 - Yellow Cards and ZeroR-Bello Wins Round 10 0:11:53 - Round 10 Summary: ZeroR-Bello Wins 0:11:56 - Round 11 Begins - Green Card Plays and Wild 0:12:35 - Yellow Cards and ZeroR-Bello Wins Round 11 0:13:05 - Round 11 Summary: ZeroR-Bello Wins 0:13:08 - Round 12 Begins - Green Card Plays and Wild 0:13:46 - Yellow Cards and ZeroR-Bello Wins Round 12 0:14:16 - Round 12 Summary: ZeroR-Bello Wins 0:14:19 - Round 13 Begins - Green Card Plays and Wild 0:14:58 - Yellow Cards and ZeroR-Bello Wins Round 13 0:15:28 - Round 13 Summary: ZeroR-Bello Wins 0:15:31 - Round 14 Begins - Green Card Plays and Wild 0:16:09 - Yellow Cards and ZeroR-Bello Wins Round 14 0:16:39 - Round 14 Summary: ZeroR-Bello Wins 0:16:42 - Round 15 Begins - Green Card Plays and Wild 0:17:21 - Yellow Cards and ZeroR-Bello Wins Round 15 0:17:51 - Round 15 Summary: ZeroR-Bello Wins 0:17:54 - Round 16 Begins - Green Card Plays and Wild 0:18:32 - Yellow Cards and ZeroR-Bello Wins Round 16 0:19:02 - Round 16 Summary: ZeroR-Bello Wins 0:19:05 - Round 17 Begins - Green Card Plays and Wild 0:19:44 - Yellow Cards and ZeroR-Bello Wins Round 17 0:20:14 - Round 17 Summary: ZeroR-Bello Wins 0:20:17 - Round 18 Begins - Green Card Plays and Wild 0:20:56 - Yellow Cards and ZeroR-Bello Wins Round 18 0:21:26 - Round 18 Summary: ZeroR-Bello Wins 0:21:29 - Round 19 Begins - Green Card Plays and Wild 0:22:08 - Yellow Cards and ZeroR-Bello Wins Round 19 0:22:38 - Round 19 Summary: ZeroR-Bello Wins 0:22:41 - Round 20 Begins - Green Card Plays and Wild 0:23:20 - Yellow Cards and ZeroR-Bello Wins Round 20 0:23:50 - Round 20 Summary: ZeroR-Bello Wins 0:23:53 - Round 21 Begins - Green Card Plays and Wild 0:24:32 - Yellow Cards and ZeroR-Bello Wins Round 21 0:25:02 - Round 21 Summary: ZeroR-Bello Wins 0:25:05 - Round 22 Begins - Green Card Plays and Wild 0:25:44 - Yellow Cards and ZeroR-Bello Wins Round 22 0:26:14 - Round 22 Summary: ZeroR-Bello Wins 0:26:17 - Final Round Begins - Green Card Plays 0:26:54 - Red Cards and UNO Call by PermaDAK 0:27:16 - ZeroR-Bello Wins the Match and Final Summary Chapters: 0:00:00 - 0:02:25 - Round one begins with classic stacking rules as players quickly cycle through colors. 0:02:25 - 0:04:15 - Round two starts with intense wild card action and jump-ins shifting the turn order. 0:04:15 - 0:07:10 - Round three features tactical draw cards and a rapid succession of color changes. 0:07:10 - 0:09:30 - AI bots take over disconnected slots during the final rounds as the match concludes. Chapters: 0:00:00 - 0:03:30 - Initial match setup and opening turns of the first classic UNO game 0:03:30 - 0:07:15 - High-stakes action as players stack draw cards, leading to the first match conclusion 0:07:15 - 0:10:15 - The second match begins with a new roster of opponents, showcasing fast-paced strategy 0:10:15 - 0:14:00 - Strategic card plays, block actions, and color changes dominate the third round 0:14:00 - 0:17:15 - Climax of the third match as players race to empty their hands before the final draw 0:17:15 - 0:21:00 - The fourth match introduces bot replacements after player disconnections, altering the gameplay dynamic 0:21:00 - 0:24:00 - Tense card exchanges and quick defensive plays wrap up the fourth match 0:24:00 - 0:27:30 - The fifth match launches with aggressive card stacking and reverse turn sequences 0:27:30 - 0:30:00 - Final rounds of the fifth match feature constant color shifts and wild card deployments 0:30:00 - 0:32:30 - Match start and initial card exchanges 0:32:30 - 0:35:00 - Mid-game tactics with stacking draw cards and skips 0:35:00 - 0:37:15 - Final rounds of match one and victory screen 0:37:15 - 0:39:31 - Lobby transition and the kickoff of match two
Siren Level 55 Gameplay: Defeating The Rampager
This gameplay video features a high-level Siren character progressing through the 'Beneath the Meridian' main story mission in Borderlands 3. The content showcases a variety of gameplay elements, including vehicle-based combat in the Neon Arterial zone on Promethea, tactical clearing of the Apollyon Transit Station, and exploration of Eridian-themed subterranean caverns. Viewers will see intensive gunplay against the Children of the Vault and Eridian Guardians, leveling up to 55, and the management of skill trees and Guardian Ranks. The video concludes with a multi-phase boss encounter against The Rampager inside The Forgotten Basilica, demonstrating elemental weapon effectiveness and character survivability in late-game scenarios. Chapters: 0:00:00 - 0:00:34 - Initial vehicle combat and mission objectives in Neon Arterial 0:00:34 - 0:01:25 - Escorting Maya and navigating subterranean transit tunnels 0:01:25 - 0:02:12 - Entering Apollyon Transit Station and environmental looting 0:02:12 - 0:04:52 - Extensive map navigation and quest tracking menu usage 0:04:52 - 0:06:22 - Ruin-based combat against COV forces and leveling up to 55 0:06:22 - 0:08:25 - Prolonged tactical review of the zone map 0:08:25 - 0:09:43 - Continued COV engagement and room-to-room tactical clearing 0:09:43 - 10:54 - Intensive close-quarters firefights inside the Transit Station 0:10:54 - 0:11:06 - Menu management for skill tree and Guardian Rank bonuses 0:11:06 - 0:12:43 - Demonstration of high-intensity elemental gunplay 0:12:43 - 0:13:42 - Transitioning to Eridian caverns and Guardian combat 0:13:42 - 0:14:52 - Combat with Guardians and discovery of Typhon Deleon logs 0:14:52 - 0:15:08 - Final approach to The Forgotten Basilica 0:15:08 - 0:18:02 - Paused menu screen with active mission dialogue 0:18:02 - 0:20:12 - Boss battle encounter with The Rampager Chapters: 0:00:00 - 0:00:33 - Cyclone Driving and Gateway Objective 0:00:33 - 0:01:25 - Spawning Outrunner and Entering Apollyon Station 0:01:25 - 0:02:12 - Exploring Apollyon Station and Finding Loot 0:02:12 - 0:04:55 - Apollyon Station Map Overview 0:04:55 - 0:09:40 - Apollyon Station Combat and Level 55 Level-Up 0:09:40 - 0:11:48 - Green Diamond Platform Firefight 0:11:48 - 0:13:25 - Restricted Catacombs Map Check 0:13:25 - 0:14:42 - Restricted Catacombs Exploration and Skirmish 0:14:42 - 0:15:53 - Collecting Typhon Logs and Typhon Dead Drop Cache 0:15:53 - 0:16:36 - Entering The Forgotten Basilica 0:16:36 - 0:17:50 - The Rampager Boss Battle First Phase 0:17:50 - 0:19:10 - The Rampager Boss Battle Mid-Phase and Elemental Shields 0:19:10 - 0:20:00 - Defeating The Rampager and Collecting Legendary Loot Chapters: 0:00:00 - 0:01:10 - Cyclone Driving & Vehicle Spawn 0:01:10 - 0:01:45 - Navigating Flooded Tunnels 0:01:45 - 0:04:50 - Exploring Apollyon Transit Station 0:04:50 - 0:08:00 - Clearing COV Forces & Leveling Up 0:08:00 - 0:09:30 - Catacombs Combat & Typhon Logs 0:09:30 - 0:10:00 - The Rampager Boss Fight Initiation Chapters: 0:00:00 - 0:01:25 - Traversing Neon Arterial by Vehicle 0:01:25 - 0:04:52 - Entering Apollyon Station and Map Inspection 0:04:52 - 0:10:04 - COV Skirmishes Outside the Station 0:10:04 - 0:13:26 - Ticket Area Combat and Weapon Looting 0:13:26 - 0:18:00 - Entering Restricted Catacombs 0:18:00 - 0:23:36 - Fighting Eridian Wraths and Typhon Cache Discovery 0:23:36 - 0:26:00 - Forgotten Basilica Vault Entry and Boss Battle

The Crew 2
This video showcases the initial gameplay experience of The Crew 2, focusing on the introduction to two distinct racing disciplines: Street Race and Aerobatics. Viewers will first witness an intense street race where the player, driving an orange Porsche 911 GT3 RS, navigates city streets, performs drifts, uses nitro boosts, and races against AI opponents, demonstrating various driving techniques and interactions with the urban environment. After successfully completing the race, the player is introduced to the 'Street Race Family' headquarters, where they are prompted to choose a free vehicle from a selection including a Mazda MX-5, Ford Mustang GT Fastback, Audi TT RS Coupé, and a Chevrolet Camaro ZL1 (though the Mustang is ultimately chosen). The video then transitions to the Aerobatics discipline. The player takes control of a pink and black stunt plane, learning fundamental aerial maneuvers such as rolls, air drifts, looping, and low-altitude flying over a scenic mountainous and lakeside area. This segment highlights precision flying and performing tricks to earn points. Upon successful completion of the aerobatics trial, the player is welcomed into the 'Freestyle Family' and chooses a free stunt plane. The video effectively demonstrates the variety of vehicle types and gameplay styles available in The Crew 2. 📖 Chapters: 0:00:00 - Introduction to Street Race 0:00:07 - Street Race Countdown 0:00:08 - Start of Street Race: Porsche 911 GT3 RS 0:00:15 - Navigating City Streets and Checkpoints 0:00:25 - Aggressive Driving and Collisions 0:00:35 - Driving Through Narrow Passages 0:00:45 - Underground Tunnel Section 0:00:55 - Returning to Open Roads, Using Nitro 0:01:05 - Cornering and Overtaking Opponents 0:01:15 - Approaching and Executing Jumps 0:01:25 - Second Pass Through Underground Section 0:01:38 - Street Race Completion and Rewards 0:02:08 - Welcome to the Street Racing Family 0:02:26 - Choosing a Free Street Race Vehicle 0:03:17 - Customizing the Ford Mustang GT Fastback 0:03:30 - LiveMap Overview: New Street Race Activities Unlocked 0:04:03 - Introduction to Aerobatics Discipline 0:04:13 - Start of Aerobatics Trial: Edge 540 V3 0:04:19 - Learning to Perform Rolls 0:04:30 - Mastering Air Drifts 0:04:52 - Attempting Knife Flights 0:05:31 - Executing Looping Maneuvers 0:06:07 - Practicing Low-Altitude Flying 0:06:58 - Aerobatics Objective Completed and Rewards 0:07:22 - Welcome to the Freestyle Family 0:07:46 - Choosing a Free Aerobatics Vehicle 0:08:12 - LiveMap Overview: New Aerobatics Activities Unlocked

The Crew 2
This video provides a comprehensive overview of 'The Crew 2' gameplay, showcasing various vehicle types and racing disciplines across a massive open-world rendition of the USA. Viewers will witness thrilling aerobatic plane races through checkpoints, experience dynamic vehicle switching between planes and cars during free-roam exploration, and get a taste of adrenaline-pumping off-road truck rallies in desert landscapes. The video also covers powerboat racing in bustling city harbors and intense street races in urban environments. Key aspects of the game's progression system are highlighted, including earning followers, collecting loot (performance parts), and unlocking new disciplines and vehicles. Throughout the video, tips on game mechanics like fast-swapping vehicles, accessing the map, and using photo mode are provided. The narrative introduces different racing personalities and challenges, culminating in successful event completions and rewards. The overall experience emphasizes high-octane action, diverse vehicle handling, and the freedom of an expansive open world. 📖 Chapters: 0:00:00 - Video Introduction & Aerobatic Plane Race Start 0:00:07 - Initiating the 'Creator' Air Race 0:10:00 - Navigating Checkpoints and Performing Aerial Maneuvers 0:20:00 - Mid-Race Progression and Environment Overview 0:30:00 - Approaching the Finish Line of the Air Race 0:39:57 - Aerobatic Race Completion and Reward Screen 0:53:00 - Post-Race XP and Loot Acquisition Summary 1:03:00 - Player Feedback Prompt: Did you like the race? 1:15:00 - Transitioning to Free Drive and Environmental Showcase 1:20:00 - Free Roam with Plane and Fast Vehicle Swap Tutorial 1:55:00 - Switching from Plane to Car (Mustang GT) 2:05:00 - Driving the Mustang GT in Rainy Conditions 2:30:00 - First-Person View Driving in Rain 2:59:00 - Accessing the Livemap and Exploring Activities 3:22:00 - Introduction to Wade Palmer and Offroad Rally 3:38:00 - Starting the Ford Raptor Offroad Race 3:50:00 - Driving through Rocky Terrain in the Raptor 4:15:00 - Offroad Driving with Dynamic Camera Angles 4:40:00 - Utilizing Nitro for Speed Boosts in Offroad Race 5:05:00 - Approaching the Finish Line of the Offroad Race 5:54:00 - Offroad Race Completion and Rewards 6:10:00 - Welcome to the Offroad Family - New Discipline Unlocked 6:30:00 - Selecting a Rally Raid Vehicle: Proto Buggy 7:00:00 - Customizing the Rally Raid Vehicle 7:12:00 - Livemap: Showing Rally Raid Activities Across the USA 7:35:00 - Live Track Feature: Replaying Previous Driving 7:55:00 - Rally Raid Gameplay with a New Proto Buggy 8:20:00 - Livemap: Additional Activity Locations 8:36:00 - Introduction to Alexis and Powerboat Racing 8:47:00 - Starting the Powerboat Race in New York 9:00:00 - High-Speed Powerboat Racing Action 9:25:00 - Navigating Race Checkpoints in the City Harbor 9:50:00 - Approaching the Statue of Liberty and Finish Line 10:09:00 - Powerboat Race Completion and Rewards 10:25:00 - Welcome to the Pro Racing Family - New Discipline Unlocked 10:46:00 - Selecting a Powerboat Vehicle: Proto Offshore Mk1 11:00:00 - Customizing the Powerboat Vehicle 11:13:00 - Livemap: Displaying Powerboat Activity Locations 11:55:00 - Starting 'The Sleeper' Street Race 12:02:00 - Street Race Leaderboard and Results 12:15:00 - Free Drive and Enhanced Vehicle Swap Mechanic 12:38:00 - Dialogue about Street Racing and Starting a Race 12:44:00 - Starting the 'Reach Top 3' Street Race in Rainy Conditions 13:00:00 - Intense Street Race with Opponents 13:25:00 - Continuing the Race, Handling Wet Roads 13:50:00 - Navigating Turns and Checkpoints 14:15:00 - Close Racing and Opponent Encounters 14:40:00 - Maintaining Speed and Position 15:05:00 - Final Stretch of the Street Race 16:19:00 - Street Race Completion and Loot Rewards 16:43:00 - Animated Story Segment: History of Street Racing 16:53:00 - Free Drive in a City Environment 17:10:00 - Livemap: San Francisco Night Call Street Race 17:20:00 - Entering Parking Garage for 'The Strip South' Race 17:49:00 - Starting 'The Strip South' Street Race 18:00:00 - Racing through City Streets in Las Vegas 18:25:00 - Navigating City Landmarks and Checkpoints 18:50:00 - Challenging Turns and Opponent Positions 19:15:00 - Intense Racing Action with Multiple Opponents 19:40:00 - Reaching the Final Checkpoints 20:25:00 - Race Completion and Reward Screen 20:42:00 - Free Drive in Las Vegas: Exploring Landmarks and Speed Traps 21:07:00 - Tip on Photo Mode and Photo Album Features 21:14:00 - Livemap: Reviewing Activities and Progress 21:58:00 - Entering 'The Chase' Event with Police Car 22:25:00 - Starting 'Takedown 8 Outlaws' Event 22:50:00 - Chasing and Takedown of Outlaw Vehicles 23:20:00 - Mid-Chase Action and Environmental Obstacles 23:50:00 - Strategic Vehicle Takedowns 24:20:00 - Intense Pursuit and Multiple Outlaw Takedowns 24:50:00 - Event Completion: Takedown 8 Outlaws 25:07:00 - Final Game Overview and Credits

JUMP FORCE
This video provides a comprehensive demonstration of Jump Force gameplay, featuring high-intensity battles between custom avatars and legendary anime characters. The content illustrates team-based combat mechanics, showcasing a variety of special moves, awakening abilities, and cinematic ultimate attacks from characters like Goku, Toshiro Hitsugaya, Meruem, and Yugi Muto. Beyond combat, the video demonstrates the depth of character customization, showing various outfit options and physical features for custom avatars. Viewers will also see navigation through the game's mission hub and reward screens, providing a complete look at the player experience from customization to victory. Chapters: 0:00:00 - 0:01:44 - Initial battle sequence: custom avatar vs Toshiro Hitsugaya 0:01:44 - 0:03:30 - Team transitions and conclusion of the first match 0:03:30 - 0:04:04 - Match results, experience gain, and loading screen tips 0:04:04 - 0:04:45 - Avatar customization menu: exploring outfits and hairstyles 0:04:45 - 0:05:43 - Mission hub navigation and selection of new combat challenges 0:05:43 - 0:07:47 - Battle 2 Round 1: Ryo Saeba and Goku vs Meruem and Yugi 0:07:47 - 0:09:14 - Round 2 combat and match finalization 0:09:14 - 0:09:35 - Technical loading screens featuring gameplay mechanics tips 0:09:35 - 0:10:33 - Final match segment and high-level ability demonstrations Chapters: 0:00:00 - 0:01:40 - Round 1 of the first battle features Kenshi and Dai against Toshirou 0:01:40 - 0:03:30 - Round 2 concludes with Kenshi's ultimate awakened ability defeating Toshirou 0:03:30 - 0:04:05 - Battle results and rewards display before transitioning to the lobby 0:04:05 - 0:04:55 - Customization menus show updates to the avatar's outfit, colors, and hairstyle 0:04:55 - 0:05:40 - Mission selection and team setup screen transitions to the next stage in Paris 0:05:40 - 0:07:45 - Match 2 Round 1 initiates with Ryo Saeba and Goku fighting Meruem in Paris 0:07:45 - 0:09:30 - Round 2 intensifies as Yugi summons Slifer and fights Goku and Asta 0:09:30 - 0:11:45 - The Final Round displays competitive exchanges before Ryo Saeba clinches victory 0:11:45 - 0:12:33 - Final results screen evaluates the team's performance with a D rank
Brawlhalla gameplay
The video presents a comprehensive compilation of 2v2 Friendly Brawl matches in Brawlhalla. Viewers will observe high-level teamwork and coordination across multiple stages, featuring a diverse cast of Legends including Fait, Petra, Jaeyun, Reno, and others. The gameplay demonstrates effective use of signatures, weapon combos, and edge-guarding techniques. Each match highlights the chaotic nature of 2v2 battles and the strategic synergy required to secure victories in various arenas like Demon Island, Small Fangwild, and Miami Dome. 📖 Chapters: 0:00:00 - 0:00:13 - Intro and loading screen for the first match 0:00:13 - 0:03:35 - 2v2 Friendly Brawl featuring Fait and Petra against Seven and Tezca on Demon Island 0:03:35 - 0:04:10 - Post-match results and lobby preparation for the next round 0:04:10 - 0:06:14 - 2v2 Friendly Brawl with Jaeyun and King Zuva facing Orion and Mordex on Small Hall of Heroes 0:06:14 - 0:06:54 - Transition through character select screen and loading into a new map 0:06:54 - 0:09:03 - Kor and Teros team up against King Zuva and Nix on Small Enigma 0:09:03 - 0:09:42 - Lobby interaction and loading sequence for the fourth match 0:09:42 - 0:12:11 - Reno and Teros compete against Nix and Sentinel on Small Fangwild 0:12:11 - 0:13:05 - Brief period in the lobby followed by loading the next battle 0:13:05 - 0:15:13 - Specter Knight and Sidra battle Bodvar and Mirage on Small Enigma 0:15:13 - 0:15:45 - Match results screen and setup for the sixth match 0:15:45 - 0:17:51 - Sidra and Mirage take on Jake and Teros on Miami Dome 0:17:51 - 0:18:31 - Lobby navigation and loading the next arena 0:18:31 - 0:21:55 - Mordex and Tezca face off against Brynn and Koji on Small Black Hole 0:21:55 - 0:22:39 - Results review and lobby wait for the final match 0:22:39 - 0:25:56 - Final 2v2 match with Ragnir and Mako against Magyar and Fait on Crystal Temple 0:25:56 - 0:26:30 - Final lobby interactions and conclusion of the gameplay session

Brawlhalla Square Pants
This video showcases multiple rounds of Brawlhalla 2v2 friendly matchmaking. The gameplay features various characters and maps, highlighting fast-paced combat, strategic maneuvers, and exciting K.O. sequences. Viewers will experience the dynamic nature of Brawlhalla, including character matchups, weapon utilization, and the thrill of victory and defeat across different stages. The video is a compilation of seven full matches, providing an extended look at competitive gameplay. 📖 Chapters: 0:00:00 - Match 1 Loading Screen - Diana & Ember vs Enchantress & Vivi 0:10:00 - Match 1 Countdown and Initial Brawl 0:55:00 - First Strike by Enchantress, followed by Double K.O. 1:07:00 - Diana K.O.s Vivi and Enchantress 1:19:00 - Ember K.O.s Vivi, then Enchantress 1:36:00 - Diana K.O.s Vivi 1:55:00 - Ember K.O.s Vivi 2:10:00 - Enchantress K.O.s Diana and Ember 2:25:00 - Diana K.O.s Vivi; Red Team is Dominating 2:40:00 - Enchantress K.O.s Diana 3:06:00 - Enchantress K.O.s Diana for a Shutdown 3:31:00 - Red Team Wins Match 1 after Diana K.O.s Vivi 3:38:00 - Match 2 Loading Screen - Cross & Kaya vs Lucien & Hattori (Spongebob map) 4:05:00 - Match 2 Initial Brawl and Engagements 4:38:00 - Cross gets First Strike on Hattori 4:56:00 - Lucien K.O.s Kaya; Double K.O. between Lucien and Kaya 5:18:00 - Lucien K.O.s Kaya and is Dominating 6:07:00 - Lucien K.O.s Kaya; Dominating again 6:34:00 - Cross K.O.s Lucien for a Shutdown 6:59:00 - Kaya K.O.s Hattori; Red Team Wins Match 2 7:09:00 - Match 3 Loading Screen - Jhala & Loki vs Gnash & Kor 7:45:00 - Match 3 Initial Brawl 8:15:00 - Gnash gets First Strike on Loki 8:39:00 - Loki K.O.s Kor, then Gnash 9:15:00 - Kor K.O.s Jhala 9:55:00 - Loki K.O.s Gnash 10:17:00 - Loki is Dominating after K.O.ing Kor 10:50:00 - Blue Team Wins Match 3 after Gnash K.O.s Jhala 10:56:00 - Match 4 Loading Screen - Volkov & Scarlet vs Yumiko & Bödvar 11:41:00 - Bödvar gets First Strike on Scarlet 11:58:00 - Scarlet K.O.s Yumiko 12:25:00 - Scarlet K.O.s Bödvar 12:58:00 - Bödvar K.O.s Volkov, becoming Dominating 13:16:00 - Bödvar K.O.s Scarlet, continuing Dominating streak 13:41:00 - Bödvar K.O.s Yumiko 14:06:00 - Blue Team Wins Match 4 after Bödvar K.O.s Volkov 14:15:00 - Match 5 Loading Screen - Mordex & Diana vs Cassidy & Mordex 15:17:00 - Mordex (Blue) gets First Strike on Diana 15:30:00 - Cassidy K.O.s Mordex (Red) 15:43:00 - Diana K.O.s Cassidy 15:59:00 - Mordex (Blue) K.O.s Diana 16:15:00 - Mordex (Blue) K.O.s Mordex (Red) 16:34:00 - Blue Team Wins Match 5 as Cassidy K.O.s Mordex (Red), who disconnects 17:00:00 - Match 6 Loading Screen - Thor & Thor vs Magyar & King Zuva 17:46:00 - Magyar (Blue) gets First Strike on Thor (Red) 18:02:00 - Magyar K.O.s Thor 18:31:00 - Thor (Red) K.O.s Magyar 18:52:00 - King Zuva K.O.s Thor (Red) 19:18:00 - Thor (Red) K.O.s King Zuva 19:52:00 - Thor (Red) K.O.s King Zuva again 20:18:00 - Blue Team Wins Match 6 after Magyar K.O.s Thor (Red) 20:26:00 - Match 7 Loading Screen - Macho Man & Seven vs Asuri & Val 21:00:00 - Match 7 Initial Brawl, followed by Val's First Strike on Macho Man and a Double K.O. 21:28:00 - Seven K.O.s Val 21:47:00 - Asuri K.O.s Seven 22:00:00 - Val K.O.s Asuri 22:20:00 - Macho Man K.O.s Val 22:45:00 - Seven K.O.s Val 22:55:00 - King Zuva K.O.s Seven, resulting in Complete Annihilation and a Blue Team victory
Dynamic Brawlhalla 2v2 Highlights: Elite Team Play and Strategies
This video presents a comprehensive compilation of several 2v2 Brawlhalla matches. Viewers will observe various Legend compositions and tactical approaches across multiple iconic stages. The gameplay highlights include complex weapon combinations, effective team coordination for knockouts, and strategic positioning during off-stage battles. Each segment demonstrates the fast-paced nature of competitive platform fighting, from the initial character selection screens to the final match results, showcasing high-level synergy between team members. 📖 Chapters: 0:00:00 - 0:03:00 - Match 1: Rayman and Arcadia vs Mordex and Azoth on Demon Island 0:03:00 - 0:03:25 - Match results display and lobby transition 0:03:25 - 0:05:51 - Match 2: Hattori and Gnash vs Nix and Ada in the Neo-Tokyo arena 0:05:51 - 0:06:14 - Post-match statistics and matchmaking for the next session 0:06:14 - 0:07:16 - Match 3: Cross and Dusk vs Artemis and Imugi in a temple stage 0:07:16 - 0:07:37 - Menu navigation and character selection for the fourth game 0:07:37 - 0:10:26 - Match 4: Asuri and Val vs Munin and Specter Knight on Bikini Bottom 0:10:26 - 0:11:00 - Final score breakdown and preparations for the last round 0:11:00 - 0:11:15 - Match 5: Initial exchanges between teams on the Graveyard map
Watch Dogs 2 - The Grand Finale: Hacking the Election
This video captures the thrilling conclusion of a key mission in Watch Dogs 2, focusing on the protagonist's efforts to expose corruption and manipulate electoral processes. Viewers will first witness a meticulous infiltration of the Inv!te office building, utilizing parkour and stealth to reach a highly secured server room. The core of the early gameplay involves an intricate drone hacking sequence, where the player navigates a complex network bypass puzzle to install a backdoor on Inv!te's servers. Following this, a crucial cutscene reveals the involvement of Bellwether and Blume in manipulating elections, setting the stage for the larger conflict. The player then orchestrates an escape from the Inv!te offices, transitioning to an outdoor urban environment where they receive further instructions from DedSec allies. Another significant segment involves driving to Thrusss' penthouse, followed by another multi-layered hacking challenge to breach the penthouse's advanced security systems. Once inside, a dramatic cutscene unfolds, featuring a confrontation with Dusan and Mary Catskill, exposing Catskill's betrayal and Dusan's cunning. The player then embarks on a destructive mission to obliterate Blume's backup servers and main generators, leading to intense combat and explosions. The video culminates in a high-stakes escape from the compromised facility as news reports confirm DedSec's successful data leak, and a final debriefing with Wrench and Sitara initiates the ultimate 'Motherload' mission. 📖 Chapters: 0:00:00 - Infiltrating the Inv!te Building 0:00:24 - Complex Drone Hacking to Access Inv!te Server 0:03:34 - Installing Backdoor and Escaping Inv!te Offices 0:04:15 - DedSec Briefing on Thrusss's Manipulation 0:05:32 - Driving to Thrusss's Penthouse 0:07:50 - Hacking into the Penthouse Security System 0:10:15 - Confrontation with Dusan and Catskill 0:12:20 - Destroying Blume's Backup Servers and Generators 0:14:40 - Escape from the Facility and DedSec Broadcast 0:16:10 - Debriefing and 'Motherload' Mission Commencement Chapters: 0:00:00 - 0:01:10 - Infiltrating Nvite Server Room 0:01:10 - 0:04:20 - Solving the Server Room Network Bypass 0:04:20 - 0:05:40 - Downloading Nvite Data and Escaping 0:05:40 - 0:07:34 - Meeting Sitara and Planning the Next Move 0:07:34 - 0:09:25 - Climbing to Thruss's Penthouse 0:09:25 - 11:07:00 - Wrench Destroys Blume's Backup Servers
Intense Team Combos and KOs in Brawlhalla
This video presents high-level competitive 2v2 gameplay in the platform fighter Brawlhalla. It starts with a brief warm-up session where viewers can observe various move sets and mobility techniques while the players wait in the queue. The first full match takes place on a red-themed stage, showcasing a blue team composed of Asuri and Lin Fei against a red team of Red Raptor and Nix. This segment highlights fast-paced KOs and effective team synergy. After a transition through the results and loading screens, the video moves into a second, more extended match on a mechanical gears stage. This second battle features a matchup between two Caspians on the red team and a team of Lucien and Xull on the blue team, demonstrating advanced edge-guarding, precise weapon throws, and strategic use of gadgets to control the arena. 📖 Chapters: 0:00:00 - 0:00:19 - Warm-up phase and practice while in the matchmaking queue 0:00:19 - 0:01:56 - First 2v2 match featuring Asuri and Lin Fei vs. Red Raptor and Nix 0:01:56 - 0:02:29 - Match results display and loading screen for the subsequent battle 0:02:29 - 0:05:00 - Second 2v2 match showcasing Caspian, Lucien, and Xull in high-intensity combat
Every Kill & Strategy in Splitgate 2 Battle Royale - Part 2
This video features a series of full gameplay sessions of Splitgate 2 in Battle Royale mode, showcasing the player's perspective from start to finish. Viewers will experience the complete loop of Battle Royale matches, including character selection, lobby queues, drops onto various maps like Drought, Glacier, and Fracture, and dynamic combat scenarios. The player engages in intense firefights, utilizing different weapons and abilities, achieving multiple kills, double kills, and team wipes. The video also highlights in-game events like 'Biomes Changing', 'Time Bubble' (which speeds up gameplay), and 'Fire Sale' (offering cheaper items). Each match concludes with the team placement and a progression screen showing earned XP and completed challenges. The video ends with a final match where the player is eliminated, resulting in a 'Team Placed #9' status. 📖 Chapters: 0:00:00 - Video Start & Game Introduction 0:00:13 - Splitgate 2 Title Screen & Server Connection 0:00:25 - Main Menu & Battle Royale Selection 0:00:58 - SSL Intro Animation & Character Selection (Sabrask) 0:03:20 - First Match Drop on Drought Map 0:03:50 - Initial Looting & Equipping Synapse 0:04:34 - Equipping Warden & First Perk Acquired 0:04:50 - Zone Open & First Enemy Engagement 0:05:16 - Weapon Level Up & Biomes Changing Notification 0:05:56 - Double Kill & Guardian Angel 0:06:50 - Enemy Team Wiped & Round 2 Begins 0:08:29 - Time Bubble Event: Everything Goes Faster 0:09:00 - Double Kill & Another Enemy Team Wiped 0:09:53 - Player Eliminated & Spectating Teammate 0:10:05 - Teammate Double Kill 0:11:43 - Match Ends: Team Placed #4 0:12:00 - SSL Intro & New Match Begins on Glacier Map 0:13:42 - First Kill on Glacier Map 0:14:00 - Final Round & Time Bubble Event 0:14:09 - Player Eliminated & Match Ends 0:15:00 - SSL Intro & New Match on Fracture Map 0:17:10 - Friendly Fire Teammate Kill 0:17:50 - Final Round & Time Bubble Event 0:18:00 - Player Eliminated & Match Ends 0:18:30 - SSL Intro & New Match on Fracture Map 0:20:50 - Fire Sale Event Active 0:21:16 - Player Eliminated & Match Ends 0:21:30 - Match Results & Progression Display 0:22:00 - Video End & SSL Outro

Ghostwire: Tokyo side missions
The protagonist navigates a neon-lit, rain-soaked Tokyo, utilizing supernatural abilities to interact with the spirit world. After a successful spirit transfer via a payphone, the journey continues to the Shiroyama Shrine, where elemental wind magic is used to defeat hostile Visitors. Cleansing Torii gates purifies the area, allowing for deeper exploration of the shrine grounds and its buildings. Interactions with helpful Nekomata merchants provide necessary supplies for the challenges ahead. A side quest leads into a haunted apartment where a Zashiki-warashi must be rescued from a lingering specter through the use of precise hand seals. Back on the streets, dynamic battles unfold around city landmarks as spirits are liberated from containment. The pursuit of a mischievous Karakasa-kozo requires stealth and persistence through desolate urban areas. Throughout the journey, the bond with local animals remains a focal point, as feeding and petting dogs often leads to rewards or a brief moment of respite in the desolate city. Akito explores the rain-drenched streets of a deserted Tokyo, populated by supernatural Visitors. He accepts various side missions from lingering spirits. In 'A Doll's Last Rites', he follows a psychic trail across city rooftops to find and cleanse a cursed doll. Next, he aids a Tanuki boss in locating his missing crew, finding one cleverly disguised as a cooking pot. He then investigates 'The Hoarder's House', where malevolent energy has manifested due to greed. Inside, he purges corrupted objects like a television and a refrigerator, eventually entering a distorted dimension to defeat the specter within. Throughout his journey, Akito utilizes elemental powers—wind, fire, and eventually water—to banish enemies. He also cleanses Tori gates to lift the deadly fog, facing a powerful masked enemy with giant scissors in the process. The exploration involves significant verticality, using grappling hooks to reach skyscrapers and navigating construction sites, all while collecting spirits to transfer via telephone booths for level progression. Chapters: 0:00:00 - Initial exploration and payphone spirit transfer 0:01:13 - Arriving at and exploring the surroundings of Shiroyama Shrine 0:01:58 - Combat against Visitors within the shrine grounds 0:02:23 - Cleansing the main Torii gate at Shiroyama Shrine 0:03:46 - Investigating a shrine building and collecting essential items 0:05:18 - Viewing the cityscape and utilizing fast travel via the map 0:06:09 - Trading with a Nekomata merchant at a roadside stall 0:07:38 - Entering an apartment to search for the missing Zashiki-warashi 0:09:29 - Confronting a greedy specter and performing a purge seal 0:10:21 - Freeing the Zashiki-warashi spirit with a snack offering 0:11:09 - Returning to the quest giver and concluding the side mission 0:12:21 - Engaging in street combat to rescue spirits trapped in a containment cube 0:13:48 - Commencing the search for the Karakasa-kozo umbrella spirit 0:14:32 - Initial attempt to track and capture the elusive Karakasa-kozo 0:15:35 - Persistent chasing of the umbrella monster through a restricted area 0:17:14 - Continued efforts to outmaneuver and capture the Karakasa-kozo 0:18:23 - Taking a moment to feed and interact with local dogs 0:19:34 - Visiting a Daily Ninja convenience store to restock supplies 0:00:00 - Initiating 'A Doll's Last Rites' side mission 0:02:15 - Transferring collected spirits at a phone booth 0:03:21 - Rooftop combat encounter with Visitors 0:04:18 - Cleansing the cursed straw doll with hand seals 0:06:13 - Completing the doll mission and returning to the shrine 0:06:40 - Interacting with Tanuki and starting the 'Tanuki Hunt' 0:08:02 - Starting 'The Hoarder's House' side mission 0:08:42 - Intense battle against Visitors outside the hoarder's house 0:09:43 - Purging supernatural corruption inside the hoarder's house 0:12:31 - Entering the distorted spirit realm to confront the specter 0:13:33 - Finalizing 'The Hoarder's House' mission 0:15:51 - Leveling up and managing skill points 0:18:55 - Battling the powerful scissor-wielding Visitor 0:21:05 - Cleansing the Tori gate and unlocking Water Weaving 0:24:43 - Navigating rooftops towards the Kagerie observation deck 0:29:15 - Large-scale combat encounter under the city highway
Brawlhalla: Gauntlet 🥊vs🥊 Blaster
This video captures a high-energy 2v2 Brawlhalla match on the scenic Small Kanto stage. The gameplay features intense action, showcasing a 'Gauntlet vs Blaster' dynamic as highlighted by the video's title. The blue team consists of Ada (using Gauntlets and Spear) and Asuri (wielding Katars and Gauntlets), while the red team includes Tezca (with Gauntlets and Cannon) and another Asuri (utilizing Katars and Blasters). Viewers will observe a series of rapid exchanges, strategic weapon pickups, impressive combos, and decisive K.O.s from both sides. Notable moments include Ada's early dominance with gauntlets, securing multiple K.O.s and a double K.O., as well as the effective use of katars, spears, and cannons by other legends. The video provides a quick, action-packed look at competitive Brawlhalla, culminating in a clear victory for the blue team. 📖 Chapters: 0:00:00 - Start of a fast-paced 2v2 Brawlhalla match on the Small Kanto stage. 0:00:08 - Blue team's Ada (using gauntlets) secures the first K.O. of the match. 0:00:14 - Ada (blue team) executes a powerful gauntlet combo, achieving an impressive Double K.O. 0:00:21 - Blue team's Tezca (using cannon) enters the fray with an empowered attack, landing significant damage. 0:00:30 - Blue team's Asuri (using katars) executes a signature move, eliminating an opponent from the red team. 0:00:40 - Ada (blue team) switches to spear, using a strong attack to launch a red team opponent off-stage. 0:00:49 - Tezca (blue team) lands another critical K.O. with a series of gauntlet attacks. 0:00:53 - An opponent disconnects, leading to a rapid final K.O. by Tezca. 0:00:55 - The 'GAME!' screen appears, followed by the scoreboard confirming Blue Team's victory and player statistics.

GTA 5 ONLINE 2v1 - I finish what I start
This GTA Online gameplay video features a variety of high-action sequences, starting with an aerial mission using the Oppressor Mk II. Viewers will see the utilization of chaff countermeasures and homing missiles during a 'Headhunter' VIP work mission. The content transitions to a brief parachute combat sequence before moving into ground-based maneuvers. A significant portion of the video is dedicated to stunt driving and boosting with the Toreador, showcasing its unique physics and speed in an urban environment. The final act of the video focuses on a highly competitive sniping duel in the Rockford Hills district, demonstrating quick-scope techniques, movement strategies, and tactical positioning, culminating in a close-quarters indoor shootout. Chapters: 0:00:00 - 0:01:28 - Aerial Mission Tactics with Oppressor Mk II 0:01:28 - 0:02:30 - Parachute Combat and Vehicle Deployment 0:02:30 - 0:04:35 - Toreador Stunt Driving and Boost Mechanics 0:04:35 - 0:05:55 - High-Speed Urban Navigation and Maneuvers 0:05:55 - 0:07:24 - Intense Sniper Duel and Parking Garage Engagement
Masterclass Dragon Ball FighterZ: Best Character Combos & Finishes
This video showcases a series of high-level matches in Dragon Ball FighterZ, featuring a wide variety of characters and iconic stages. Viewers will see intense tag-team battles involving powerful fusions like Vegito and Gogeta, formidable antagonists like Cooler and Kid Buu, and fan favorites like Teen Gohan and Kefla. The gameplay demonstrates complex combos, strategic character swaps, and cinematic super moves that capture the fast-paced action of the anime. From character selection screens to dramatic finishes, the content provides a comprehensive look at the diverse rosters and dynamic fighting mechanics of the game. 📖 Chapters: 0:00:00 - 0:02:30 - Red Team (Android 18, Cooler, Bardock) vs Blue Team opening match 0:02:30 - 0:04:12 - Character selection screen and loading phase for the next match 0:04:12 - 0:06:15 - Red Team (Kefla, Videl, Android 21) battle against Hit and Goku Ultra Instinct 0:06:15 - 0:08:30 - Setup and initial rounds for a match featuring Kid Buu and Android 21 0:08:30 - 0:11:03 - Dominant gameplay from Kid Buu's team showcasing unique move sets 0:11:03 - 0:13:00 - Start of a match between the Captain Ginyu team and Teen Gohan's team 0:13:00 - 0:13:52 - Reviewing pause menu options, move lists, and button settings 0:13:52 - 0:15:55 - Continuation and conclusion of the Captain Ginyu vs Teen Gohan match 0:15:55 - 0:18:05 - Character selection for the final set of high-energy matches 0:18:05 - 0:20:00 - Final showcase featuring fused fighters like Vegito and Gogeta in intense clashes

Roblox boxing beta
This video provides a comprehensive look at the gameplay in the Roblox title 'Boxing Beta.' Viewers will observe various aspects of the game, beginning with the server selection and character customization menus. The core content focuses on several PvP boxing matches against different opponents, demonstrating combat mechanics such as punching, blocking, and dodging. Throughout the duration, the footage shows the progression of matches from early rounds to knockouts, as well as social interactions within the game's lobby area and the use of the trading hub. The video concludes with a look at character stats and a brief interaction with training equipment. Chapters: 0:00:00 - 0:02:15 - Server Selection and First Match Highlights 0:02:15 - 0:04:30 - Three-Round Technical Boxing Match Demonstration 0:04:30 - 0:06:45 - Lobby Exploration and Quick Knockout Victory 0:06:45 - 0:09:45 - Intense High-Level PvP Combat and Win Streaks 0:09:45 - 0:11:24 - Social Hub Interactions and Trading Interface Overview

WATCH DOGS 2 Showdown
This video showcases multiple rounds of Watch Dogs 2's 'Showdown' multiplayer mode, where players engage in team-based hacking and combat scenarios. Viewers will see the player's strategic approaches to protecting servers, downloading data, and stealing hard drives, often involving stealth, hacking tools like drones and jumpers, and direct combat with various weapons. The video highlights both successful wins for the player's team (DedSec) and moments of being eliminated by rivals (Prime Eight), demonstrating the dynamic and often chaotic nature of the game mode. Different maps and objectives are featured across the rounds, providing a comprehensive look at the Showdown experience, including player coordination and adapting tactics in real-time. 📖 Chapters: 0:00:00 - Video begins with multiplayer session launch 0:00:01 - Game tips and loading screen 0:17:34 - First Showdown round starts: Objective 'Protect at least 1 server' 0:21:99 - Player runs outside the warehouse towards server A 0:30:26 - Player climbs onto the roof of a building 0:42:04 - Player uses a sniper rifle to eliminate an enemy near a vehicle 0:50:04 - Player drops from the roof and engages an enemy with an SMG 0:52:03 - Player is eliminated by a rival 0:55:00 - Player respawns and teammate continues the hack 1:01:25 - Player's teammate engages enemies while hack is in progress 1:15:37 - Player's teammate gets a kill, hack continues 1:21:40 - Player's teammate gets eliminated 1:28:90 - Player's teammate hacks server C successfully 1:33:00 - Player's teammate hacks server B successfully 1:39:51 - Player's teammate hacks server A successfully 1:42:30 - Server C is erased by a rival 1:44:00 - Player's teammate gets eliminated, server B is erased 1:48:90 - Player gets eliminated, server A is erased, 'Match Over You Lose' 1:52:90 - Player is back in free roam, searching for other players for a new Showdown match 2:38:39 - Second Showdown round starts: Objective 'Download the data before the rival team' 2:41:99 - Player runs towards the download objective 2:49:10 - Player encounters rivals, uses an explosive device 2:52:99 - Player gets eliminated by a rival 2:54:99 - Player respawns, teammate continues the download 3:01:50 - Player deploys a drone to hack rivals 3:07:90 - Drone is destroyed by a rival 3:11:90 - Player's teammate gets killed, hack progress is paused 3:13:90 - Player gets eliminated, hack progress continues slowly 3:18:90 - Player respawns, teammate continues the download, DedSec wins 3:20:90 - Player is back in free roam, searching for other players 3:27:90 - Third Showdown round starts: Objective 'Hack 3 servers' 3:29:90 - Player runs towards server B 3:33:90 - Player hacks server B 3:35:00 - Rival attacks player with an explosive, player is eliminated 3:38:90 - Player respawns, teammate protects the server 3:41:00 - Player eliminates a rival with a sniper rifle 3:46:00 - Player's teammate gets eliminated, player gets a kill 3:49:00 - Server C is hacked by a rival 3:51:00 - Player runs towards server A 3:54:00 - Player hacks server A 3:56:00 - Rival attacks player with a shotgun, player is eliminated 3:59:00 - Player respawns, hack continues on server A 4:00:00 - Player's teammate eliminates a rival 4:03:00 - Server A is hacked by player's teammate, DedSec wins 4:05:00 - Player gets followers and leaderboard points, searching for next match 4:15:00 - Fourth Showdown round starts: Objective 'Steal 3 hidden drives' 4:17:00 - Player encounters rivals, uses an explosive device 4:20:00 - Player eliminates a rival 4:24:00 - Player gets eliminated, teammate picks up the drive 4:28:00 - Player respawns, teammate continues to steal the drive 4:31:00 - Player's teammate gets eliminated 4:34:00 - Player gets eliminated while trying to get the drive 4:38:00 - Player respawns, still pursuing the drive 4:41:00 - Player uses a drone to get the drive 4:43:00 - Drone successfully steals the HDD 4:44:00 - Player's teammate steals the second HDD 4:46:00 - Player's teammate is eliminated after picking up the second HDD 4:48:00 - Player gets eliminated 4:50:00 - Player respawns, pursuing the remaining drive 4:53:00 - Player's teammate steals the third HDD, DedSec wins 4:55:00 - Player earns followers and leaderboard points Chapters: 0:00:00 - 0:01:53 - First Showdown Match: Protecting the Servers 0:01:53 - 0:02:21 - Matchmaking and Queueing in Horseshoe Bay 0:02:21 - 0:05:12 - Second Showdown Match: Data Download at 16th Street Station 0:05:12 - 0:08:04 - Third Showdown Match: Server Hacking under San Rafael Bridge
Blasphemous gameplay
This video captures over 30 minutes of gameplay from 'Blasphemous', a challenging action-platformer with Metroidvania elements. The player navigates through various snow-covered and interior environments, showcasing exploration, combat against different enemy types, and platforming mechanics. Key moments include finding a Rosary Bead (Muted Bell) and a Sternum of Vitas, recovering Guilt Fragments, resting at altars, and dealing with environmental hazards like lava. The video primarily focuses on movement and combat, with minimal UI interaction beyond checking items and abilities. It provides a good look at the game's pixel art style, gothic atmosphere, and challenging gameplay. 📖 Chapters: 0:00:00 - 0:00:09 - Game startup and main menu 0:00:09 - 0:00:16 - Selecting 'Graveyard of the Peaks' pilgrimage 0:00:16 - 0:00:24 - Starting gameplay in 'Graveyard of the Peaks' 0:00:24 - 0:00:44 - Platforming and climbing through snowy caverns 0:00:44 - 0:01:04 - Combat with a coffin-wielding enemy 0:01:04 - 0:01:19 - Navigating platforms and attacking a wall enemy 0:01:19 - 0:02:16 - Platforming and combat with flying bell-shaped enemies 0:02:16 - 0:03:00 - More platforming, combat with coffin enemy and another flying bell enemy 0:03:00 - 0:03:29 - Continuing platforming and navigating ledges 0:03:29 - 0:03:59 - Resting at an altar and defeating another wall enemy 0:03:59 - 0:04:21 - Combat with a flying bell enemy and moving platforms 0:04:21 - 0:04:37 - Acquiring 'Muted Bell' Rosary Bead and viewing inventory 0:04:37 - 0:05:04 - Returning to the coffin enemy for a minor battle 0:05:04 - 0:05:59 - Restarting from the main menu and returning to the last save point, re-engaging coffin enemy 0:05:59 - 0:06:24 - Continuing through the snowy area, combat with a wall enemy 0:06:24 - 0:07:17 - Platforming and battling flying bell enemies again 0:07:17 - 0:08:26 - Combat with coffin enemy and wall enemy 0:08:26 - 0:09:05 - Fighting multiple flying bell enemies and retrieving a 'Guilt Fragment' 0:09:05 - 0:10:00 - Combat with a wall enemy and navigating jumping platforms 0:10:00 - 0:10:54 - Entering 'Convent of Our Lady of the Charred Visage' 0:10:54 - 0:11:20 - First encounter and combat with a chained enemy and retrieving a 'Guilt Fragment' 0:11:20 - 0:12:12 - Navigating a vertical shaft with platforms and climbing 0:12:12 - 0:12:39 - Encountering environmental hazards (lava streams) and a chained enemy 0:12:39 - 0:13:02 - Moving through a new area with crawling enemies and a boss-like enemy 0:13:02 - 0:13:38 - Combat with crawling enemies and the boss-like enemy 0:13:38 - 0:14:29 - Repeating the previous combat sequence against crawling and boss-like enemies 0:14:29 - 0:15:16 - Navigating the previous snowy area, using a cage to ascend/descend 0:15:16 - 0:15:47 - Exploring a new chamber and cleansing guilt at a statue 0:15:47 - 0:16:13 - Returning to a previous area via the cage lift 0:16:13 - 0:17:18 - Encountering and fighting more chained enemies and navigating lava traps 0:17:18 - 0:18:26 - Fighting multiple crawling enemies in a platforming section 0:18:26 - 0:19:13 - More lava traps and chained enemy combat 0:19:13 - 0:20:06 - Fighting multiple crawling enemies and navigating lava streams 0:20:06 - 0:21:04 - More lava traps and chained enemy combat 0:21:04 - 0:22:18 - Platforming through lava traps, fighting crawling enemies and obtaining 'Sternum of Vitas, the Performer' 0:22:18 - 0:23:28 - More platforming and combat with crawling enemies in a multi-layered area 0:23:28 - 0:24:14 - Combat with crawling enemies and dealing with lava 0:24:14 - 0:25:16 - Final combat sequence with crawling enemies and lava traps Chapters: 0:00:00 - 0:00:45 - Exploring Graveyard of the Peaks 0:00:45 - 0:01:20 - Acquiring the Mated Bell and falling 0:01:20 - 0:01:50 - Respawning and climbing the peaks again 0:01:50 - 0:02:20 - Entering Convent of Our Lady of the Charred Visage 0:02:20 - 0:03:00 - Challenging flame pillar platforming 0:30:00 - 0:30:17 - Game Startup and Title Screen 0:30:17 - 0:30:44 - Ascending the Graveyard of the Peaks 0:30:44 - 0:31:15 - Combat Against Tomb Carriers 0:31:15 - 0:31:46 - Aerial Bell Enemy Encounters 0:31:46 - 0:32:15 - Climbing Falling Platforms 0:32:15 - 0:33:01 - Hazardous Descent and Defeat
Epic Brawlhalla Ranked Battles: Scythe vs. Axe Showdown
This video features a series of high-level ranked 1v1 Brawlhalla matches showcasing various legends and weapons. Viewers will see competitive gameplay featuring Mordex, Xull, Artemis, Wu Shang, Sidra, Koji, and Zariel across different maps. The content demonstrates advanced mechanics such as gravity cancels, off-stage edge guarding, active input scythe strings, and strategic weapon management. Each match highlights different playstyles, from the aggressive axe play of Xull to the technical bow and sword maneuvers of Koji, providing a comprehensive look at high-tier competitive 1v1 play. 📖 Chapters: 0:00:00 - 0:01:20 - Mordex vs. Xull on Demon Island 0:01:20 - 0:02:30 - Match results and character selection transitions 0:02:30 - 0:05:05 - Artemis vs. Wu Shang high-speed encounter 0:05:05 - 0:07:00 - Sidra vs. Wu Shang rematch on Twilight Grove 0:07:00 - 0:09:00 - Final match begins: Koji vs. Zariel 0:09:00 - 0:10:42 - Concluding combat and final victory screens
Borderlands 3
This gameplay video covers the full 'Blood Drive' mission from Borderlands 3, featuring the Siren character, Amara. The content begins with viewers seeing intense on-foot combat against various enemy factions in The Splinterlands as the player pushes toward a mission objective. The video shows the player securing a specialized vehicle, the 'Golden Chariot', from a crane outpost after a chaotic firefight. Gameplay then demonstrates high-speed vehicle combat and pursuit across the desert to stall the massive moving fortress known as Carnivora. After successfully sabotaging the machine's fuel lines and transmission, the player infiltrates its interior, known as 'The Guts of Carnivora', navigating industrial platforms and fighting through waves of bandits. The video concludes with an epic boss battle against Pain and Terror's massive robot, the Agonizer 9000, in a crowded arena, followed by a major plot reveal involving Tannis and her secret Siren powers before the player returns to the Sanctuary III hub. Chapters: 00:00:00 - 00:02:15 - Combat and exploration in the outskirts of The Splinterlands 00:02:15 - 00:04:35 - Securing the mission vehicle at the crane outpost 00:04:35 - 00:06:50 - Chasing the Carnivora mobile fortress and sabotaging its systems 00:06:50 - 00:09:10 - Infiltrating the internal industrial sections of Carnivora 00:09:10 - 00:10:00 - Final boss encounter against the Agonizer 9000 and mission wrap-up
Fortnite Chapter 2: Battle Royale Duel & Sniper One Shot Action
The video provides a comprehensive look at various gameplay modes and social features within Fortnite Chapter 2. It begins with a high-stakes firefight in the final circles of a Battle Royale match, where viewers see advanced building techniques and defensive play before the player is eliminated, finishing in second place. Following the match, the content transitions through various menu screens, showcasing seasonal challenges and the lobby interface. The video then moves into Creative mode, starting with a trap-filled obstacle course that demonstrates the complexity of player-created maps. A significant portion of the footage is dedicated to social interactions in the Creative hub, where players utilize a variety of emotes. The final segment of the video features gameplay from the 'Sniper One Shot' limited-time mode, highlighting fast-paced movement, impressive no-scope shots, and aggressive sniping tactics in a low-gravity environment. 📖 Chapters: 0:00:00 - 0:02:49 - Battle Royale Finale: Building and Firefight 0:02:49 - 0:05:15 - Match Results and Loading into Creative Mode 0:05:15 - 0:06:18 - Trap Maze Challenge Exploration 0:06:18 - 0:09:08 - Socializing in the Creative Hub with Emotes 0:09:08 - 0:12:21 - Sniper One Shot Mode: Early Match Gameplay 0:12:21 - 0:13:51 - High-Action Sniping and Eliminations 0:13:51 - 0:15:04 - Post-Match Hub Socialization Chapters: 0:00:00 - 0:00:30 - Building defenses and scouting the woods 0:00:30 - 0:01:00 - Exchanging long-range rifle fire from the fort 0:01:00 - 0:01:39 - Healing and boxing up inside a brick structure 0:01:39 - 0:02:04 - Looting the cabin for heavy weaponry 0:02:04 - 0:02:20 - Close-quarters combat and player elimination 0:02:20 - 0:02:50 - Spectating the final teammate's defense 0:02:50 - 0:03:04 - Match conclusion and return to lobby 0:30:00 - 0:32:18 - Battle Royale combat at Weeping Woods 0:32:18 - 0:33:40 - Checking Deadpool's weekly challenges in the lobby 0:33:40 - 0:35:15 - Matchmaking and loading into Creative Mode 0:35:15 - 0:36:18 - Testing a high-difficulty trap map in Creative 0:36:18 - 0:39:08 - Socializing and showing off emotes in the Creative Hub 0:39:08 - 0:39:25 - Managing the in-game friends list 0:39:25 - 0:43:05 - Low-gravity Sniper One Shot gameplay and trick shots

UFC
This video provides a comprehensive walkthrough of the career mode in UFC 3, showcasing the journey of a created fighter, Eli Wilson, as he progresses through multiple fights to become a 'Contender'. Viewers will learn about the game's career hub, including managing contract goals, viewing G.O.A.T. status, and editing perks. The video demonstrates the pre-fight routine, which involves simulating recovery, accepting fight offers, and engaging in weekly training activities to increase fighter attributes like strike stamina, chin strength, heart, legs strength, endurance, strike speed, toughness, power, and blocking. It also highlights the impact of social media interactions on fight hype and popularity. The core of the video features several full-fight sequences, demonstrating the gameplay mechanics, striking, takedowns, and ground and pound leading to spectacular knockouts. Each fight concludes with post-fight results, updated career statistics, and progression toward becoming a legendary fighter. The video concludes with a cinematic montage of various UFC fighters and gameplay moments, emphasizing the 'Road to Legend' theme. 📖 Chapters: 0:00:00 - 0:13:00 - Career Mode Intro & First Social Media Interaction 0:13:00 - 1:07:00 - Career Hub Navigation & Initial Fight Offers 1:07:00 - 1:53:00 - Training for First Fight (Aubin-Mercier) 1:53:00 - 2:27:00 - Pre-Fight Preparations & Social Media Hype 2:27:00 - 3:18:00 - UFC Fight Night 161 - Round 1 Begins & Takedowns 3:18:00 - 4:50:00 - Striking Exchanges & First Knockdown 4:50:00 - 5:51:00 - Knockout Victory & Replays vs. Aubin-Mercier 5:51:00 - 6:55:00 - Post-Fight Results & New Fight Offer (L. Santos) 6:55:00 - 7:22:00 - Training for Second Fight (L. Santos) 7:22:00 - 8:30:00 - UFC Fight Night 171 - Knockout Victory vs. Leonardo Santos 8:30:00 - 9:28:00 - Post-Fight Results & New Fight Offer (Nate Diaz) 9:28:00 - 10:25:00 - UFC Fight Night 180 - Knockout Victory vs. Nate Diaz 10:25:00 - 11:39:00 - Post-Fight Results & New Fight Offer (R. Dos Anjos) 11:39:00 - 12:44:00 - UFC Fight Night 190 - Knockout Victory vs. Rafael Dos Anjos 12:44:00 - 13:42:00 - Post-Fight Results & New Fight Offer (Diego Sanchez 1) 13:42:00 - 14:32:00 - UFC Fight Night 171 - Knockout Victory vs. Diego Sanchez 14:32:00 - 15:23:00 - Post-Fight Results & New Fight Offer (Diego Sanchez 2) 15:23:00 - 16:20:00 - Training & Pre-Fight Preparations (Diego Sanchez 2) 16:20:00 - 17:00:00 - UFC Fight Night 180 - Knockout Victory vs. Diego Sanchez 17:00:00 - 17:59:00 - Post-Fight Results & Contender Status Earned 17:59:00 - 18:25:00 - UFC Game Cinematic Montage - Road to Legend Chapters: 0:00:00 - 0:02:25 - Accepting the fight offer against Olivier Aubin-Mercier and simulating recovery 0:02:25 - 0:06:10 - Preparing with training camp activities and starting the first round 0:06:10 - 0:08:15 - Trading heavy strikes in the second round and securing a knockout victory 0:08:15 - 0:13:45 - Upgrading fighter attributes and promoting the next fight against Leonardo Santos 0:13:45 - 0:16:30 - Dominating Leonardo Santos in the first round with a fast knockout win 0:16:30 - 0:21:25 - Upgrading stamina and chin strength during training for the Diego Sanchez matchup 0:21:25 - 0:25:10 - Challenging Diego Sanchez in a tactical first round filled with grappling and striking 0:25:10 - 0:31:00 - Closing the rivalry with a devastating knockout in the second round and looking toward the next opponent

Epic Victory Royale in Fortnite Chapter 2!
Experience extensive Fortnite Battle Royale gameplay across multiple intense matches, showcasing strategy, combat, and dynamic teamwork. Navigate iconic locations including The Agency, Weeping Woods, Frenzy Farm, Sweaty Sands, Lazy Lake, and Misty Meadows. Witness skilled engagements with tactical building, precise shooting, and a varied arsenal (assault rifles, shotguns, SMGs, grenades, remote explosives). Key actions include inventory management, reviving teammates, eliminating bosses/henchmen, and using phone booth disguises. Explore the map via swimming, motorboats, and helicopter aerial attacks. Enjoy the full spectrum of match outcomes, from exhilarating Victory Royales to strategic eliminations. Casual player commentary covers in-game performance and tactics. The video also features pre-game lobbies, Battle Bus launches, and useful loading screen tips. 📖 Chapters: 0:00:00 - Victory Royale and Post-Game Lobby 0:00:32 - Loading Screen for Battle Royale 0:01:18 - Pre-game Lobby and Battle Bus Launch 0:02:12 - Looting in Weeping Woods, Initial Engagements & Opponent Eliminations 0:04:15 - Exploring, Looting & Teammate Reboot 0:05:40 - Fishing, Combat on Structure & Intense Build Fight 0:08:10 - Strategic Positioning, Health & Looting 0:09:55 - Moving to Bridge, Fishing & Teammate Reboot at Van 0:11:00 - Combat Near Reboot Van, Looting & Final Victory 📖 Chapters: 0:00:00 - Victory Royale and Post-Game Lobby 0:00:32 - Loading Screen for Battle Royale 0:01:18 - Pre-game Lobby and Battle Bus Launch 0:02:12 - Looting in Weeping Woods, Initial Engagements & Opponent Eliminations 0:04:15 - Exploring, Looting & Teammate Reboot 0:05:40 - Fishing, Combat on Structure & Intense Build Fight 0:08:10 - Strategic Positioning, Health & Looting 0:09:55 - Moving to Bridge, Fishing & Teammate Reboot at Van 0:11:00 - Combat Near Reboot Van, Looting & Final Victory 0:00:00 - Exploring The Agency & Motorboat Travel 0:01:25 - Lazy Lake Combat & Storm Zone Management 0:02:55 - Looting, Teammate Joins & Grenade Attacks 0:04:22 - Intense Building, Bomb Attacks & 9th Place Elimination 0:06:29 - Pre-Match Prep & Battle Bus Launch 0:07:56 - Landing at The Agency, Looting & Multiple Eliminations 0:09:30 - Player Eliminated during Firefight 0:00 - Teammate Revive, Looting & Engaging Enemies 0:20 - Progressing Through Building & Boss Elimination 0:35 - Mythic Weapon Loot & Strategic Positioning 0:45 - Engaging Multiple Enemies & Earning Medals 0:55 - Phone Booth Disguise & Vault Access 1:15 - Close Quarters Combat & Henchman Eliminations 1:25 - Resource Gathering, Second Disguise & Frenzy Farm Landing 1:40 - Engaging Enemies in Frenzy Farm 0:00:00 - Frenzy Farm Combat, Eliminations & AR Specialist 0:00:20 - Looting, Building & Storm Navigation to Bridge 0:01:15 - Build Fight, Intense Combat & 8th Place Elimination 0:02:10 - Match Ends, XP Earned & Lobby Prep 0:03:30 - Second Match: Battle Bus to Sweaty Sands 0:04:15 - Landing at Sweaty Sands, Looting & SMG Combat 0:05:15 - Close-Range Battles, Multiple Eliminations & Reboot Card 0:06:00 - Engaging Enemies, Reboot Attempt & 41st Place Elimination 0:06:30 - Return to Lobby & Next Match Prep 0:07:30 - Third Match: Battle Bus to The Agency 0:08:15 - Landing at The Agency, Looting & Enemy Engagements 0:09:20 - Henchman Elimination, Reboot Van & Final Shotgun Battle 0:00:00 - Mid-Match Engagement & Player Elimination 0:00:15 - Lobby, New Match & Battle Bus Launch 0:02:18 - Dropping from Battle Bus & Phone Booth Disguise 0:03:19 - Shadow Safe House Entry & Initial Combat 0:03:53 - Engaging Multiple Opponents with Disguise Advantage 0:04:24 - Team Combat, Teammate Revive & Henchman Elimination 0:05:42 - Swimming in Misty Meadows & Helicopter Piloting 0:06:38 - Aerial Attack & Ground Combat in Lazy Lake 0:07:11 - Intense Build Fight & Close Quarters Battle 0:07:49 - Strategic Building, Shooting & Final Elimination 0:08:50 - Return to Lobby & Post-Match Discussion 0:00:00 - Fortnite Loading Screen & Lobby Transition Chapters: 0:00:00 - Victory Royale Celebration 0:01:18 - New Match Lobby 0:01:34 - Dropping into the Map 0:02:12 - First Looting at Weeping Woods 0:02:26 - Engaging Enemies in the Cabins 0:03:01 - Elimination and Revival Tactics 0:04:05 - Exploring the Main Lodge 0:05:09 - Using the Reboot Van 0:06:00 - Fishing for Support Items 0:07:19 - Assault Rifle Skirmish at Weeping Woods 0:08:50 - Transitioning to New Zone 0:10:53 - Powerboat Manoeuvers on the River 0:12:09 - Arriving at Lazy Lake 0:13:54 - Explosive Showdown in Lazy Lake Buildings 0:15:51 - Roof-top Combat and Elimination 0:17:53 - Dropping at The Agency 0:19:38 - Infiltrating The Agency's Base 0:21:05 - Intense Vault Looting Sequence 0:22:12 - Disguise and Stealth Tactics 0:24:43 - Escaping The Agency via Choppa 0:26:48 - Urban Skirmish in Lazy Lake 0:28:52 - Late-Game High-Rise Battle 0:30:00 - Final Gameplay Wrap-up 0:30:00 - Victory Royale Celebration 0:31:18 - New Match - Battle Bus and Drop Strategy 0:32:13 - Entering Weeping Woods - Looting and Initial Contacts 0:33:01 - High-Stakes Skirmish in Weeping Woods 0:35:10 - Team Reboot Attempt and Field Tactics 0:37:19 - Mid-Game Engagements and Defensive Building 0:39:43 - Lazy Lake Skirmish and Strategic Positioning 0:42:00 - High-Intensity Firefight and Survival Struggles 0:44:46 - Drop into The Agency - Close Quarters Combat 0:46:31 - Intense Agency Battles and Strategic Retreats 0:48:15 - Strategic Deployment and Area Scouting 0:50:00 - Session Wrap-up and Post-Match Analysis
Ultimate Fortnite Fashion Show: Judging the Best Skins
This video features a high-energy Fortnite Creative 'Fashion Show' where players compete to showcase their best character skin, back bling, and pickaxe combinations. The gameplay demonstrates the host managing a large group of players, enforcing rules, and judging each participant's aesthetic choices. Viewers will see various popular skins, including Midas and Meowscles, as the host eliminates players with mismatched outfits through a series of rounds until only a few finalists remain. The content covers the entire process from the initial lobby gathering to the intense final judging moments. 📖 Chapters: 0:00:00 - 0:01:25 - Lobby Management and Game Setup 0:01:25 - 0:02:50 - Entering the Fashion Show Map and Rules Explanation 0:02:50 - 0:04:30 - Judging the Initial Round of Skin Combinations 0:04:30 - 0:05:50 - Advanced Elimination Rounds and Highlighted Outfits 0:05:50 - 0:06:11 - Final Showdown and Video Conclusion
High-Stakes Build Battles at Slurpy Swamp
This video features a full match of Fortnite Chapter 2 Season 2 gameplay. It starts with the selection of a Duo game mode in the lobby and proceeds through a long loading sequence accompanied by humorous meme narrations. The gameplay properly begins with a drop toward the Rig area, eventually landing at Shanty Town. Viewers will see early-game looting and initial combat engagements involving building and the use of the Harpoon Gun. The action then shifts toward Slurpy Swamp, where gameplay demonstrates tactical looting, resource gathering by consuming foraged items, and several high-intensity build battles on the rooftops of the industrial facility. The video concludes with the final combat encounter where the player is eliminated, followed by a return to the lobby and additional meme-based narrations during the exit loading screen. 📖 Chapters: 0:00:00 - 0:01:23 - Lobby Navigation and Initial Loading Phase 0:01:23 - 0:02:10 - Battle Bus Sequence and Landing at Shanty Town 0:02:10 - 0:04:30 - Early Match Looting and Initial Build Battles 0:04:30 - 0:07:15 - Resource Gathering and Movement Toward Slurpy Swamp 0:07:15 - 0:10:30 - Tactical Looting and Combat Engagements in Slurpy Swamp 0:10:30 - 0:13:30 - Rooftop Positioning and Inventory Organization 0:13:30 - 0:15:25 - Final Intense Build Battle and Match Conclusion 0:15:25 - 0:17:21 - Post-Match Lobby Return and Outro Loading
Intense Fortnite Box PVP Highlights & Building Practice
This video showcases high-level Fortnite Creative gameplay, specifically focusing on Box PVP matches and advanced building techniques. It begins with a spectator view of a Box PVP round before the player enters the final round using a festive character skin. The content demonstrates fast-paced building, strategic wall editing, and close-quarters shotgun combat. Following the match, the video provides a detailed look at the player's controller sensitivity settings, including adjustments to build mode and edit mode multipliers. The final portion of the video features extended building practice, highlighting rapid vertical movement and complex editing maneuvers in a controlled Creative environment. 📖 Chapters: 0:00:00 - 0:01:22 - Spectating Box PVP and loading into the final round 0:01:23 - 0:03:09 - Round 10 Box PVP gameplay featuring intense building and elimination 0:03:10 - 0:04:10 - Scoreboard review and navigation through the Creative hub 0:04:11 - 0:05:04 - Detailed adjustment of controller sensitivity and advanced settings 0:05:05 - 0:06:29 - Free build practice demonstrating rapid editing and vertical building
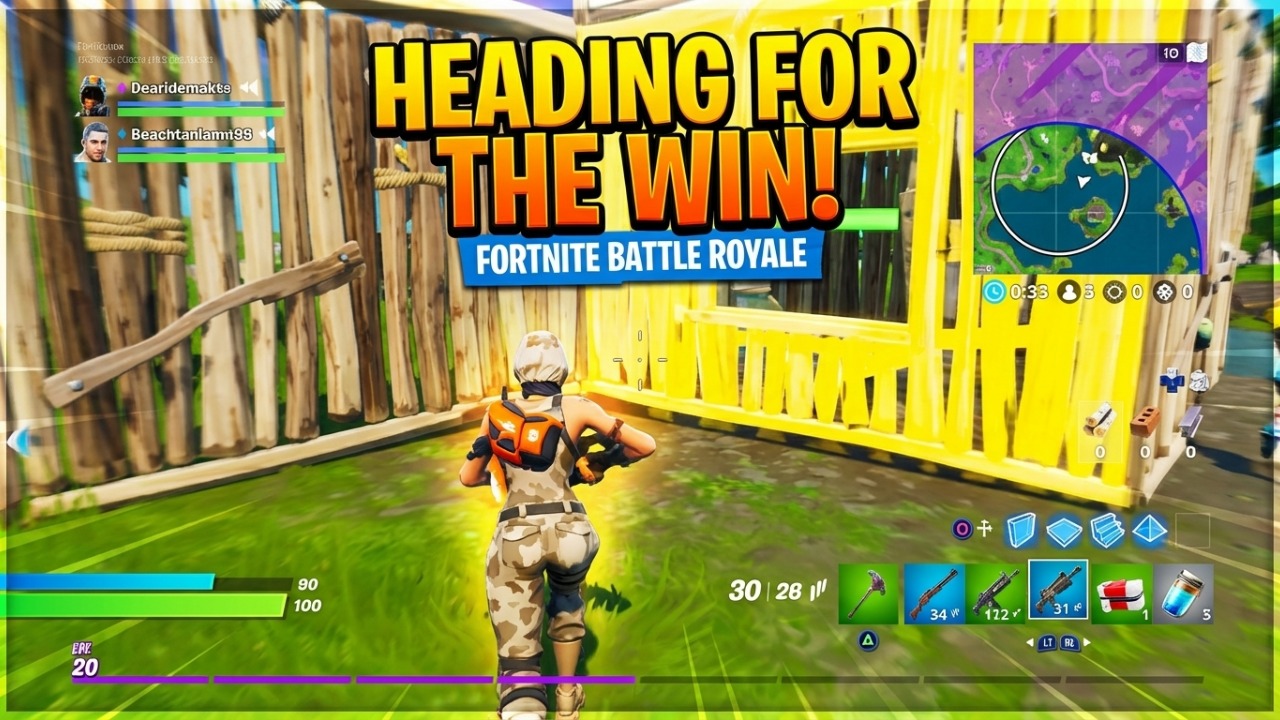
Fortnite Battle Royal Heading For the win
The video presents a full match of Fortnite Chapter 2 Season 2 in Duos mode. It starts with the player selecting the game mode and navigating the lobby menu before entering a lengthy loading sequence. Once the match begins, the gameplay shows the player jumping from the Battle Bus and landing at Salty Springs. The content covers the initial phase of looting for weapons and gathering materials. Viewers will see early-game combat encounters where the player successfully eliminates opponents using basic weaponry. As the match progresses into the mid-game, the video demonstrates tactical rotations across the map, further looting, and defensive building strategies. Intense firefights occur near The Agency, showcasing long-range shooting and quick construction. The climax of the video features a final battle within a very small storm circle, where the team's coordination and building skills lead to a Victory Royale. The video concludes with the match summary screens and the beginning of a new match sequence. 📖 Chapters: 0:00:00 - 0:01:06 - Introduction, game mode selection, and loading screen 0:01:07 - 0:01:27 - Battle Bus phase and choosing landing location 0:01:28 - 0:02:12 - Landing at Salty Springs and initial resource gathering 0:02:13 - 0:03:20 - First combat engagement and securing early eliminations 0:03:21 - 0:06:50 - Mid-game looting, rotation, and tactical movement 0:06:51 - 0:08:18 - Building mechanics and firefights near the river 0:08:19 - 0:09:23 - Final circle positioning and using a launch pad 0:09:24 - 0:10:45 - Final battle sequence and Victory Royale 0:10:46 - 0:12:44 - Match statistics and return to the game lobby 0:12:45 - 0:13:46 - Start of a new match and initial landing Chapters: 0:00:00 - 0:01:07 - Lobby Preparation and Matchmaking 0:01:07 - 0:02:03 - Battle Bus Drop to Salty Springs 0:02:03 - 0:03:30 - Early House Fights and Initial Looting 0:03:30 - 0:05:15 - Salty Springs Mid-Game Skirmishes 0:05:15 - 0:08:00 - Tactical Defensive Hiding 0:08:00 - 0:11:30 - River Crossings and Long-Range Pressure 0:11:30 - 0:14:24 - Storm Navigation and Close Duels 0:14:24 - 0:17:15 - Bridge and Lake Engagements 0:17:15 - 0:19:45 - Final Showdown and Victory Royale 0:19:45 - 0:21:33 - Victory Screen and Next Match Matchmaking 0:21:33 - 0:24:17 - Second Match Drop and Risky Reels Harvesting 0:24:17 - 0:27:14 - Infiltrating The Agency and Henchmen Combat 0:27:14 - 0:30:00 - Agency Corridor Fights and Final Elimination 0:30:00 - 0:31:07 - Matchmaking and Lobby Preparation 0:31:07 - 0:32:04 - Dropping into Salty Springs 0:32:04 - 0:33:32 - Early House Looting & Pistol Elims 0:33:32 - 0:35:45 - Salty Springs Skirmishes and Build Fights 0:35:45 - 0:36:11 - Victory Royale Celebration 0:36:11 - 0:37:33 - Match Transition and Lobby Chat 0:37:33 - 0:38:47 - Second Drop to Slurpy Swamp 0:38:47 - 0:39:24 - Factory Skirmish and Elimination
Fortnite Chapter 2 Season 2: Lobby and Social Menu Tour
This video provides a comprehensive tour of the Fortnite Chapter 2 Season 2 user interface and menu systems. Viewers will see the initial loading sequence followed by an exploration of the main lobby, where character animations and basic UI elements are demonstrated. The content covers the Item Shop, highlighting specific featured outfits like 'Infinity', and moves into the V-Bucks store page. A major portion of the footage is dedicated to navigating the social and party management menus, showcasing how friend lists and player statuses are displayed. The latter half of the video remains on the lobby screen, illustrating the idle environment and real-time updates to the party and friend sidebars over an extended period. 📖 Chapters: 0:00:00 - 0:02:30 - Initial loading screen and first look at the Chapter 2 Season 2 lobby 0:02:30 - 0:05:00 - Navigation through the Item Shop and initial browsing of the social menu 0:05:00 - 0:07:30 - Detailed walkthrough of the extensive friend list and party invitation interface 0:07:30 - 0:10:00 - Monitoring real-time lobby activity and player status changes in the sidebar 0:10:00 - 0:12:30 - Continued observation of the idle lobby environment and friend list updates 0:12:30 - 0:14:13 - Final recording segment of the main menu and social status notifications
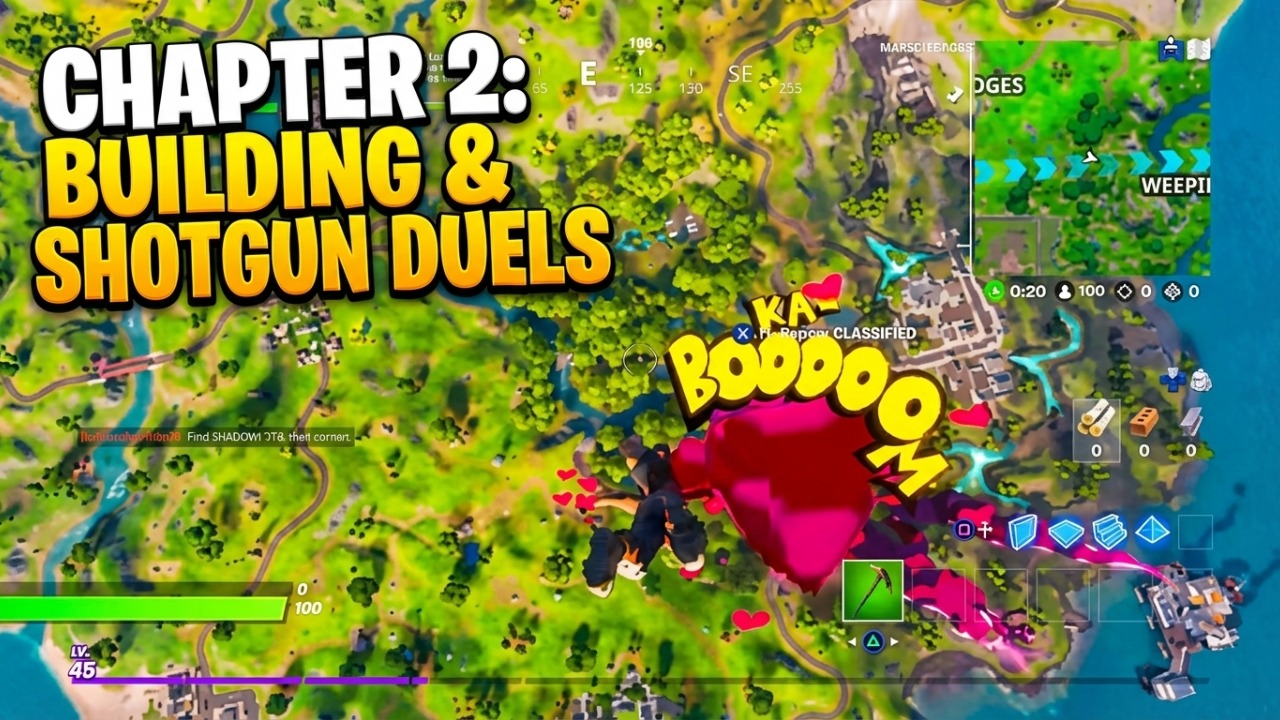
Fortnite Chapter 2: Building and Close-Quarters Shotgun Duels
This video features two complete matches of Fortnite Battle Royale, showcasing different landing locations and tactical approaches. The first half of the video focuses on a drop into Holly Hedges, where the gameplay demonstrates early-game looting, rooftop navigation, and long-range engagements using an assault rifle. After an elimination, the content transitions into a second match starting at Weeping Woods. This segment highlights close-quarters combat inside the main cabin, effective use of the pump shotgun, and high-speed building maneuvers during an intense final duel. Throughout the video, viewers can observe material harvesting techniques and strategic movement across the map. 📖 Chapters: 0:00:00 - 0:00:37 - Initial loading screen and lobby preparation 0:00:37 - 0:01:15 - First match drop sequence towards Holly Hedges 0:01:15 - 0:02:50 - Looting phase and material harvesting at Holly Hedges 0:02:50 - 0:03:30 - Combat engagement from window and rooftop elimination 0:03:30 - 0:04:42 - Post-match spectating and transition to second match 0:04:42 - 0:05:30 - Second match drop sequence into Weeping Woods 0:05:30 - 0:06:40 - Navigating the cabin interior and acquiring high-tier loot 0:06:40 - 0:07:22 - Close-quarters cabin combat and final build fight 0:07:22 - 0:07:40 - Video conclusion and final loading screen